
:max_bytes(150000):strip_icc()/GettyImages-157187140-37e3901e6d024481b1ea394bff30cd84.jpg)
"2024 Approved Inside DiscoNitro Understanding and Obtaining Entry Passes"
Inside DiscoNitro: Understanding and Obtaining Entry Passes
What Is Discord Nitro

Liza Brown
Mar 27, 2024• Proven solutions
If you want to join an online community of like-minded folks, Discord is a perfect platform to do so. Introduced originally for gamers, it now has become a platform for all types of communities who want video calls, voice chats, video streaming, and more.
It’s arguably one of the best and most popular apps among the global gaming community. Though it’s free to use, you need a paid subscription plan to unlock its full potential like almost all other online services available.
The premium subscription service for Discord is known as Discord Nitro! Want to learn more about it? Read on as we elaborate.
- Part 1: What Is Discord Nitro?
- Part 2: Why Should People Use The Discord Nitro?
- Part 3: How Much Does Discord Nitro Cost??
- Part 4: How to Subscribe to Discord Nitro?
- Part 5: How to Get Discord Nitro for Free?
- Part 6: When People should Use Discord Nitro?
Part 1: What Is Discord Nitro And What Does It Do?
Discord is absolutely free, but you may require a Discord Nitro subscription if you want to use its more powerful features! At this point, you may be wondering, what does Discord Nitro do?
Though upgrading is not a requirement as most features do not require a subscription, free users still have certain limitations.
For instance, they can’t use the same emojis on two servers. In addition to that, the streaming quality and account customization features also lack on the free plan. These features and more are strictly for Discord Nitro users only.
Apart from the fact that Discord Nitro offers better additional features, it also lets users help their preferred servers and unlock various features.
Part 2: Why Should People Use The Discord Nitro?
With the discord free version, you can do many things: communicate with your friend outside and inside of games, start your server, and even participate in various channels.
For some, these features are more than adequate; for others, they aren’t! They want more capabilities, and Discord Nitro provides them exactly with that.
However, most of these new features are cosmetic.
For instance, you can make and use your custom emojis if you’re an emoji admirer. Not only this, but you can also use animated emojis, including GIFs.
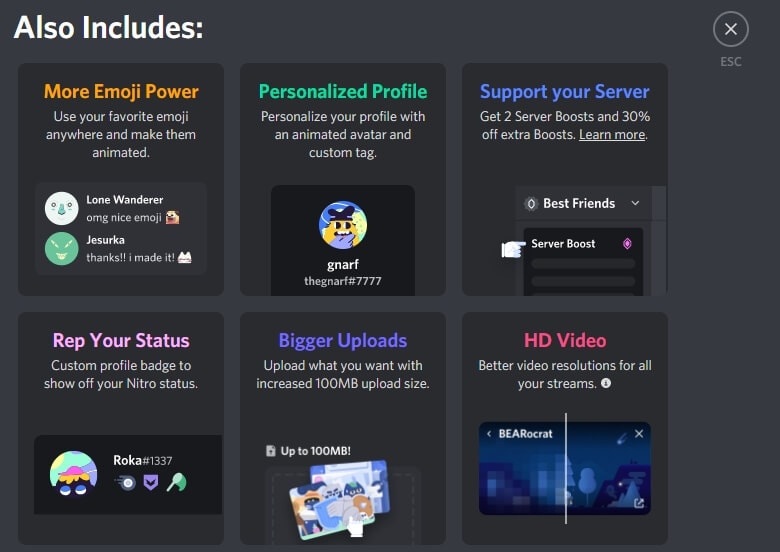
Without further ado, here are a few key benefits you’ll get with Discord Nitro:
Better Emojis
We all know how vital emojis have become for healthy chitchats, even to the extent that no conversation seems complete if you don’t have an emoji in it.
Discord Nitro allows you to collect and create your customized emojis. Usually, these emojis are animated and easily used while chatting with other Discord users.
Personal Profile
Since your personal profile is your only Discord identity, make sure to customize it with animated avatars and claim custom tags to get going.
Better Animation
With Discord Nitro, you can also unblock various GIF avatars and custom tags.
High-Definition (HD) Screen Sharing
You can share the game screen on the server or with friends and other users with Discord Nitro. Choose from 720p and 1080p at 30fps.
Fancy Badge
One of the better additions for several Discord users is getting the latest, fancy badge. With Discord Nitro, you can earn new badges to display on your personal profile.
Part 3: How Much Does Discord Nitro Cost?
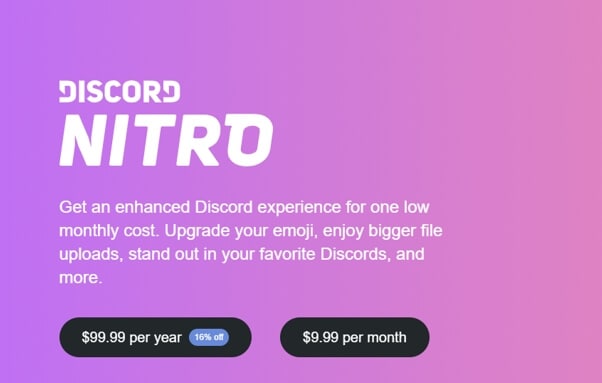
Free Discord users can choose from two variants if they want to switch to Discord Nitro premium services.
You can choose between annual or monthly subscription plans. And if you pick a yearly subscription plan, you’ll get a 16% discount.
The two Discord Nitro variants are Nitro Classic and Nitro!
If you choose the Nitro classic subscription service, you’ll have to pay $4.99 on the monthly plan or $49.99 annually. This variant is comparatively cheaper than the Nitro and provides stripped-down features.
On the other hand, if you go for the Nitro subscription service, get ready to pay $99.99 on the yearly plan and $9.99 on the monthly. It offers many features to its users.
Both these variants provide loads of advantages to discord users; here are a handful of benefits the two paid subscription services offer:
- If you choose the free version, your screen share settings typically max out at the 720p resolution (30fps). However, if you select either of the two paid versions, you can share a screen with friends at 720p (60fps) resolution or 1080p resolution (30fps)
- Go-Live provides users with limited streaming; it means you can stream games to users who don’t happen to be your friends, unlike screen-share. So, with a free version, you can stream at 720p (30fps), whereas, Nitro Classic subscription will allow you to stream up to 1080p resolution (60fps), and the Nitro will provide you with 60fps and more quality
- With the free version, you can upload and share only 8MB size files. But with paid variants, you’ll get an increased uploading limit. For example, Nitro Classic allows an upload limit up to 50MB, while the Nitro goes a step further and allows 100MB
- Users of both paid versions will get a badge which will be displayed with their usernames
- You can upgrade your image to an animated GIF!
- With paid subscriptions, you can create customized usernames and emojis to enhance your experience
One significant difference between the Nitro and Nitro Classic versions is the difference between their server boost capability.
Server boost is a user-gifted advantage that paid subscribers can provide to server owners to unlock extra perks for other users. The Nitro service has two server boosts, unlike the Nitro Classic service.
Part 4: How to Subscribe to Discord Nitro?
Looking at the perks you get if you become a paid Discord member, it’s evident that several users will want to avail the opportunity. Especially with the number of streamers and gamers increasing every day!
But how does one upgrade to Discord Nitro?
It’s quite straightforward to get a paid subscription plan with Discord. You can either do it using the mobile app or through your desktop.
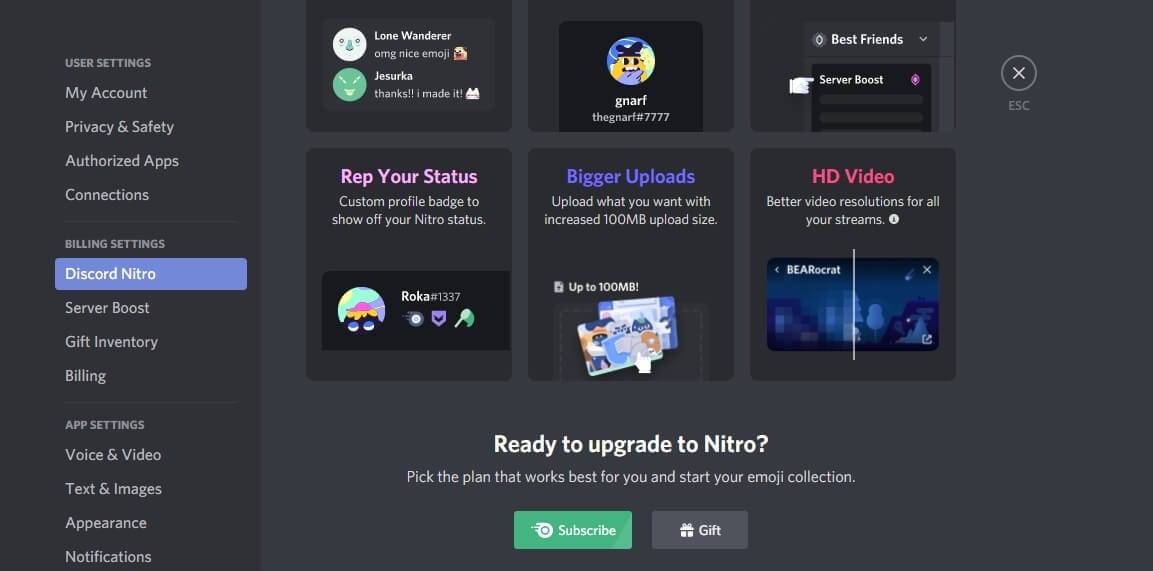
Subscribing On MAC Or PC
To get a subscription plan through a desktop app or Discord website, follow the steps below:
- Click the ‘settings’ icon at the bottom of your screen
- Once your settings menu appear, click Discord Nitro
- Press the subscribe button below Discord Nitro to subscribe to either of the two variants you choose
- If you want to gift a paid subscription plan to some other user on Discord, click gift next to the ‘subscribe’ button
Subscribing Via Mobile Apps
If you want to subscribe through a mobile app, you can tap the hamburger menu on the top-left.
As the menu appears, tap the user icon and then tap Subscribe Today from the various options listed below the settings category.
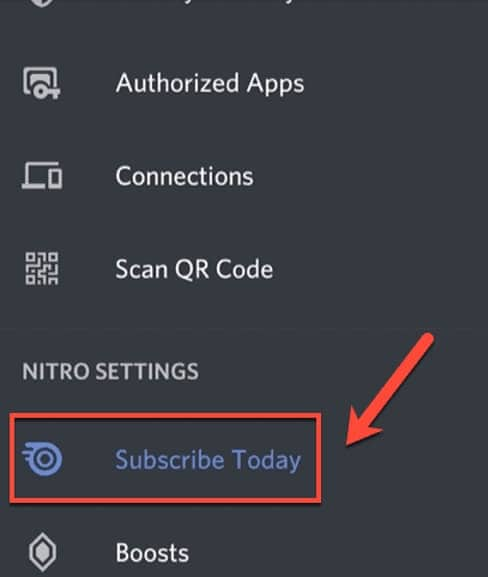
You’ll see brief info on the subscription-plan. Once you read it, tap subscribe button below Discord Nitro Classic or Discord Nitro.
Follow the directions to confirm the payment. The moment it gets approved, your subscription is activated.
Part 5: How to Get Discord Nitro for Free?
If you want to get Discord Nitro for free, you can get it without paying a dime. There are various methods you can follow to get a free subscription plan.
Today, we will tell you two effective ways through which you’ll get your free Discord Nitro subscription plan.
First Method
Here’s how to get free Nitro with your Xbox game-pass:
As the menu appears, tap the user icon and then tap Subscribe Today from the various options listed below the settings category.
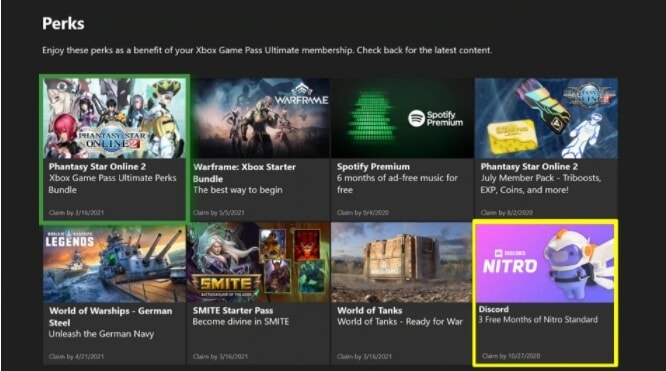
- Download, install, and run your Xbox app for Windows
- Log in to your account; if you don’t have one, create your account using outlook email. After that, place a gamer tag, press Game Pass and then press Get a Game Pass
- Press Join Game Pass and make sure to join through “Xbox game pass ultimate” to qualify for a free subscription plan
- Buy a game pass that will cost you only a dollar to get a free Discord Nitro
- Click the perks button on your Game Pass window tab and scroll down and click the Get Link button
- As the link opens, subscribe for the three-month plan of Nitro
- Now visit Microsoft services to claim it
- Log in to the account through which you bought “game pass ultimate” and cancel the subscription
This way, you can Discord Nitro free of cost!
Second Method
Here’s how you can get free Discord Nitro through your mobile app:
- Create a Discord account using a mobile app
- Join some, if not many, public servers
- Now add some people
- Buy a Discord “Nitro Gift” for one month using your dummy account (make sure to purchase the gift through Apple)
- Then, send the Nitro Gift back to your primary account
- Redeem the gift on the primary account and wait at least a day or two
- Now, contact Apple and say you have no idea what this ten-dollar charge is on the Discord. Make them believe your little brother or kid has been purchasing things using your cell phone
- Apple Inc. will repay you the entire $10 you spent on buying
- Discord will likely ban the dummy account you have created in the first place
Note: Make sure your primary account is safe. If you intend to repeat the process, make a new dummy account and Apple ID and use a different type of payment method.
Part 6: When Should I Use Discord Nitro?
Discord Nitro improves your all in one Discord video, voice, and chats. Here’s when you should use Discord Nitro subscription plans, be it Nitro Classic or Nitro:
- Use the Discord Nitro if you want better, customized, and animated emojis in your chats to make the conversation more lively
- Go for the paid plan if you want a personalized profile with custom tags and an animated avatar
- Use discord Nitro if you want an extra 30% boost and two server boosts
- Lastly, if you want bigger uploads and high-definition videos, you should use Discord Nitro!
Liza Brown
Liza Brown is a writer and a lover of all things video.
Follow @Liza Brown
Liza Brown
Mar 27, 2024• Proven solutions
If you want to join an online community of like-minded folks, Discord is a perfect platform to do so. Introduced originally for gamers, it now has become a platform for all types of communities who want video calls, voice chats, video streaming, and more.
It’s arguably one of the best and most popular apps among the global gaming community. Though it’s free to use, you need a paid subscription plan to unlock its full potential like almost all other online services available.
The premium subscription service for Discord is known as Discord Nitro! Want to learn more about it? Read on as we elaborate.
- Part 1: What Is Discord Nitro?
- Part 2: Why Should People Use The Discord Nitro?
- Part 3: How Much Does Discord Nitro Cost??
- Part 4: How to Subscribe to Discord Nitro?
- Part 5: How to Get Discord Nitro for Free?
- Part 6: When People should Use Discord Nitro?
Part 1: What Is Discord Nitro And What Does It Do?
Discord is absolutely free, but you may require a Discord Nitro subscription if you want to use its more powerful features! At this point, you may be wondering, what does Discord Nitro do?
Though upgrading is not a requirement as most features do not require a subscription, free users still have certain limitations.
For instance, they can’t use the same emojis on two servers. In addition to that, the streaming quality and account customization features also lack on the free plan. These features and more are strictly for Discord Nitro users only.
Apart from the fact that Discord Nitro offers better additional features, it also lets users help their preferred servers and unlock various features.
Part 2: Why Should People Use The Discord Nitro?
With the discord free version, you can do many things: communicate with your friend outside and inside of games, start your server, and even participate in various channels.
For some, these features are more than adequate; for others, they aren’t! They want more capabilities, and Discord Nitro provides them exactly with that.
However, most of these new features are cosmetic.
For instance, you can make and use your custom emojis if you’re an emoji admirer. Not only this, but you can also use animated emojis, including GIFs.
Without further ado, here are a few key benefits you’ll get with Discord Nitro:
Better Emojis
We all know how vital emojis have become for healthy chitchats, even to the extent that no conversation seems complete if you don’t have an emoji in it.
Discord Nitro allows you to collect and create your customized emojis. Usually, these emojis are animated and easily used while chatting with other Discord users.
Personal Profile
Since your personal profile is your only Discord identity, make sure to customize it with animated avatars and claim custom tags to get going.
Better Animation
With Discord Nitro, you can also unblock various GIF avatars and custom tags.
High-Definition (HD) Screen Sharing
You can share the game screen on the server or with friends and other users with Discord Nitro. Choose from 720p and 1080p at 30fps.
Fancy Badge
One of the better additions for several Discord users is getting the latest, fancy badge. With Discord Nitro, you can earn new badges to display on your personal profile.
Part 3: How Much Does Discord Nitro Cost?
Free Discord users can choose from two variants if they want to switch to Discord Nitro premium services.
You can choose between annual or monthly subscription plans. And if you pick a yearly subscription plan, you’ll get a 16% discount.
The two Discord Nitro variants are Nitro Classic and Nitro!
If you choose the Nitro classic subscription service, you’ll have to pay $4.99 on the monthly plan or $49.99 annually. This variant is comparatively cheaper than the Nitro and provides stripped-down features.
On the other hand, if you go for the Nitro subscription service, get ready to pay $99.99 on the yearly plan and $9.99 on the monthly. It offers many features to its users.
Both these variants provide loads of advantages to discord users; here are a handful of benefits the two paid subscription services offer:
- If you choose the free version, your screen share settings typically max out at the 720p resolution (30fps). However, if you select either of the two paid versions, you can share a screen with friends at 720p (60fps) resolution or 1080p resolution (30fps)
- Go-Live provides users with limited streaming; it means you can stream games to users who don’t happen to be your friends, unlike screen-share. So, with a free version, you can stream at 720p (30fps), whereas, Nitro Classic subscription will allow you to stream up to 1080p resolution (60fps), and the Nitro will provide you with 60fps and more quality
- With the free version, you can upload and share only 8MB size files. But with paid variants, you’ll get an increased uploading limit. For example, Nitro Classic allows an upload limit up to 50MB, while the Nitro goes a step further and allows 100MB
- Users of both paid versions will get a badge which will be displayed with their usernames
- You can upgrade your image to an animated GIF!
- With paid subscriptions, you can create customized usernames and emojis to enhance your experience
One significant difference between the Nitro and Nitro Classic versions is the difference between their server boost capability.
Server boost is a user-gifted advantage that paid subscribers can provide to server owners to unlock extra perks for other users. The Nitro service has two server boosts, unlike the Nitro Classic service.
Part 4: How to Subscribe to Discord Nitro?
Looking at the perks you get if you become a paid Discord member, it’s evident that several users will want to avail the opportunity. Especially with the number of streamers and gamers increasing every day!
But how does one upgrade to Discord Nitro?
It’s quite straightforward to get a paid subscription plan with Discord. You can either do it using the mobile app or through your desktop.
Subscribing On MAC Or PC
To get a subscription plan through a desktop app or Discord website, follow the steps below:
- Click the ‘settings’ icon at the bottom of your screen
- Once your settings menu appear, click Discord Nitro
- Press the subscribe button below Discord Nitro to subscribe to either of the two variants you choose
- If you want to gift a paid subscription plan to some other user on Discord, click gift next to the ‘subscribe’ button
Subscribing Via Mobile Apps
If you want to subscribe through a mobile app, you can tap the hamburger menu on the top-left.
As the menu appears, tap the user icon and then tap Subscribe Today from the various options listed below the settings category.
You’ll see brief info on the subscription-plan. Once you read it, tap subscribe button below Discord Nitro Classic or Discord Nitro.
Follow the directions to confirm the payment. The moment it gets approved, your subscription is activated.
Part 5: How to Get Discord Nitro for Free?
If you want to get Discord Nitro for free, you can get it without paying a dime. There are various methods you can follow to get a free subscription plan.
Today, we will tell you two effective ways through which you’ll get your free Discord Nitro subscription plan.
First Method
Here’s how to get free Nitro with your Xbox game-pass:
As the menu appears, tap the user icon and then tap Subscribe Today from the various options listed below the settings category.
- Download, install, and run your Xbox app for Windows
- Log in to your account; if you don’t have one, create your account using outlook email. After that, place a gamer tag, press Game Pass and then press Get a Game Pass
- Press Join Game Pass and make sure to join through “Xbox game pass ultimate” to qualify for a free subscription plan
- Buy a game pass that will cost you only a dollar to get a free Discord Nitro
- Click the perks button on your Game Pass window tab and scroll down and click the Get Link button
- As the link opens, subscribe for the three-month plan of Nitro
- Now visit Microsoft services to claim it
- Log in to the account through which you bought “game pass ultimate” and cancel the subscription
This way, you can Discord Nitro free of cost!
Second Method
Here’s how you can get free Discord Nitro through your mobile app:
- Create a Discord account using a mobile app
- Join some, if not many, public servers
- Now add some people
- Buy a Discord “Nitro Gift” for one month using your dummy account (make sure to purchase the gift through Apple)
- Then, send the Nitro Gift back to your primary account
- Redeem the gift on the primary account and wait at least a day or two
- Now, contact Apple and say you have no idea what this ten-dollar charge is on the Discord. Make them believe your little brother or kid has been purchasing things using your cell phone
- Apple Inc. will repay you the entire $10 you spent on buying
- Discord will likely ban the dummy account you have created in the first place
Note: Make sure your primary account is safe. If you intend to repeat the process, make a new dummy account and Apple ID and use a different type of payment method.
Part 6: When Should I Use Discord Nitro?
Discord Nitro improves your all in one Discord video, voice, and chats. Here’s when you should use Discord Nitro subscription plans, be it Nitro Classic or Nitro:
- Use the Discord Nitro if you want better, customized, and animated emojis in your chats to make the conversation more lively
- Go for the paid plan if you want a personalized profile with custom tags and an animated avatar
- Use discord Nitro if you want an extra 30% boost and two server boosts
- Lastly, if you want bigger uploads and high-definition videos, you should use Discord Nitro!
Liza Brown
Liza Brown is a writer and a lover of all things video.
Follow @Liza Brown
A Step-by-Step Guide to Adding and Modifying Discord Roles
How to Add Roles in Discord?

Richard Bennett
Mar 27, 2024• Proven solutions
Having a Discord server for you and your friends is a fun experience. And for gamers, Discord is a necessity. You can customize it with bots, connect real-time over voice channels, and even add rooms for chat forums.
Obviously, creating and managing a Discord server can get difficult. Especially when the server gets crammed with members, it is no longer a one-person show. You need help with monitoring and moderation. And let’s face it – you cannot watch your server round the clock.
So, let us learn the art of delegation on Discord! This guide will help you with – How to add roles in Discord and how to assign them to members. This includes creating roles, deleting them, and granting appropriate permissions.
- Part 1: Discord Server Permissions Introduction
- Part 2: How to Make and Add Roles in Discord on Computer
- Part 3: How to Manage Roles in Discord?
- Part 4: How to Delete Roles in Discord?
- Part 5: How to Add Roles on Discord Mobile?
- Part 6: Adding Roles to Discord FAQs
Part 1: Discord Server Permissions You Can Set Up
To give you a heads-up, there are around 29 permissions that you can adjust over a Discord server. More specifically, there are 7 voice permissions, 9 permissions related to texts, and about 13 permissions dealing with the server.
1. General server permission
Administrator – this is the highest permission that you can grant to a user. Think twice before giving this authority to anyone.
View Audit Log – with this permission, a user can read the server’s audits.
Manage Server – this permission enables a user to change the server’s name or shift it to another region.
Manage Roles – a user with this authority can make new roles or modify the roles without this permission.
Manage Channels – with this; a user can make, edit, or remove channels on a server.
Manage emojis – users with this authority can manage emotes.
Manage Webhooks – if you have this authority, you can add, modify, and remove webhooks.
Read Text Channels & See Voice Channels – a user with this permission can read text channels.
2. Membership permissions
Ban Members – a member with permission, can ban members from the server.
Create Instant Invite – users with this permission can invite people to the server.
Change Nickname – you can change your nickname anytime if this permission is enabled.
Manage Nicknames – if enabled, a user can change other’s nicknames.
Kick Members – a user with this authority can remove members from the server.
3. Text channel permissions
Send Messages – with this; users can send texts on chats.
Send TTS Messages – this enables users to send text-to-speech texts.
Manage Messages – with this; a user can remove or pin texts of other users.
Embed Links – enables users to embed hyperlinks in texts.
Attach Files – with this; users can attach files in the texts.
Read Message History – enables users to access earlier texts.
Mention Everyone – you can send push notifications on the channel if this permission is enabled.
Use External Emojis – if enabled, users can send emojis from other servers.
Add Reactions – with this; users can add new reactions to a text.
4. Voice channel permissions
Connect – enables users to connect themselves over the voice channel.
Speak – users can talk over the voice channel.
Mute Members – turn off other user’s speech.
Deafen Members – turn off hearing on the channel for a user.
Move Members – enables a user to shift members from one channel to a different channel.
Use Voice Activity – a member can talk without using Push-to-Talk, with this permission.
Priority Speaker – when this permission is turned on for a user, other’s
this permission allows the user to reduce the volume of other users when this user is speaking so that their words are louder on the channel.
5. Advanced permissions
Includes the ‘Administrator’ permission, which by default enables all the permissions to the assigned user.
Part 2: How to Make and Add Roles in Discord on Computer
The desktop app and Browser resemble the mobile apple a lot. The process of assigning roles and configuring members is more or less the same across devices. First, you need to create roles and define their authority before assigning these roles to some members.
How to create roles in Discord?
Before you can assign roles, you need a server. Once you have created your Discord server, start crafting the structure.
- Open your server and right-click on it.
- From the menu that appears, tap server settings.
- Name the role suitably. It should be descriptive of the authority.
- Tap on the plus sign that appears on the top right of the page.
- Here, you can change the title off the roll and even choose the color.
- Now comes the time to grant some permissions. These are basically the authority that you gave to every profile.
- When you are done, save the changes.
How to Assign Roles to Members in Discord?
To be able to assign roles, you should first create them
- Once again, hit that right button on your server and go to server settings.
- From the menu that appears to the left, ‘choose members’ under user management.
- Here, you will see the list of all the members on your server, tap the Plus sign that is right beside the username.
- From the drop-down menu that appears, select a role you want to assign to that member.
- You will notice that the color changes as per your settings. And this is how you assign roles to a server.
Part 3: How to Manage Roles in Discord?
After you learn how to make roles in Discord, you might want to manage them.
If you have got the hang of creating roles, then managing them is no different. Whenever the server gets crowded, you can create more roles or modify the existing ones. A smaller server can run smoothly with just an admin and an ‘everyone’ role.
The quickest and easiest way to manage your bloating server is to let all members be ‘everyone’ and adjust permissions accordingly. So, whenever members enter your server, they will automatically be assigned the common role.
Further, you can easily figure out what roles you have assigned to whom. Due to these colors, the other members can identify moderators, admins, or other roles.
Part 4: How to Delete Roles in Discord?
Honestly, removing Discord roles easier than setting them up. There are hardly a few steps that you need to follow for role removal.
- place the cursor on the server, and hit the right-click.
- From the list, choose server settings. Then click on roles.
- From the roles window, tap on the role that you wish to delete.
- Towards the bottom, you will see the option to delete the role.
- Press ok to confirm.
Part 5: How to Add Roles on Discord Mobile?
Like we mentioned earlier, the user interface of Discord is similar across devices. So, there is little difference between the process of creating and managing roles. But it can be baffling for beginners, so here’s a brief!
1. How to create roles in Discord mobile app?
Before you can assign roles, you have to create them.
- Open your server.
- Tap on the arrow beside the server’s title. A drop-down menu will appear. Select ‘server settings’ from that.
- Tap on ‘Roles.’ A common role, ‘everyone’ is assigned to all the members who have basic permissions enabled for everyone.
- Tap the plus sign and add a role.
- Give the role a color and describe it in a few words.
- Go through the permissions and enable the ones that fit the role.
- Save the changes.
You can repeat this multiple times to create more roles.
2. How to Assign Roles in Discord mobile app?
- Head over to settings and select ‘Members.’
- Select the members you want to assign roles to.
- Tick the boxes beside each member’s name for the roles you are assigning them.
Save the changes, and you are good to go! You can assign multiple roles to a member.
Part 6: FAQs about Discord Server Roles
Just some obvious things you might wonder about.
- How to make someone admin on Discord?
Making someone admin is the same as assigning other roles. Open your server and go to server settings.
- From there, select ‘roles’ from the left pane.
- Create a new role.
- Name the role ‘admin’ or an equivalent title.
- Adjust the setting related to sorting out role members with other members.
- Go to general permissions and tick the ‘Administrator’ option.
- Hit the ‘save changes’ button at the bottom.
- Now it’s time to assign the role to someone. Right-click on the user that you want to assign the role.
- Choose ‘roles’ from the drop-down list and select ‘Admin.’
And now your server has an admin!
- How can I assign roles to new users in Discord automatically?
By default, every member gets the role of ‘everyone’ on the server. However, you can customize this and add the MEE6 bot for automatic role allocation.
- Why can’t I manage the server even I am an admin on the server?
This is likely to happen if the server owner gave you the role of admin, but the permissions are disabled. You can ask the owner to enable the permissions for your user ID.
Richard Bennett
Richard Bennett is a writer and a lover of all things video.
Follow @Richard Bennett
Richard Bennett
Mar 27, 2024• Proven solutions
Having a Discord server for you and your friends is a fun experience. And for gamers, Discord is a necessity. You can customize it with bots, connect real-time over voice channels, and even add rooms for chat forums.
Obviously, creating and managing a Discord server can get difficult. Especially when the server gets crammed with members, it is no longer a one-person show. You need help with monitoring and moderation. And let’s face it – you cannot watch your server round the clock.
So, let us learn the art of delegation on Discord! This guide will help you with – How to add roles in Discord and how to assign them to members. This includes creating roles, deleting them, and granting appropriate permissions.
- Part 1: Discord Server Permissions Introduction
- Part 2: How to Make and Add Roles in Discord on Computer
- Part 3: How to Manage Roles in Discord?
- Part 4: How to Delete Roles in Discord?
- Part 5: How to Add Roles on Discord Mobile?
- Part 6: Adding Roles to Discord FAQs
Part 1: Discord Server Permissions You Can Set Up
To give you a heads-up, there are around 29 permissions that you can adjust over a Discord server. More specifically, there are 7 voice permissions, 9 permissions related to texts, and about 13 permissions dealing with the server.
1. General server permission
Administrator – this is the highest permission that you can grant to a user. Think twice before giving this authority to anyone.
View Audit Log – with this permission, a user can read the server’s audits.
Manage Server – this permission enables a user to change the server’s name or shift it to another region.
Manage Roles – a user with this authority can make new roles or modify the roles without this permission.
Manage Channels – with this; a user can make, edit, or remove channels on a server.
Manage emojis – users with this authority can manage emotes.
Manage Webhooks – if you have this authority, you can add, modify, and remove webhooks.
Read Text Channels & See Voice Channels – a user with this permission can read text channels.
2. Membership permissions
Ban Members – a member with permission, can ban members from the server.
Create Instant Invite – users with this permission can invite people to the server.
Change Nickname – you can change your nickname anytime if this permission is enabled.
Manage Nicknames – if enabled, a user can change other’s nicknames.
Kick Members – a user with this authority can remove members from the server.
3. Text channel permissions
Send Messages – with this; users can send texts on chats.
Send TTS Messages – this enables users to send text-to-speech texts.
Manage Messages – with this; a user can remove or pin texts of other users.
Embed Links – enables users to embed hyperlinks in texts.
Attach Files – with this; users can attach files in the texts.
Read Message History – enables users to access earlier texts.
Mention Everyone – you can send push notifications on the channel if this permission is enabled.
Use External Emojis – if enabled, users can send emojis from other servers.
Add Reactions – with this; users can add new reactions to a text.
4. Voice channel permissions
Connect – enables users to connect themselves over the voice channel.
Speak – users can talk over the voice channel.
Mute Members – turn off other user’s speech.
Deafen Members – turn off hearing on the channel for a user.
Move Members – enables a user to shift members from one channel to a different channel.
Use Voice Activity – a member can talk without using Push-to-Talk, with this permission.
Priority Speaker – when this permission is turned on for a user, other’s
this permission allows the user to reduce the volume of other users when this user is speaking so that their words are louder on the channel.
5. Advanced permissions
Includes the ‘Administrator’ permission, which by default enables all the permissions to the assigned user.
Part 2: How to Make and Add Roles in Discord on Computer
The desktop app and Browser resemble the mobile apple a lot. The process of assigning roles and configuring members is more or less the same across devices. First, you need to create roles and define their authority before assigning these roles to some members.
How to create roles in Discord?
Before you can assign roles, you need a server. Once you have created your Discord server, start crafting the structure.
- Open your server and right-click on it.
- From the menu that appears, tap server settings.
- Name the role suitably. It should be descriptive of the authority.
- Tap on the plus sign that appears on the top right of the page.
- Here, you can change the title off the roll and even choose the color.
- Now comes the time to grant some permissions. These are basically the authority that you gave to every profile.
- When you are done, save the changes.
How to Assign Roles to Members in Discord?
To be able to assign roles, you should first create them
- Once again, hit that right button on your server and go to server settings.
- From the menu that appears to the left, ‘choose members’ under user management.
- Here, you will see the list of all the members on your server, tap the Plus sign that is right beside the username.
- From the drop-down menu that appears, select a role you want to assign to that member.
- You will notice that the color changes as per your settings. And this is how you assign roles to a server.
Part 3: How to Manage Roles in Discord?
After you learn how to make roles in Discord, you might want to manage them.
If you have got the hang of creating roles, then managing them is no different. Whenever the server gets crowded, you can create more roles or modify the existing ones. A smaller server can run smoothly with just an admin and an ‘everyone’ role.
The quickest and easiest way to manage your bloating server is to let all members be ‘everyone’ and adjust permissions accordingly. So, whenever members enter your server, they will automatically be assigned the common role.
Further, you can easily figure out what roles you have assigned to whom. Due to these colors, the other members can identify moderators, admins, or other roles.
Part 4: How to Delete Roles in Discord?
Honestly, removing Discord roles easier than setting them up. There are hardly a few steps that you need to follow for role removal.
- place the cursor on the server, and hit the right-click.
- From the list, choose server settings. Then click on roles.
- From the roles window, tap on the role that you wish to delete.
- Towards the bottom, you will see the option to delete the role.
- Press ok to confirm.
Part 5: How to Add Roles on Discord Mobile?
Like we mentioned earlier, the user interface of Discord is similar across devices. So, there is little difference between the process of creating and managing roles. But it can be baffling for beginners, so here’s a brief!
1. How to create roles in Discord mobile app?
Before you can assign roles, you have to create them.
- Open your server.
- Tap on the arrow beside the server’s title. A drop-down menu will appear. Select ‘server settings’ from that.
- Tap on ‘Roles.’ A common role, ‘everyone’ is assigned to all the members who have basic permissions enabled for everyone.
- Tap the plus sign and add a role.
- Give the role a color and describe it in a few words.
- Go through the permissions and enable the ones that fit the role.
- Save the changes.
You can repeat this multiple times to create more roles.
2. How to Assign Roles in Discord mobile app?
- Head over to settings and select ‘Members.’
- Select the members you want to assign roles to.
- Tick the boxes beside each member’s name for the roles you are assigning them.
Save the changes, and you are good to go! You can assign multiple roles to a member.
Part 6: FAQs about Discord Server Roles
Just some obvious things you might wonder about.
- How to make someone admin on Discord?
Making someone admin is the same as assigning other roles. Open your server and go to server settings.
- From there, select ‘roles’ from the left pane.
- Create a new role.
- Name the role ‘admin’ or an equivalent title.
- Adjust the setting related to sorting out role members with other members.
- Go to general permissions and tick the ‘Administrator’ option.
- Hit the ‘save changes’ button at the bottom.
- Now it’s time to assign the role to someone. Right-click on the user that you want to assign the role.
- Choose ‘roles’ from the drop-down list and select ‘Admin.’
And now your server has an admin!
- How can I assign roles to new users in Discord automatically?
By default, every member gets the role of ‘everyone’ on the server. However, you can customize this and add the MEE6 bot for automatic role allocation.
- Why can’t I manage the server even I am an admin on the server?
This is likely to happen if the server owner gave you the role of admin, but the permissions are disabled. You can ask the owner to enable the permissions for your user ID.
Richard Bennett
Richard Bennett is a writer and a lover of all things video.
Follow @Richard Bennett
Also read:
- [New] 2024 Approved Decoding the Best Platform for Real-Time Team Collaboration Slack Vs. Discord Comparison
- [New] In 2024, A Comprehensive Guide to Changing Avatars & Statuses on Discord
- [Updated] Navigating with Precision Updating Status & Avatars in Discord
- [Updated] Enhancing Community Management with Discord Roles for 2024
- [Updated] Unveiling the Power of Pinning Your Guide to Discord Mastery for 2024
- [Updated] 2024 Approved Top 5 Tactile Social Symbols Dynamic Designs
- [Updated] Elite AI Companions for Chat
- In 2024, Navigating Disputes The Step-by-Step Approach to Reporting on Discord
- Perfecting Pitch & Volume in Discord Chats via VoiceMod Adjustments for 2024
- [Updated] Step-By-Step Tips Perfecting Your Discord Profile Through Emojis (PC/Mobile) for 2024
- [Updated] 2024 Approved Conduct a Chat Symphony with Discord TTS Capabilities
- [Updated] 2024 Approved Elite Social Media Platforms Excluding Discord
- Premiered 5 Innovative Logo Movements for Networks
- In 2024, Accessing and Saving Discord Media Free Methods Revealed
- [New] Unlock the Potential of Your Channels with Our Guide to Discord Broadcasting
- [New] From Anonymity to Authority The Essential Pathway for Raising Issues on Digital Platforms Like Discord for 2024
- [Updated] Step-by-Step to Stunning Discord Profiles
- [New] Audiophile's Guide to Text-to-Speech on Discord for 2024
- [New] 2024 Approved Unlink Discord From PC/Mobile
- [New] 2024 Approved Masterful Monikers A Compendium of Cool Channel Titles
- [Updated] 2024 Approved Unleash Your Inner Conversationalist with Discord Responses
- Unraveling Discord's Features for Aspiring Broadc Writers (Streaming)
- In 2024, Catch or Beat Sleeping Snorlax on Pokemon Go For Apple iPhone 14 Pro | Dr.fone
- How To Fake GPS On Oppo Find X6 For Mobile Legends? | Dr.fone
- 2024 Approved Do You Want to Create Adjustment Layers in Final Cut Pro? This Article Will Discuss a Simple yet Efficient Method to Generate Adjustment Layers in Final Cut Pro
- In 2024, 6 Ways To Transfer Contacts From Oppo A78 to iPhone | Dr.fone
- In 2024, How to Transfer Photos from Apple iPhone X to other iPhone without iCloud | Dr.fone
- How to restore wiped videos on Tecno Phantom V Fold
- [Updated] 2024 Approved Effortless Twitpic Integration A Video Guide
- Things You Dont Know About Nokia C12 Plus Reset Code | Dr.fone
- Gmail Not Working on Infinix Hot 30i 7 Common Problems & Fixes | Dr.fone
- How To Unlock A Found Apple iPhone 12 Pro?
- 4 solution to get rid of pokemon fail to detect location On Realme 11 5G | Dr.fone
- Updated Adjust Image Dimensions Accurately for 2024
- [New] 2024 Approved Quick-Fire Methods to Record and Save Your Virtual Gatherings (Windows & Mac)
- Enhanced Interaction Through Effective Zoom Screenshares for 2024
- [New] Best Practices for Engaging with Facebook Live Content for 2024
- How Can We Unlock Our Nubia Red Magic 8S Pro Phone Screen?
- Updated Best 15 Female Anime Characters-Who Is Your Favorite, In 2024
- Delete Gmail Account With/Without Password On Samsung Galaxy F15 5G
- 2024 Approved Full Screen Capture Excellence 4 Leading PC/Mac Programs
- [New] Prioritizing Visibility A Guide to Insta Highlights Perfection
- [New] Streamlined Coordination The Best Facebook Timetellers Ranked
- Title: "2024 Approved Inside DiscoNitro Understanding and Obtaining Entry Passes"
- Author: Timothy
- Created at : 2024-05-23 22:47:46
- Updated at : 2024-05-24 22:47:46
- Link: https://discord-videos.techidaily.com/2024-approved-inside-disconitro-understanding-and-obtaining-entry-passes/
- License: This work is licensed under CC BY-NC-SA 4.0.
