
:max_bytes(150000):strip_icc()/481205627-5804f62c3df78cbc289797fb.jpg)
"Essential, No-Cost Software Compilation for High-Quality Discord Audio Capture for 2024"
Essential, No-Cost Software Compilation for High-Quality Discord Audio Capture
10 Best Free Software to Record Discord Audio [+How-tos]

Richard Bennett
Mar 27, 2024• Proven solutions
If you are looking for the best Discord audio recording software, then you are at the right place! Here’s a solution to the difficulty you face in finding suitable software compatible with your platform.
For this article, I have selected 10 highly useful software programs that will make it easy for you to record Discord audio both on PC and phone.
You will learn:
- Part I: 10 Best Record Discord Audio software and How to Use
- Part II: Roundup of Best Discord Audio Software
- Part III: FAQs about Discord Audio Recording
10 Best Record Discord Audio software and How to Use It?
Below are the top 10 programs which can be used to record Discord audio. All of these are very easy to use and do not require any technical knowledge to get the work done.
1.Wondershare Filmora – Editor Recommend
It is a powerful tool for screen recording , offering high-quality audio recording and streaming. Although it can be used to record both, audio and video. So if you are an avid gamer and need to record audio calls from any of the communicating parties then this software offers you a solution.
Platform Compatibility
- Windows OS
- MAC OS
Features
- Allows simultaneous use of webcam and computer
- Immaculate for recording fast-speed games
- Diverse editing suite
- Supports several file formats
- Customize recording settings
- Facilitate tutorial features
Pros
- Supported by both desktop platforms, Windows and Mac OS
- A free trial is also available despite the paid ones
- Offers 15-120 FPS for windows OS
- Around 60 FPS for Mac OS
- Advanced customization options for high-quality audio.
- Friendly user interface
Cons
- Watermark on free trials.
- Paid licensing


2.AUDACITY
When you need to record both the ends of a conversation being held then AUDACITY may not be your best option. You are facilitated with the ease of availability of this software since it is open source and most importantly, free of cost. But, on the contrary, it only facilitates the users with the single audio-in recording system. That means only the audio from one side can be recorded at a time.
Platform Compatibility
- Windows OS
- MAC OS
Features
- An open-source application
- Free of cost
- Allowing post-editing of the audio after being recorded.
Pros
- Supported by both desktop platforms, windows
- Free software
Cons
- Single audio-in logic
How to Use Audacity Recorder to Record Discord Audio?
The steps in this regard are as follows:
Step 1: Right-click the volume control to access the “Recording Devices“.

Step 2: Set the microphone to default and click the record button that is the big red one in the center.

Step 3: You can then see the audio tracks of the Audacity that have started recording your Discord.

3.OBS
This software will provide you with an easy and user interface-friendly interaction platform for gamers. People belonging to the same interests now have software perfect for their communication. The text-to-speech conversion facilities the transformation of any chat into audio.
Therefore, if one sends a message in a written form while you are playing, then this software allows you to read out the chat. Therefore, this facilitates a user to not care about what a person on the other side is sending. It lets you listen to the conversation without distracting you from your game.
Platform compatibility
- Windows OS
Features
- Text-to-speech conversion
- Facilitate integration of stream element tools and chats
- Offers Media Reques t integration in OBS
- Easy broadcasting to multiple domains
- Facilitate high-quality audio streaming
- Desktop application
Pros
- Supported by both desktop platforms, Windows & Mac
- Free software
- Open-source platform
- Rapidly enhance stream engagement
- Fans’ loyalty
Cons
- Not supported for Mac OS
- It is a web app, which does not support mobile operating systems.
How to Use OBS Recorder to Record Discord Audio ?
Step 1: Go to “Settings”; “Output” of the OBS to set the output mode to simple.
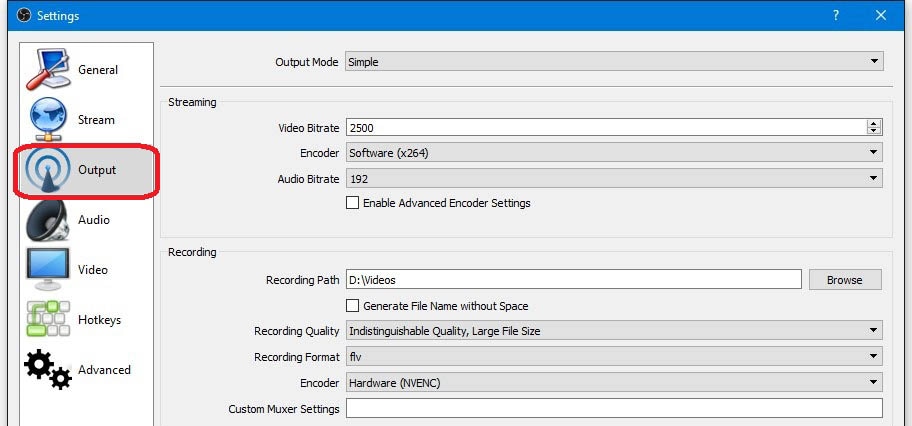
Step 2: Now set the “Recording Quality” to make sure that the best audio output is generated.

Step 3: Select the “Encoder”:

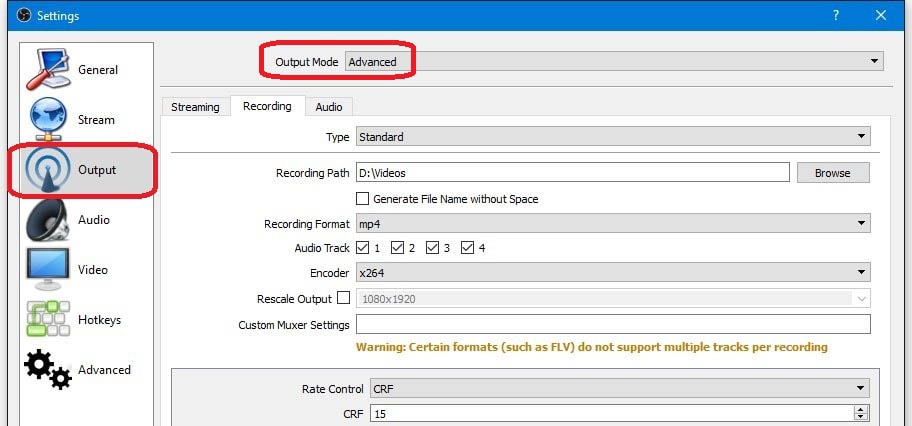
Step 4: By selecting the “Advanced“ option you can make sure that the multiple tracks are recorded at the same time but in Discord, it is not required:
Now when the Discord is launched the OBS will auto-capture the audio which can then be extracted with ease.
4.LEAWO
This software also allows a user to communicate with other peers involved with you in the gaming world. It is a communication that not only offers low latency communication among peers but also allows secure communication at both ends. It is compatible with the desktop platforms like Windows and Mac OS.
Moreover, it also facilitates its usability on phones as well. You can record your audio from any audio source and can save it accordingly with one of the many formats that it offers.
Platform Compatibility
- Windows OS
- Mac OS
- iOS
- Android
Features
- Allows multiple audio-in sources
- The result can be saved in several formats, allowing WAV or
- High audio recording capability
- The dedicated infrastructure of servers.
- Facilitate high-quality audio streaming
- Promises security
- Free of cost chat servers
Pros
- Supported by both desktop and mobile platforms, Windows, Mac, Android, and iOS.
- Free Software
- High-Quality Outcome
- Multi-purpose application with chat, audio, and image transfer features
Cons
- It offers limited features, as it is free software.
How to use Leawo Recorder to Record Discord Audio ?
Step 1: Once the program is launched click the “Settings” tab at the top right corner.

Step 2: Set the audio source to “Record Computer Audio”.

Step 3: Click the “Format“ button to change the audio settings as described in the picture:

Step 4: Once the red “Start“ button is pressed the program will start recording what is to be integrated into Discord.

5.Bandicam
Though this software is paid it is recommended to the naïve users as it is easy to use and captures the parts of the screen as you desire. It is one of the most used programs that are highly in demand in contrast to Discord audio recording.
Compatibility
The program at the time of this writing is only compatible with windows.
Features
- The program has a built-in function of PIP and video in video.
- It supports AVI 2.0 and there is no output length defined.
- The real-time highlighting of the mouse cursor is offered by this program.
Pros
- It has an intuitive interface that is GUI-based and easy to use.
- The program is fast and therefore the best option for Discord audio recording.
Cons
- Since it is only compatible with windows so users of other operating systems cannot use it.
- The program does not compress the audio as well as video and therefore uses more power.
How to Use Bandicam Recorder to Record Discord Audio ?
Below are the steps which are to be followed to get the Discord audio recorded using Bandicam.
Step 1: Once the program is started, select the default recording device as a primary sound device:

Step 2: Plugin the “Speakers” and if they are disabled then please enable them. Set the Speakers as the default device as well.

Step 3: Open the volume mixture tray and set the voice to whatever level you love.

Step 4: Now whenever the Discord is run on your system you will get to know the recording sound by the fluctuating bar.

6.Camtasia
It is one of the programs that have the best interface. The integrated GUI makes it possible for the users to overcome the problems which the other programs present. With the best and the most advanced controls, it makes the process very easy.
Compatibility
The program is compatible with both Mac and Windows.
Features
- The program integrates sound with the on-screen activities using state-of-the-art functionalities.
- The HD surround sound option is also available in the paid version.
Pros
- The program has a GUI which makes it easy for the users to operate it.
- The one-step process for audio recording is something that no other program presents.
Cons
- It is a paid program so not everyone can use it.
- The free version is very much limited and therefore practically of no use.
How to Use Camtasia Recorder to Record Discord Audio ?
The program has only one step that needs to be followed to get the work done. Under recorded inputs click on the down arrow beside the “Audio On” function and select the highlighted elements to record the audio of Discord.

7.Movavi
If you are looking for a program that provides the full value for the money spent then it is the one that you should be using. It is all because of the interface that has been embedded and the speed that is incredible.
Compatibility
This program is compatible with Windows and Mac.
Features
- Movavi has a built-in database of several sound effects that can be applied to the recorded audio.
- The live broadcast is also supported by the program it is the best for Discord use.
Pros
- The program is fast as compared to the other ones on the list as it uses flash programming for development.
- Movavi is a complete suite that will allow users to perform a range of functions.
Cons
- The program is high priced so it is not recommended to individual users
- As it uses flash sometimes the screen capture is frozen for no reason
How to Use Movavi Recorder to Record Discord Audio ?
Step 1: Turn on the “System Audio” capture and specify the area from where the audio is to be captured. The button will be highlighted in green if the audio capture is on.
Step 2: Use F9 and F10 keys to pause and stop the audio recording respectively. Once the recording is on you will see the duration at the top of the capture along with the size of the audio that is being captured.
8.Free Sound Recorder
As the name suggests it is free and unlimited to use. The program is light as it is flash-based and is compatible with the most used operating systems in the world. It does not consume the system resources and therefore a top pick for every gamer.
Compatibility
The program is compatible with both Windows and Mac.
Features:
- The program uses the 3-step process to make sure that the audio is recorded with ease.
- The online music recording function is also available in the program which enhances its capability.
Pros
- The program captures both internal and external audio for free.
- You can also schedule the audio recording for a very long time and a hands-free recording option is also available.
Cons
- The program is not as frequently updated as it should be.
- The enhancement of the audio function is not as good as it should be.
How to Use Free Sound Recorder to Record Discord Audio ?
Step 1: On the lower half of the interface of the program, there is a “Recording Mixer“ which should be used to select the audio source. The same panel can also be used to make sure that the audio settings are changed as required.
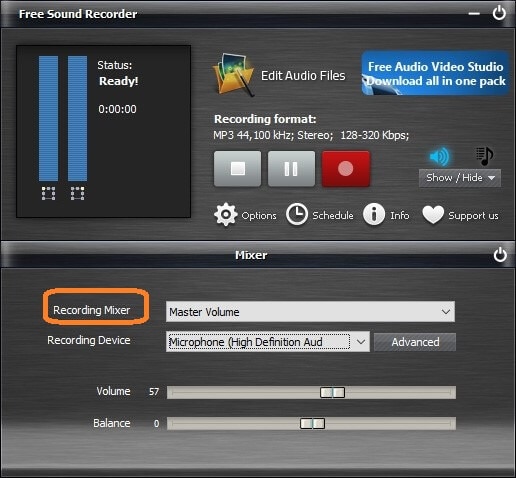
Step 2: Click the circular button and the program will start recording. On the lower half, you can also see the duration of the audio recorded.

9.Record My Desktop
This Linux-based program is something that every gamer needs. It is highly in demand due to the fact that it does the desired work within no time as the speed is incredible.
Compatibility
The program is compatible with BSD and Linux.
Features
- The configuration of ALSA and OSS is possible with this program.
- The program also supports the output in different formats.
Pros
- It is very easy to operate as the interface is self-explanatory.
- The program captures the audio in the highest definition and is therefore highly recommended.
Cons
- The audio saving process is a bit hassle when it comes to this program.
- It interferes with the computer audio and therefore the quality of the recording can be degraded.
How to Use Record My Desktop to Record Discord Audio ?
Step 1: To record Discord audio, first of all, you need to make sure that the sound recording is enabled.

Step 2: Use the “Wave”, “Mic” and “Capture” buttons to set the pace until you get satisfied. The program is automatically recorded the Discord audio from this point onward.

10.CRAIG
CRAIG is an open-source platform introduced by Yahweasel for Discord that allows easy multi-channel or multi-track recording. If the data to be recorded is already available, then it easily records the audio for multiple audio tracks.
Craig is essentially a bot that enables audio recording from both the communicating ends and makes up a separate file for each. This facilitates the extent of variations or editing required for each side of audio files for better quality.
Moreover, Craig also enables the user to download the audio while recording. The potential users of Craig are either the ones managing the Craig server or the ones who are granted permission by a created “Craig” role.
Platform Compatibility
- Windows OS
- Mac OS
Features
- Open-source platform
- Allows recording in/from multiple tracks or channel
- Enables two-way communication recording
- Allow two types of users the Craig server manager and Craig’s role assigned to the person
- Facilitate high-quality audio streaming
- Promises security
- Free of cost chat servers
- Offers enhanced reliability
- Can download the file in several modern file formats
- 7 days file download
- 6 hours recording duration
- Auto tracks synchronization
Pros
- Supported by both desktop and mobile platforms, Windows, Mac, Android, and iOS.
- Free software
- High-quality outcome
- Multiple tracks recording
- Allow several speakers
- Decent recording time
Cons
- Doesn’t support phones OS
How to Record Discord Audio Using CRAIG?
Step 1: Make a free of cost Discord account
Step 2: Craig initiates recording automatically once you call it by connecting the Discord voice server with the communication peers.
Step 3: When you open the music recorder , click on the arrow button at the top right corner, this will open the dropdown list.
Step 4: While recording, Craig will send the download links.
Step 5: You can record the audio at any instance with any file format of your choice.
Step 6: A separate file for all the people involved in communication will be saved.
Step 7: You can then import these files for post-editing by pushing them directly into digital audio workstation (DAW) software.
A roundup of the Best Discord Audio Software
| No. | Tools | Review Stars | Price | Compatibility | Best For | Trial Version Limitations |
|---|---|---|---|---|---|---|
| 1 | Wondershare Filmora | 4.5 | Free, $49.99 | Mac, Windows | Screencasting, technical documentation. | One usage restriction |
| 2 | Leawo Music Recorder | 4.0 | $19.99 | Mac, Windows | Gaming, streaming, and instructional videos. | 30 Days |
| 3 | Audacity | 3.0 | Free | Mac, Windows, Linux | Tutorial, promotional videos and streaming. | Unlimited |
| 4 | OBS | 4.0 | Free | Mac, Windows, Linux | Presentations, tutorials, and screencasting. | Unlimited |
| 5 | Bandicam | 4.0 | $39 | Windows | Presentation recordings and interactive quizzes | 14 Days |
| 6 | Camtasia | 4.4 | $249 | Mac, Windows | Game recording, webcams, and all types of screencasting | 30 Days |
| 7 | Movavi | 4.0 | $39.95 | Mac, Windows | Streaming, presentations, digitization of VHS Tapes, and Screencasting. | 7 Days |
| 8 | Free Sound Recorder | 2.5 | Free | Windows | Basic screen copying. | Unlimited |
| 9 | Record My Desktop | 3.0 | Free | Linux, BSD | Webinars and online tutorials. | Unlimited |
| 10 | CRAIG | 3.5 | Free | Windows, macOS | Screencasting | Unlimited |
Frequently Ask Questions about How to Record Discord Audio
1. What is Discord?
Discord is a platform exclusively designed for gamers. The platform not only supports voice but also specializes in text and imagery. The best part of the platform is that it has been developed for gamers so that at low latencies they can communicate with each other in a better manner.
2. Why Do You Need Software for Discord Recording?
If you are a gamer and want to communicate with your peers efficiently then there is some dedicated software for it. This will not only connect the gamers together but will also help you make friends at the same time.
This will help you record any incoming calls from any selected number of gamers’ communities. You may also save it or share any incoming/outgoing calls further on.
3. How to Select a Best Discord Audio Recorder?
The program is considered to be the best to record Discord audio if it has the following qualities. There are many programs on the market that are completely aligned with these qualities.
- The program should be easy to use and must not present any issues to novice users.
- The recording quality should be high so that the output becomes presentable.
- The program should be such that the integration with Discord does not pose any issues.
- It should have all the necessary options to share the audio to the social media platforms or with friends if the owner requires it.
4. How to Record Discord audio on PC Windows?
Discord audio recording software like OBS, AUDACITY, CRAIG, FILMORA, and LEAWO is open-source software. They allow recording Discord audio by first having the software downloaded.
Then you have to configure the audio sources and other parameters accordingly. After the recording is done, you can then save the file in any of the available file formats. Further editing may boost the audio quality as well.
5. How to Record Discord audio on PC Mac?
Software like FILMORA and LEAWO supports Mac OS. Firstly, we have to install the exe file and then download it. To get started, you have to select the appropriate recording options and audio sources respectively, and start recording!
6. How to record Discord audio on phones (iOS/Android)?
LEAWO is the only software that’s been mentioned above that supports phones OS as well. All you need to do is download LEAWO Music Recorder, which will initiate the recording process once the Discord is played.
Conclusion
Want to know how to record Discord audios? All the above software are very great to help you out. Most of the aforementioned software is open sources, which entails easy accessibility.
Select and download your favorite, and following the guide step by step, you are very comfortable making your recording easy and fun.
One thing is for sure, in the end, reliability and quality always matter. Software that is free of cost but offers less quality output will always go under the radar in the industry where competition is rife.
Rather invest in good software that will ensure you not a good quality Discord audio recording but also has a user-friendly interface, such as Wondershare Filmora .
![]()

The All-in-One Screen Recorder & Video Editor
- Record desktop screen, voiceover, and webcam simultaneously
- Edit recorded clips quickly with a wide range of professional tools
- Built-in plentiful templates and effects
- Export to MP4, MOV, MKV, GIF and multiple formats
For Win 7 or later (64-bit)
For macOS 10.12 or later
 Secure Download
Richard Bennett
Richard Bennett is a writer and a lover of all things video.
Follow @Richard Bennett
Richard Bennett
Mar 27, 2024• Proven solutions
If you are looking for the best Discord audio recording software, then you are at the right place! Here’s a solution to the difficulty you face in finding suitable software compatible with your platform.
For this article, I have selected 10 highly useful software programs that will make it easy for you to record Discord audio both on PC and phone.
You will learn:
- Part I: 10 Best Record Discord Audio software and How to Use
- Part II: Roundup of Best Discord Audio Software
- Part III: FAQs about Discord Audio Recording
10 Best Record Discord Audio software and How to Use It?
Below are the top 10 programs which can be used to record Discord audio. All of these are very easy to use and do not require any technical knowledge to get the work done.
1.Wondershare Filmora – Editor Recommend
It is a powerful tool for screen recording , offering high-quality audio recording and streaming. Although it can be used to record both, audio and video. So if you are an avid gamer and need to record audio calls from any of the communicating parties then this software offers you a solution.
Platform Compatibility
- Windows OS
- MAC OS
Features
- Allows simultaneous use of webcam and computer
- Immaculate for recording fast-speed games
- Diverse editing suite
- Supports several file formats
- Customize recording settings
- Facilitate tutorial features
Pros
- Supported by both desktop platforms, Windows and Mac OS
- A free trial is also available despite the paid ones
- Offers 15-120 FPS for windows OS
- Around 60 FPS for Mac OS
- Advanced customization options for high-quality audio.
- Friendly user interface
Cons
- Watermark on free trials.
- Paid licensing
2.AUDACITY
When you need to record both the ends of a conversation being held then AUDACITY may not be your best option. You are facilitated with the ease of availability of this software since it is open source and most importantly, free of cost. But, on the contrary, it only facilitates the users with the single audio-in recording system. That means only the audio from one side can be recorded at a time.
Platform Compatibility
- Windows OS
- MAC OS
Features
- An open-source application
- Free of cost
- Allowing post-editing of the audio after being recorded.
Pros
- Supported by both desktop platforms, windows
- Free software
Cons
- Single audio-in logic
How to Use Audacity Recorder to Record Discord Audio?
The steps in this regard are as follows:
Step 1: Right-click the volume control to access the “Recording Devices“.
Step 2: Set the microphone to default and click the record button that is the big red one in the center.
Step 3: You can then see the audio tracks of the Audacity that have started recording your Discord.
3.OBS
This software will provide you with an easy and user interface-friendly interaction platform for gamers. People belonging to the same interests now have software perfect for their communication. The text-to-speech conversion facilities the transformation of any chat into audio.
Therefore, if one sends a message in a written form while you are playing, then this software allows you to read out the chat. Therefore, this facilitates a user to not care about what a person on the other side is sending. It lets you listen to the conversation without distracting you from your game.
Platform compatibility
- Windows OS
Features
- Text-to-speech conversion
- Facilitate integration of stream element tools and chats
- Offers Media Reques t integration in OBS
- Easy broadcasting to multiple domains
- Facilitate high-quality audio streaming
- Desktop application
Pros
- Supported by both desktop platforms, Windows & Mac
- Free software
- Open-source platform
- Rapidly enhance stream engagement
- Fans’ loyalty
Cons
- Not supported for Mac OS
- It is a web app, which does not support mobile operating systems.
How to Use OBS Recorder to Record Discord Audio ?
Step 1: Go to “Settings”; “Output” of the OBS to set the output mode to simple.
Step 2: Now set the “Recording Quality” to make sure that the best audio output is generated.
Step 3: Select the “Encoder”:
Step 4: By selecting the “Advanced“ option you can make sure that the multiple tracks are recorded at the same time but in Discord, it is not required:
Now when the Discord is launched the OBS will auto-capture the audio which can then be extracted with ease.
4.LEAWO
This software also allows a user to communicate with other peers involved with you in the gaming world. It is a communication that not only offers low latency communication among peers but also allows secure communication at both ends. It is compatible with the desktop platforms like Windows and Mac OS.
Moreover, it also facilitates its usability on phones as well. You can record your audio from any audio source and can save it accordingly with one of the many formats that it offers.
Platform Compatibility
- Windows OS
- Mac OS
- iOS
- Android
Features
- Allows multiple audio-in sources
- The result can be saved in several formats, allowing WAV or
- High audio recording capability
- The dedicated infrastructure of servers.
- Facilitate high-quality audio streaming
- Promises security
- Free of cost chat servers
Pros
- Supported by both desktop and mobile platforms, Windows, Mac, Android, and iOS.
- Free Software
- High-Quality Outcome
- Multi-purpose application with chat, audio, and image transfer features
Cons
- It offers limited features, as it is free software.
How to use Leawo Recorder to Record Discord Audio ?
Step 1: Once the program is launched click the “Settings” tab at the top right corner.

Step 2: Set the audio source to “Record Computer Audio”.

Step 3: Click the “Format“ button to change the audio settings as described in the picture:

Step 4: Once the red “Start“ button is pressed the program will start recording what is to be integrated into Discord.

5.Bandicam
Though this software is paid it is recommended to the naïve users as it is easy to use and captures the parts of the screen as you desire. It is one of the most used programs that are highly in demand in contrast to Discord audio recording.
Compatibility
The program at the time of this writing is only compatible with windows.
Features
- The program has a built-in function of PIP and video in video.
- It supports AVI 2.0 and there is no output length defined.
- The real-time highlighting of the mouse cursor is offered by this program.
Pros
- It has an intuitive interface that is GUI-based and easy to use.
- The program is fast and therefore the best option for Discord audio recording.
Cons
- Since it is only compatible with windows so users of other operating systems cannot use it.
- The program does not compress the audio as well as video and therefore uses more power.
How to Use Bandicam Recorder to Record Discord Audio ?
Below are the steps which are to be followed to get the Discord audio recorded using Bandicam.
Step 1: Once the program is started, select the default recording device as a primary sound device:

Step 2: Plugin the “Speakers” and if they are disabled then please enable them. Set the Speakers as the default device as well.

Step 3: Open the volume mixture tray and set the voice to whatever level you love.

Step 4: Now whenever the Discord is run on your system you will get to know the recording sound by the fluctuating bar.

6.Camtasia
It is one of the programs that have the best interface. The integrated GUI makes it possible for the users to overcome the problems which the other programs present. With the best and the most advanced controls, it makes the process very easy.
Compatibility
The program is compatible with both Mac and Windows.
Features
- The program integrates sound with the on-screen activities using state-of-the-art functionalities.
- The HD surround sound option is also available in the paid version.
Pros
- The program has a GUI which makes it easy for the users to operate it.
- The one-step process for audio recording is something that no other program presents.
Cons
- It is a paid program so not everyone can use it.
- The free version is very much limited and therefore practically of no use.
How to Use Camtasia Recorder to Record Discord Audio ?
The program has only one step that needs to be followed to get the work done. Under recorded inputs click on the down arrow beside the “Audio On” function and select the highlighted elements to record the audio of Discord.
7.Movavi
If you are looking for a program that provides the full value for the money spent then it is the one that you should be using. It is all because of the interface that has been embedded and the speed that is incredible.
Compatibility
This program is compatible with Windows and Mac.
Features
- Movavi has a built-in database of several sound effects that can be applied to the recorded audio.
- The live broadcast is also supported by the program it is the best for Discord use.
Pros
- The program is fast as compared to the other ones on the list as it uses flash programming for development.
- Movavi is a complete suite that will allow users to perform a range of functions.
Cons
- The program is high priced so it is not recommended to individual users
- As it uses flash sometimes the screen capture is frozen for no reason
How to Use Movavi Recorder to Record Discord Audio ?
Step 1: Turn on the “System Audio” capture and specify the area from where the audio is to be captured. The button will be highlighted in green if the audio capture is on.
Step 2: Use F9 and F10 keys to pause and stop the audio recording respectively. Once the recording is on you will see the duration at the top of the capture along with the size of the audio that is being captured.
8.Free Sound Recorder
As the name suggests it is free and unlimited to use. The program is light as it is flash-based and is compatible with the most used operating systems in the world. It does not consume the system resources and therefore a top pick for every gamer.
Compatibility
The program is compatible with both Windows and Mac.
Features:
- The program uses the 3-step process to make sure that the audio is recorded with ease.
- The online music recording function is also available in the program which enhances its capability.
Pros
- The program captures both internal and external audio for free.
- You can also schedule the audio recording for a very long time and a hands-free recording option is also available.
Cons
- The program is not as frequently updated as it should be.
- The enhancement of the audio function is not as good as it should be.
How to Use Free Sound Recorder to Record Discord Audio ?
Step 1: On the lower half of the interface of the program, there is a “Recording Mixer“ which should be used to select the audio source. The same panel can also be used to make sure that the audio settings are changed as required.
Step 2: Click the circular button and the program will start recording. On the lower half, you can also see the duration of the audio recorded.
9.Record My Desktop
This Linux-based program is something that every gamer needs. It is highly in demand due to the fact that it does the desired work within no time as the speed is incredible.
Compatibility
The program is compatible with BSD and Linux.
Features
- The configuration of ALSA and OSS is possible with this program.
- The program also supports the output in different formats.
Pros
- It is very easy to operate as the interface is self-explanatory.
- The program captures the audio in the highest definition and is therefore highly recommended.
Cons
- The audio saving process is a bit hassle when it comes to this program.
- It interferes with the computer audio and therefore the quality of the recording can be degraded.
How to Use Record My Desktop to Record Discord Audio ?
Step 1: To record Discord audio, first of all, you need to make sure that the sound recording is enabled.
Step 2: Use the “Wave”, “Mic” and “Capture” buttons to set the pace until you get satisfied. The program is automatically recorded the Discord audio from this point onward.
10.CRAIG
CRAIG is an open-source platform introduced by Yahweasel for Discord that allows easy multi-channel or multi-track recording. If the data to be recorded is already available, then it easily records the audio for multiple audio tracks.
Craig is essentially a bot that enables audio recording from both the communicating ends and makes up a separate file for each. This facilitates the extent of variations or editing required for each side of audio files for better quality.
Moreover, Craig also enables the user to download the audio while recording. The potential users of Craig are either the ones managing the Craig server or the ones who are granted permission by a created “Craig” role.
Platform Compatibility
- Windows OS
- Mac OS
Features
- Open-source platform
- Allows recording in/from multiple tracks or channel
- Enables two-way communication recording
- Allow two types of users the Craig server manager and Craig’s role assigned to the person
- Facilitate high-quality audio streaming
- Promises security
- Free of cost chat servers
- Offers enhanced reliability
- Can download the file in several modern file formats
- 7 days file download
- 6 hours recording duration
- Auto tracks synchronization
Pros
- Supported by both desktop and mobile platforms, Windows, Mac, Android, and iOS.
- Free software
- High-quality outcome
- Multiple tracks recording
- Allow several speakers
- Decent recording time
Cons
- Doesn’t support phones OS
How to Record Discord Audio Using CRAIG?
Step 1: Make a free of cost Discord account
Step 2: Craig initiates recording automatically once you call it by connecting the Discord voice server with the communication peers.
Step 3: When you open the music recorder , click on the arrow button at the top right corner, this will open the dropdown list.
Step 4: While recording, Craig will send the download links.
Step 5: You can record the audio at any instance with any file format of your choice.
Step 6: A separate file for all the people involved in communication will be saved.
Step 7: You can then import these files for post-editing by pushing them directly into digital audio workstation (DAW) software.
A roundup of the Best Discord Audio Software
| No. | Tools | Review Stars | Price | Compatibility | Best For | Trial Version Limitations |
|---|---|---|---|---|---|---|
| 1 | Wondershare Filmora | 4.5 | Free, $49.99 | Mac, Windows | Screencasting, technical documentation. | One usage restriction |
| 2 | Leawo Music Recorder | 4.0 | $19.99 | Mac, Windows | Gaming, streaming, and instructional videos. | 30 Days |
| 3 | Audacity | 3.0 | Free | Mac, Windows, Linux | Tutorial, promotional videos and streaming. | Unlimited |
| 4 | OBS | 4.0 | Free | Mac, Windows, Linux | Presentations, tutorials, and screencasting. | Unlimited |
| 5 | Bandicam | 4.0 | $39 | Windows | Presentation recordings and interactive quizzes | 14 Days |
| 6 | Camtasia | 4.4 | $249 | Mac, Windows | Game recording, webcams, and all types of screencasting | 30 Days |
| 7 | Movavi | 4.0 | $39.95 | Mac, Windows | Streaming, presentations, digitization of VHS Tapes, and Screencasting. | 7 Days |
| 8 | Free Sound Recorder | 2.5 | Free | Windows | Basic screen copying. | Unlimited |
| 9 | Record My Desktop | 3.0 | Free | Linux, BSD | Webinars and online tutorials. | Unlimited |
| 10 | CRAIG | 3.5 | Free | Windows, macOS | Screencasting | Unlimited |
Frequently Ask Questions about How to Record Discord Audio
1. What is Discord?
Discord is a platform exclusively designed for gamers. The platform not only supports voice but also specializes in text and imagery. The best part of the platform is that it has been developed for gamers so that at low latencies they can communicate with each other in a better manner.
2. Why Do You Need Software for Discord Recording?
If you are a gamer and want to communicate with your peers efficiently then there is some dedicated software for it. This will not only connect the gamers together but will also help you make friends at the same time.
This will help you record any incoming calls from any selected number of gamers’ communities. You may also save it or share any incoming/outgoing calls further on.
3. How to Select a Best Discord Audio Recorder?
The program is considered to be the best to record Discord audio if it has the following qualities. There are many programs on the market that are completely aligned with these qualities.
- The program should be easy to use and must not present any issues to novice users.
- The recording quality should be high so that the output becomes presentable.
- The program should be such that the integration with Discord does not pose any issues.
- It should have all the necessary options to share the audio to the social media platforms or with friends if the owner requires it.
4. How to Record Discord audio on PC Windows?
Discord audio recording software like OBS, AUDACITY, CRAIG, FILMORA, and LEAWO is open-source software. They allow recording Discord audio by first having the software downloaded.
Then you have to configure the audio sources and other parameters accordingly. After the recording is done, you can then save the file in any of the available file formats. Further editing may boost the audio quality as well.
5. How to Record Discord audio on PC Mac?
Software like FILMORA and LEAWO supports Mac OS. Firstly, we have to install the exe file and then download it. To get started, you have to select the appropriate recording options and audio sources respectively, and start recording!
6. How to record Discord audio on phones (iOS/Android)?
LEAWO is the only software that’s been mentioned above that supports phones OS as well. All you need to do is download LEAWO Music Recorder, which will initiate the recording process once the Discord is played.
Conclusion
Want to know how to record Discord audios? All the above software are very great to help you out. Most of the aforementioned software is open sources, which entails easy accessibility.
Select and download your favorite, and following the guide step by step, you are very comfortable making your recording easy and fun.
One thing is for sure, in the end, reliability and quality always matter. Software that is free of cost but offers less quality output will always go under the radar in the industry where competition is rife.
Rather invest in good software that will ensure you not a good quality Discord audio recording but also has a user-friendly interface, such as Wondershare Filmora .
![]()
The All-in-One Screen Recorder & Video Editor
- Record desktop screen, voiceover, and webcam simultaneously
- Edit recorded clips quickly with a wide range of professional tools
- Built-in plentiful templates and effects
- Export to MP4, MOV, MKV, GIF and multiple formats
For Win 7 or later (64-bit)
For macOS 10.12 or later
Secure Download
Richard Bennett
Richard Bennett is a writer and a lover of all things video.
Follow @Richard Bennett
Discovering the Secrets: Seamless Video Sharing on Discord
How to Share Screen on Discord?
Richard Bennett
Mar 27, 2024• Proven solutions
Discord is a group-chat app designed to bring together communities of like-minded people. It launched in 2015 aimed at gamers, and while it is still extremely popular in the gaming world it has also branched out to cover all manner of common interests and themes. You might want to get together to discuss a classic movie series, study on a project together, or just to get involved with the fanbase of your favorite YouTuber.
You don’t just have to chat via text – Discord makes it easy to have voice chats and video calls , and you can share your screen too – ideal whether you want to stream just to a smaller audience than something like Twitch, or you need your colleagues to review your work while you talk it through. Here I’ll take you through how to screen share on Discord step-by-step.
In this article
- Part 1: Settings for Screen Sharing on Discord
- Part 2: How to Screen Share on a Discord Voice Channel Server?
- Part 3: How to Share Screen on a Discord Direct Message?
- Part 4: How to Change Settings While Screen Sharing on Discord?
- Discord Screen Sharing FAQs
Part 1: Settings for Screen Sharing on Discord
Before you get started with actually sharing your screen on Discord, you’ll want to make sure that you’ve got everything set up correctly.
Open up User Settings by clicking on the cog in the bottom left next to your username.

Here you’ll find a handy option called ‘Voice & Video’. Use this to make sure that your audio settings are working correctly – both your microphone for communicating with the person you’re sharing your screen with, and your output so that you can hear them clearly too.
You can also update your video settings here, if you want to also be on camera while you share your screen. Adjust your webcam options and run a test if you want to see how it’s looking.
There are also plenty of clever options available if you want to tinker with things like Noise Suppression, Echo Cancellation and so on if you scroll down on this menu option. Have a play around if you want to, but for most people the default options will be sufficient.
Now, when you go to share your screen (which I’ll cover off below), you’ll be presented with one final option first – your resolution and frame rate .
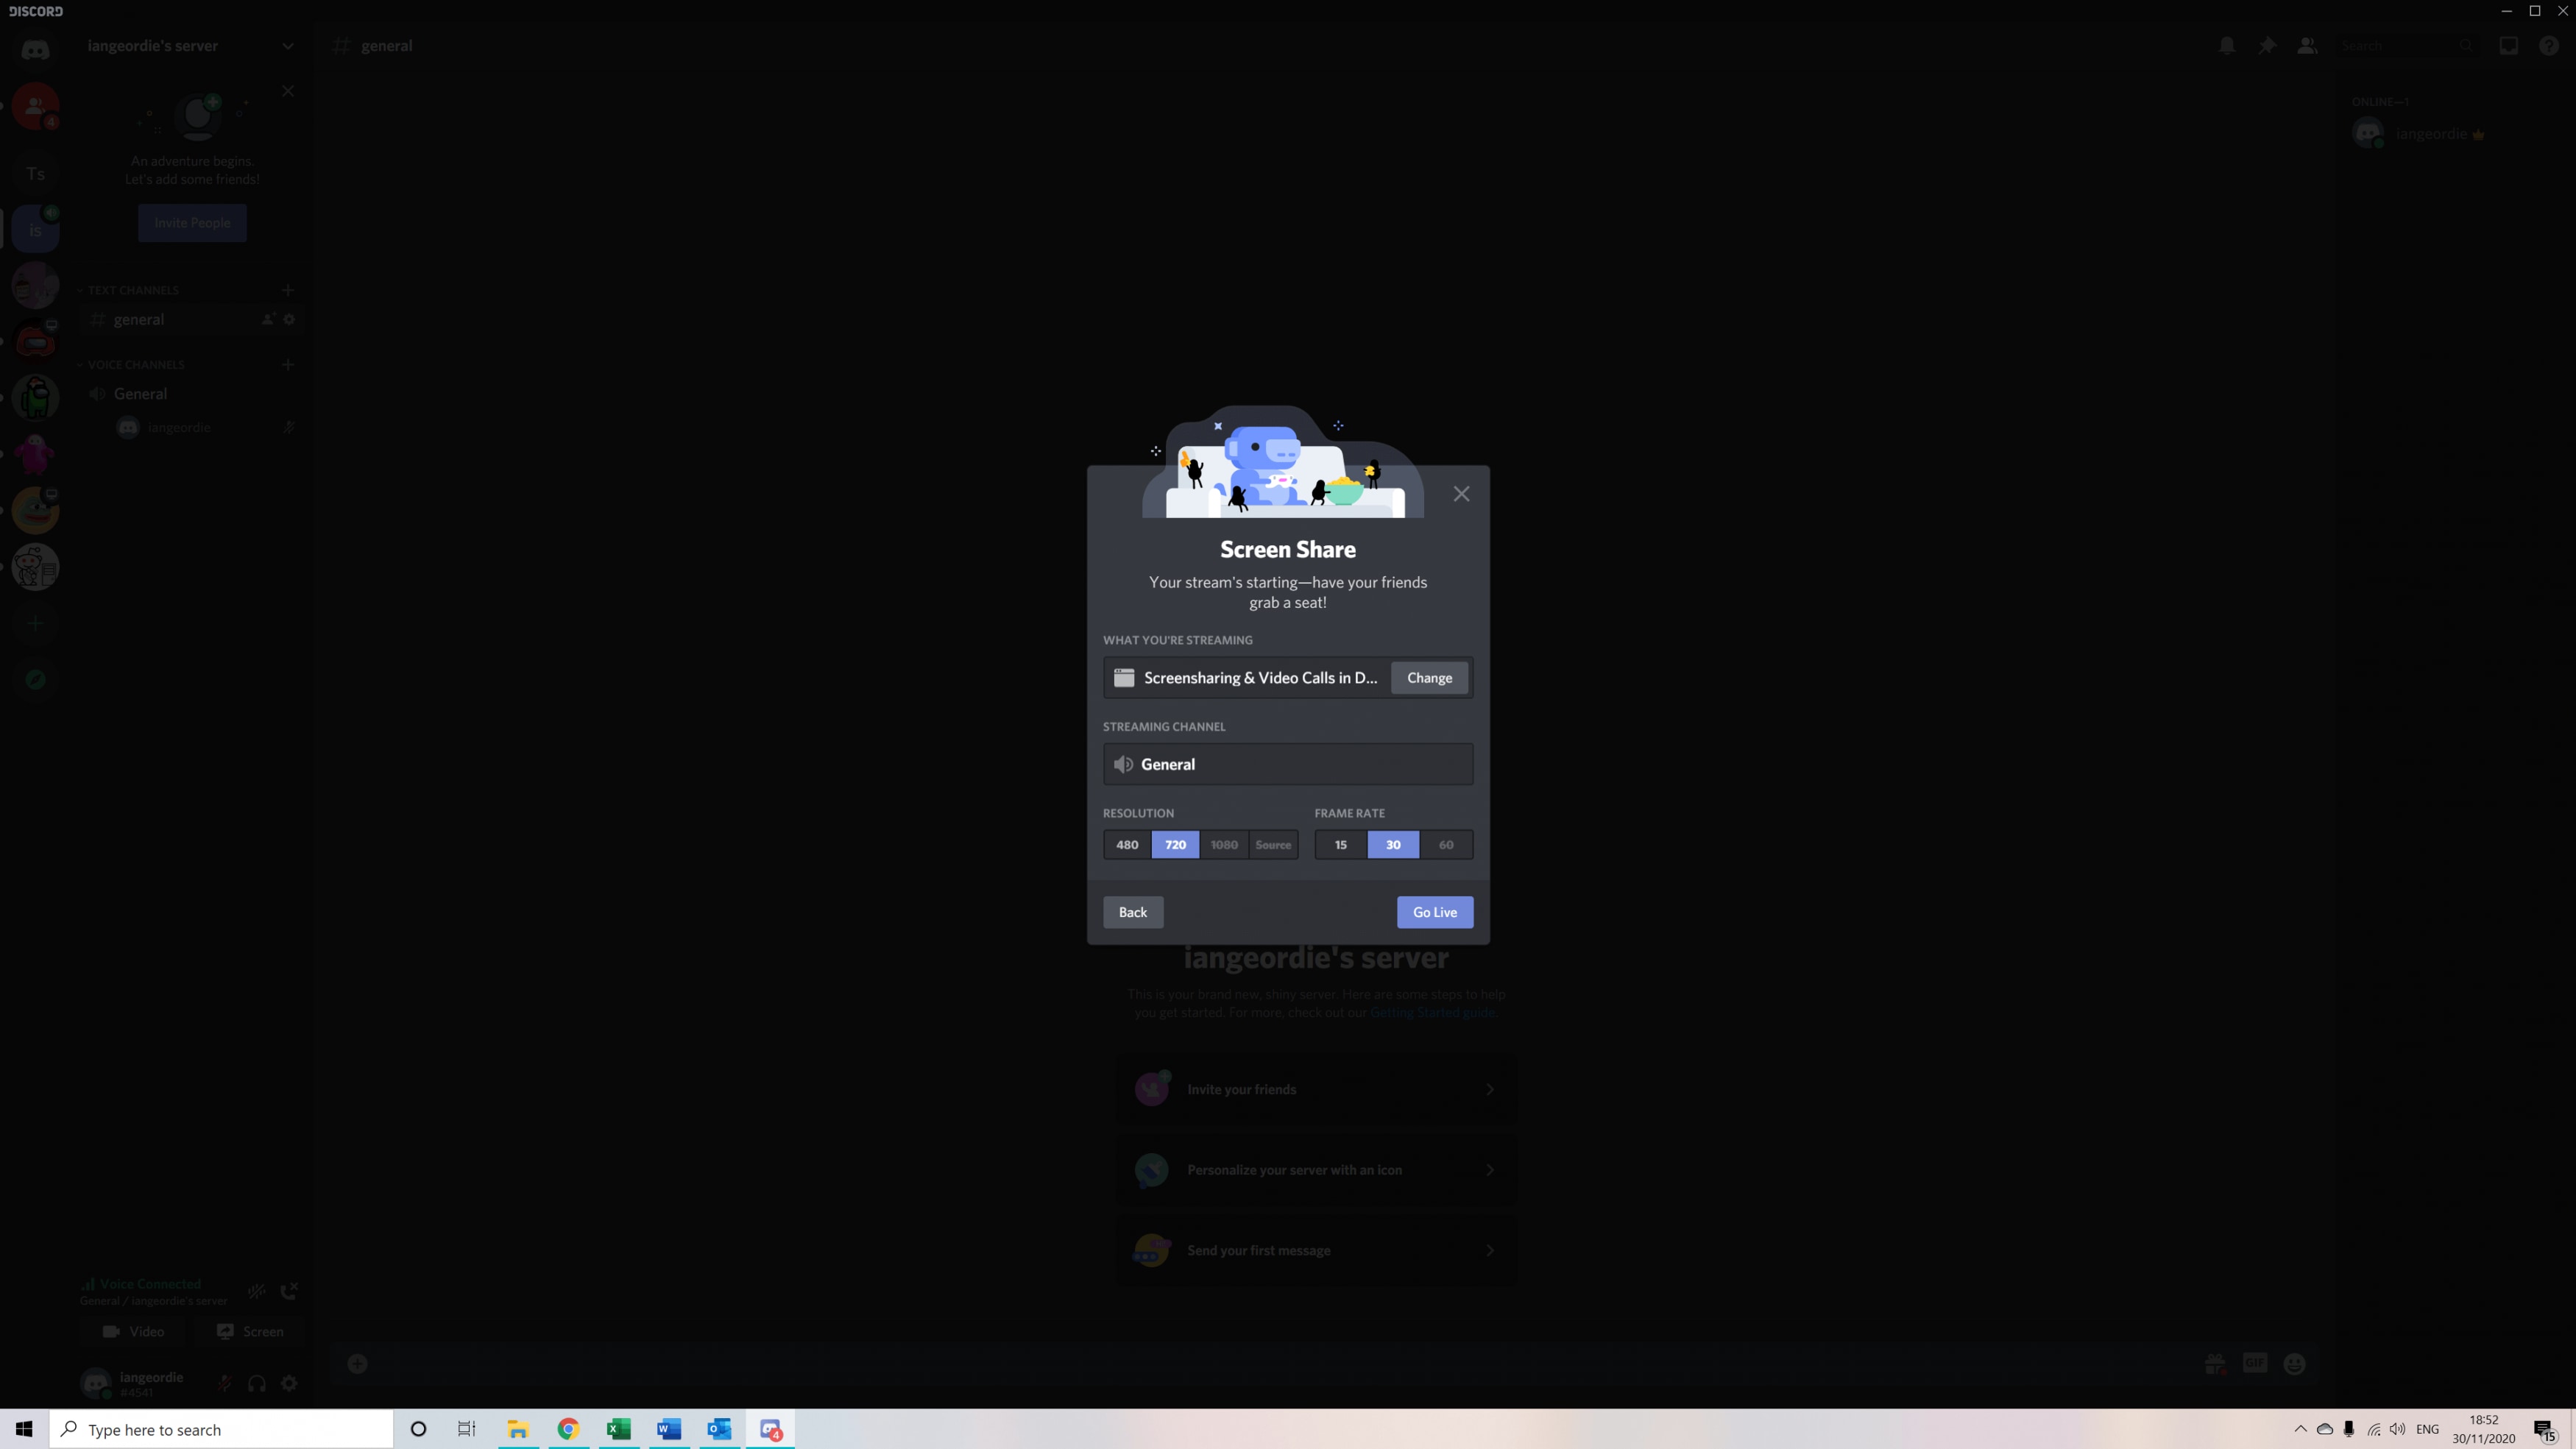
Here you can set the quality of the image you’ll be sharing. 480p and 720p (HD) are available by default along with 15fps and 30fps. If you want 1080p or to use the Source option, or 60fps, you’ll need to pay for a Discord Nitro account, which is an upgraded tier of membership that starts at $49.99 for the year or $4.99 per month.
Part 2: How to Screen Share on a Discord Voice Channel Server?
Once your settings are ready, you’re good to go. You can currently share your screen using the online Discord browser or on the Discord app. You can’t screen share on mobile. Screen sharing works on Windows, Mac and Linux but you can only share audio on Windows 10.
With that out of the way, here’s how to screen share on Discord on the desktop app.
Firstly, you’ll need to be in a voice channel server. This means that you’ll need to be on a server that either you’ve set up or joined with friends, and active in the voice chat. You’ll start in a text channel by default, so make sure to join a voice channel. Once you’re here, you’ll be able to start chatting to anyone else in the voice channel.
Once you’ve joined, you’ll see a new option at the bottom left of the screen to share your screen. Click this button and you’ll be presented with the option to start sharing your screen – you can choose which application you want to share specifically, or your whole screen.
Once you’ve chosen your screen to share, you can set the settings as mentioned above.
It’s important to note that, if you’re sharing your screen via online Discord in your web browser, you won’t get these same customization options. When you click on share screen, you’ll just get the chance to choose which window you want to share, and it’ll look slightly different. Once done, you’ll be sharing – you can’t change your resolution or frame rate on the online browser. If that’s an issue, you might want to download the app – it is free to use and is often faster.
Part 3: How to Share Screen on a Discord Direct Message?
If you want to share your screen on Discord in a private direct message, the steps are slightly different. Firstly, there’s no automatic voice channel to join, so you’ll need to begin a video call. To do this, click on the video call button at the top right of your screen when you’re in your DM folder with the person you want to share your screen with.
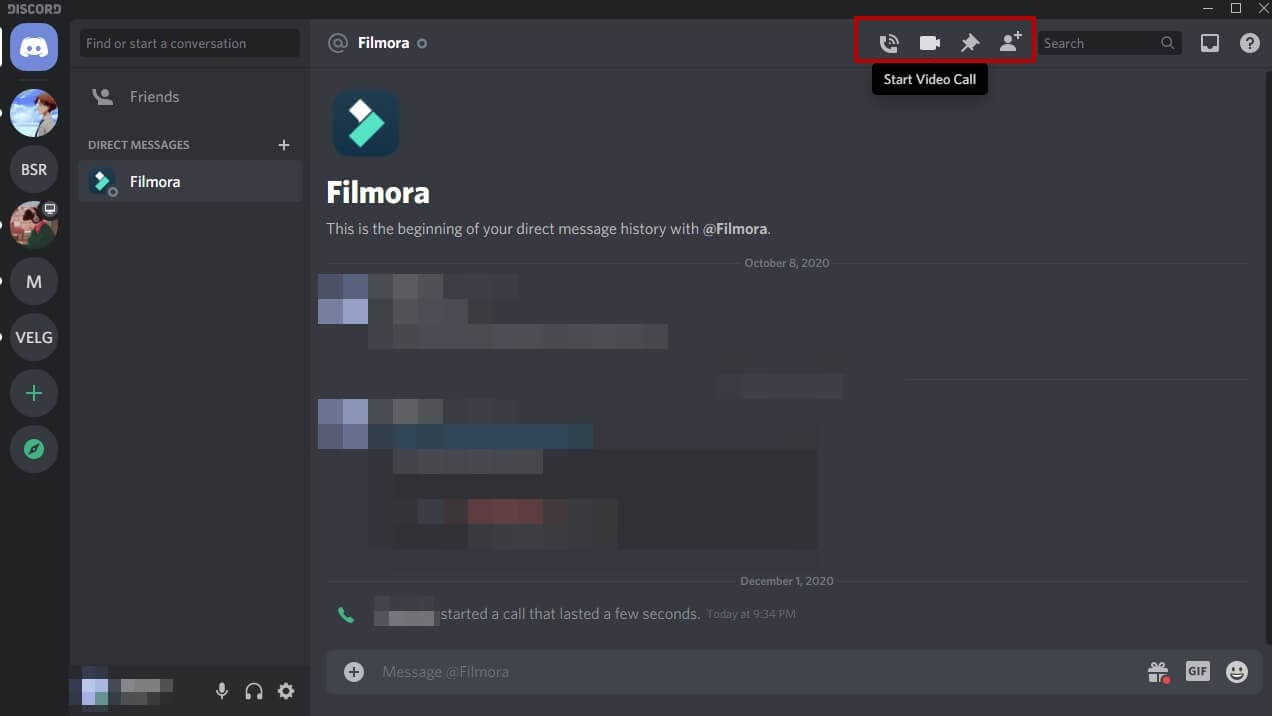
Then, you simply need to click the share screen button which will appear on your main call controls in the middle of the screen. Once done, you can share you screen in the same way as you would in a voice channel.
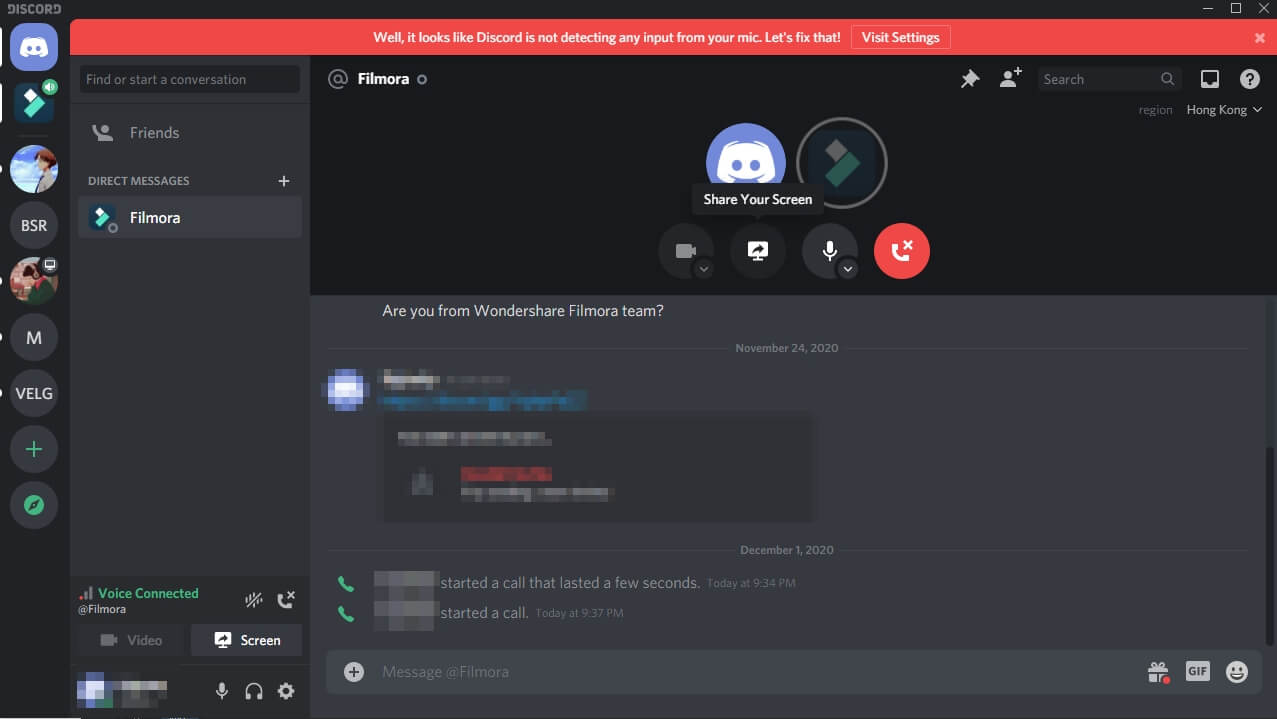
Part 4: How to Change Settings While Screen Sharing on Discord?
Once you’ve started a screen share on Discord, you don’t need to stop and start again if you want to change any of the settings. Instead, you can alter them as you’re working. It’s quite simple too.
Firstly, when you’re sharing your screen, you’ll see a little pop-up window of your screen on Discord. Hover over this and you’ll see a cog with Stream Settings highlighted. Click on this cog.
From here, you’ll get the stream settings menu where you can change the frame rate and resolution, or switch to a different window or application if you want to share something else.
This is really useful if you want to work on different applications or projects at the same time, while lowering the resolution or frame rate can really help out if your stream is lagging. If the people you’re screen sharing with are finding that your stream is stuttering or your audio and video keep cutting out, try lowering the resolution and frame rate to make it more manageable.
Discord Screen Sharing FAQs
1. How Can I Share Screen on Discord Mobile?
Unfortunately, if you’re using the Discord app on your Android or iOS smartphone, you won’t be able to share your screen. These operating systems block apps which record your screen, which means it’s not a feature that’s likely to come soon unless Discord can come to an agreement with Google and/or Apple. You can join a stream, and watch someone else’s screen, from your phone.
2. How Can I Share Screen on Discord Mobile?
By default, the only operating system that lets you share audio when you’re screen sharing is Windows 10. So, if you’re using a MacBook or iMac, or you’re on a system running Linux or any other lesser-known OS, you won’t be able to share audio by default.
There are workarounds available, such as this one that was shared on Reddit, but it involves a lot of steps and downloading of additional software. Always check downloads with your antivirus software.
3. How Many People Can I Share Screen With on Discord?
Traditionally, there was a limit of 10 people for any Go Live streams on Discord, to make sure that all users had a good experience without any performance issues. However, Discord themselves increased that limit from 10 users to 50 back in March 2020, to help people through the Coronavirus pandemic. No definitive end date has been given for the increased limit but it is expected to be lowered again.
4. Why Can’t I Share Screen on Discord?
If you’re struggling to share your screen on Discord, there are a number of potential issues. Firstly, make sure you’re on the desktop program and not the mobile app. Secondly, ensure you’re running Discord as an administrator. If it still isn’t working, try uninstalling and reinstalling Discord. If the new version doesn’t work, you may need to email [email protected] .
5. Why My Screen Sharing Is Black on Discord?
If you share your screen but it is simply black, you might have an issue with your graphics hardware. Update your graphics card drivers, and update Discord to the latest version too. Make sure you close any unnecessary programs at the same time, as they might be using up precious memory which could be causing your screen share to fail.
6. How to Improve Discord Screen Share Quality?
If you want to improve your discord screen share quality because it is lagging, you’ll need to check whether your internet connection has a sufficient upload speed. Many broadband providers offer fast downloads but with slow upload speeds, so if you’re uploading a video it may stutter and struggle.
If you want to improve the video and frame rate of your screen sharing because you want it to look better, you’ll need to upgrade to Discord Nitro, which starts at $49.99 per year or $4.99 per month.
Richard Bennett
Richard Bennett is a writer and a lover of all things video.
Follow @Richard Bennett
Richard Bennett
Mar 27, 2024• Proven solutions
Discord is a group-chat app designed to bring together communities of like-minded people. It launched in 2015 aimed at gamers, and while it is still extremely popular in the gaming world it has also branched out to cover all manner of common interests and themes. You might want to get together to discuss a classic movie series, study on a project together, or just to get involved with the fanbase of your favorite YouTuber.
You don’t just have to chat via text – Discord makes it easy to have voice chats and video calls , and you can share your screen too – ideal whether you want to stream just to a smaller audience than something like Twitch, or you need your colleagues to review your work while you talk it through. Here I’ll take you through how to screen share on Discord step-by-step.
In this article
- Part 1: Settings for Screen Sharing on Discord
- Part 2: How to Screen Share on a Discord Voice Channel Server?
- Part 3: How to Share Screen on a Discord Direct Message?
- Part 4: How to Change Settings While Screen Sharing on Discord?
- Discord Screen Sharing FAQs
Part 1: Settings for Screen Sharing on Discord
Before you get started with actually sharing your screen on Discord, you’ll want to make sure that you’ve got everything set up correctly.
Open up User Settings by clicking on the cog in the bottom left next to your username.
Here you’ll find a handy option called ‘Voice & Video’. Use this to make sure that your audio settings are working correctly – both your microphone for communicating with the person you’re sharing your screen with, and your output so that you can hear them clearly too.
You can also update your video settings here, if you want to also be on camera while you share your screen. Adjust your webcam options and run a test if you want to see how it’s looking.
There are also plenty of clever options available if you want to tinker with things like Noise Suppression, Echo Cancellation and so on if you scroll down on this menu option. Have a play around if you want to, but for most people the default options will be sufficient.
Now, when you go to share your screen (which I’ll cover off below), you’ll be presented with one final option first – your resolution and frame rate .
Here you can set the quality of the image you’ll be sharing. 480p and 720p (HD) are available by default along with 15fps and 30fps. If you want 1080p or to use the Source option, or 60fps, you’ll need to pay for a Discord Nitro account, which is an upgraded tier of membership that starts at $49.99 for the year or $4.99 per month.
Part 2: How to Screen Share on a Discord Voice Channel Server?
Once your settings are ready, you’re good to go. You can currently share your screen using the online Discord browser or on the Discord app. You can’t screen share on mobile. Screen sharing works on Windows, Mac and Linux but you can only share audio on Windows 10.
With that out of the way, here’s how to screen share on Discord on the desktop app.
Firstly, you’ll need to be in a voice channel server. This means that you’ll need to be on a server that either you’ve set up or joined with friends, and active in the voice chat. You’ll start in a text channel by default, so make sure to join a voice channel. Once you’re here, you’ll be able to start chatting to anyone else in the voice channel.
Once you’ve joined, you’ll see a new option at the bottom left of the screen to share your screen. Click this button and you’ll be presented with the option to start sharing your screen – you can choose which application you want to share specifically, or your whole screen.
Once you’ve chosen your screen to share, you can set the settings as mentioned above.
It’s important to note that, if you’re sharing your screen via online Discord in your web browser, you won’t get these same customization options. When you click on share screen, you’ll just get the chance to choose which window you want to share, and it’ll look slightly different. Once done, you’ll be sharing – you can’t change your resolution or frame rate on the online browser. If that’s an issue, you might want to download the app – it is free to use and is often faster.
Part 3: How to Share Screen on a Discord Direct Message?
If you want to share your screen on Discord in a private direct message, the steps are slightly different. Firstly, there’s no automatic voice channel to join, so you’ll need to begin a video call. To do this, click on the video call button at the top right of your screen when you’re in your DM folder with the person you want to share your screen with.
Then, you simply need to click the share screen button which will appear on your main call controls in the middle of the screen. Once done, you can share you screen in the same way as you would in a voice channel.
Part 4: How to Change Settings While Screen Sharing on Discord?
Once you’ve started a screen share on Discord, you don’t need to stop and start again if you want to change any of the settings. Instead, you can alter them as you’re working. It’s quite simple too.
Firstly, when you’re sharing your screen, you’ll see a little pop-up window of your screen on Discord. Hover over this and you’ll see a cog with Stream Settings highlighted. Click on this cog.
From here, you’ll get the stream settings menu where you can change the frame rate and resolution, or switch to a different window or application if you want to share something else.
This is really useful if you want to work on different applications or projects at the same time, while lowering the resolution or frame rate can really help out if your stream is lagging. If the people you’re screen sharing with are finding that your stream is stuttering or your audio and video keep cutting out, try lowering the resolution and frame rate to make it more manageable.
Discord Screen Sharing FAQs
1. How Can I Share Screen on Discord Mobile?
Unfortunately, if you’re using the Discord app on your Android or iOS smartphone, you won’t be able to share your screen. These operating systems block apps which record your screen, which means it’s not a feature that’s likely to come soon unless Discord can come to an agreement with Google and/or Apple. You can join a stream, and watch someone else’s screen, from your phone.
2. How Can I Share Screen on Discord Mobile?
By default, the only operating system that lets you share audio when you’re screen sharing is Windows 10. So, if you’re using a MacBook or iMac, or you’re on a system running Linux or any other lesser-known OS, you won’t be able to share audio by default.
There are workarounds available, such as this one that was shared on Reddit, but it involves a lot of steps and downloading of additional software. Always check downloads with your antivirus software.
3. How Many People Can I Share Screen With on Discord?
Traditionally, there was a limit of 10 people for any Go Live streams on Discord, to make sure that all users had a good experience without any performance issues. However, Discord themselves increased that limit from 10 users to 50 back in March 2020, to help people through the Coronavirus pandemic. No definitive end date has been given for the increased limit but it is expected to be lowered again.
4. Why Can’t I Share Screen on Discord?
If you’re struggling to share your screen on Discord, there are a number of potential issues. Firstly, make sure you’re on the desktop program and not the mobile app. Secondly, ensure you’re running Discord as an administrator. If it still isn’t working, try uninstalling and reinstalling Discord. If the new version doesn’t work, you may need to email [email protected] .
5. Why My Screen Sharing Is Black on Discord?
If you share your screen but it is simply black, you might have an issue with your graphics hardware. Update your graphics card drivers, and update Discord to the latest version too. Make sure you close any unnecessary programs at the same time, as they might be using up precious memory which could be causing your screen share to fail.
6. How to Improve Discord Screen Share Quality?
If you want to improve your discord screen share quality because it is lagging, you’ll need to check whether your internet connection has a sufficient upload speed. Many broadband providers offer fast downloads but with slow upload speeds, so if you’re uploading a video it may stutter and struggle.
If you want to improve the video and frame rate of your screen sharing because you want it to look better, you’ll need to upgrade to Discord Nitro, which starts at $49.99 per year or $4.99 per month.
Richard Bennett
Richard Bennett is a writer and a lover of all things video.
Follow @Richard Bennett
Also read:
- In 2024, Taking Audio to the Next Level on Desktop & Mobile Discord with VoiceMod
- In 2024, Learn To Use Emoji & Stylings in Discord Threads
- [Updated] Top-Class AI Mates for Online Squares
- [New] Essential Bot Selections Elevate Your Discord Space
- [Updated] The Step-by-Step Guide To Stunning Profile Photos for Discord Users
- [Updated] In 2024, The Ultimate Guide to Mastering Message Pins on Discord
- [New] Disconnect Your Discord Account
- 2024 Approved The Ultimate How-To for Eye-Catching Discord Profile Pics
- 2024 Approved Top Non-Discord Streaming Networks
- [Updated] The Ultimate Step-by-Step Guide for Adding and Curating Dynamic Graphics (GIFs) in Your Discord Chats
- Ultimate Desktop & Mobile Discord Recorders Reviewed
- [Updated] 2024 Approved Exploring Workplace Messaging Platforms Ranking Slack & Discord for Efficiency
- 2024 Approved Mastering Melodies on Discord Top-Tier Bots for Sonic Enthusiasts
- [Updated] An In-Depth Exploration of Discord Features for 2024
- [New] 2024 Approved The Ultimate List Top 10 Plugins for Elevated Discord
- [Updated] Top-Tier Desktop Applications for Discord Snaps
- [Updated] Discover Revolutionary Bots for a Better Sonic Experience on Discord
- Master the Art of Music and Messaging Spotify+Discord Connection for 2024
- 2024 Approved Revealing the Masters Behind Discord's Most Beloved Glyphs
- [New] In 2024, Mastering Mass Message Deletion on Discord
- How to Reply Message on Discord Desktop and Mobile App
- [Updated] Essential Non-Discord Chat Platforms for 2024
- [New] Quick Guide to DiscoDuty Adding Roles on Discord for 2024
- [Updated] 2024 Approved A Guide to Identifying the Right Discord Servers
- In 2024, Discord's Prime Locations to Date or Fall in Love
- [New] Top Servers for Romance Discord Edition
- In 2024, Transform Your Texts on Discord Using Simple Formats
- 2024 Approved Expertly Engineered Font Tools for Discord Channels
- [Updated] Embellish Your Discord Conversations Like a Pro for 2024
- [New] The Compreran Guide Sending Videos Through Discord's Lens for 2024
- [New] Exclusive Couple's Spaces on Discord Platform for 2024
- [New] In 2024, Premium Dating Groups in Discord Server Land
- [Updated] 2024 Approved Advanced Strategies for Mass Message Purge on Discord Networks
- [New] In 2024, Can You Project YouTube & FB Videos Onto Your HDTV?
- [Updated] Integrating FB Live on Roku Step-by-Step Guide
- [Updated] The Seamless Guide to Saving GIFs on iPhones/Androids
- 2024 Approved Bridging Platforms Integrating Instagram with Facebook
- In 2024, List of Pokémon Go Joysticks On Apple iPhone 8 Plus | Dr.fone
- [Updated] Instagram TV Deactivation Made Easy
- In 2024, Chuckle & Sob with These Top 10 Instagram Meme Collectives
- In 2024, Capture and Convert Your Instagram Feeds Top 15 Free Exporters For Windows & macOS Users
- [New] 2024 Approved Stay on Top The Essential Guide to FB's Latest Video Tracks
- YouTube on FB Maximizing Auto-Play Efficiency
- Undelete lost contacts from Honor Magic 6 Lite.
- How to Bypass Google FRP Lock on Oppo K11x Devices
- 5 Easy Ways to Change Location on YouTube TV On Itel A05s | Dr.fone
- Bypassing Google Account With vnROM Bypass For Motorola Edge 40
- In 2024, 5 Ways to Track Vivo S18e without App | Dr.fone
- Remote Recording Excellence Best 9 Webmicrone Capture Systems ('23) for 2024
- How to Make Animated Explainer Videos
- Title: "Essential, No-Cost Software Compilation for High-Quality Discord Audio Capture for 2024"
- Author: Timothy
- Created at : 2024-05-23 22:47:42
- Updated at : 2024-05-24 22:47:42
- Link: https://discord-videos.techidaily.com/essential-no-cost-software-compilation-for-high-quality-discord-audio-capture-for-2024/
- License: This work is licensed under CC BY-NC-SA 4.0.
