
:max_bytes(150000):strip_icc():format(webp)/001_best-movies-on-hulu-right-now-5025149-3c80b5664f6541b4a0698333fc447251.jpg)
"In 2024, Clearer, Louder, Better Your Discord Audio Revamped by VoiceMod"
Clearer, Louder, Better: Your Discord Audio Revamped by VoiceMod
How To Use Voicemod On Discord

Richard Bennett
Mar 27, 2024• Proven solutions
A voice changer will allow you to prank friends, create content, and most of all, secure your presence by maintaining anonymity. With it, you can turn your voice into several unique and exciting voices to serve any purpose you deem fit.
And when it comes to voice changers, none is as easy to operate as the Voicemod in Discord. Its claim to fame is that it features numerous voice options to choose from.
With Vociemod, you have to simply run the program in the background and select your desired voice!
Read on as we discuss how to use Voicemod on Discord in detail:
In this article
Part 1: How To Use Voice Changer Voicemod For Discord On Desktop Computer
Part 2: How To Fix Voicemod Not Working Discord?
Part 3: How To Change Voice For Discord On Mobile?
Part 1: How To Use Voice Changer Voicemod For Discord On Desktop Computer
Voicemod is arguably one of the best voice changer tools available on the internet for its excellent features.
But before we jump straight into using Voicemod for Discord, you must know how to install one on your desktop Mac/PC.
Here’s how to install Voicemod
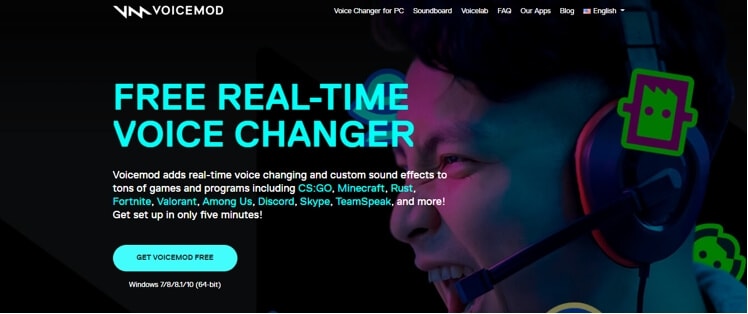
- Visit the Voicemod website to begin the download process.
- You’ll see the button “Get Voicemod Free” on the screen. Click it!
- Upon clicking, the site will ask you to sign in to your account from Discord, Twitch, to Google. Use your Discord login details to sign in.
- After you’re signed in, the “.exe” file will be downloaded to your PC/Mac’s download folder. Open the “.exe” file the moment it’s downloaded.
- An install wizard will open up. Navigate through the wizard’s installation process to install the program on your PC/Mac.
- After installation is complete, the installation wizard will ask to restart your windows’ Mac or PC.
You can skip it, but it’s best to restart it for smooth operations.
Once your Mac/PC restarts, you’ll see the Voicemod app icon on your desktop screen.
Now that you have successfully installed the voice changer Voicemod app into your desktop computer, let’s dive into knowing how to use Voicemod on Discord!
Here’s how to use voice changer on Discord
- Click the Vociemod icon on the desktop to open the app. If you can’t find it there, click the “windows icon” located at the screen’s bottom-left. Just type “Voicemod,” and the program will show up. Double click it to get it opened.
- When the app opens up, you’ll have to choose the output and input it will use. If you’re wondering, why the output? This is to give you an insight into what your voice will sound like on each filter.
Once it’s done, you can play around with different filters!
Every day, you’ll get new free filters to use; however, to unlock and access all filters, you need to upgrade to the “pro-version” of voice changer Voicemod.
On the other hand, if you only need a few filters, the “basic-version” should suffice.
Apart from that, you can unlock an additional free filter in your app by sharing it on your social media accounts.

Step 1
To set up Voicemod with Discord, open your discord account and go to the settings (gear icon) placed at the screen’s bottom-left corner.
Step 2
Click the “Voice and Video” option right under the app settings.
Step 3
To make Voicemod usable, you’ll have to change Voice settings. Within the “Input Device” option, select the option that says “Microphone Voicemod Virtual Audio.”
Step 4
After you have changed settings, you can easily change the voice within the program. Not only this, but other users can also hear your audio alteration.
Step 5
With the “basic version,” you’ll have seven free voice choices that will change each day. On the contrary, with the “pro-version,” you’ll gain access to more than 80 different voice options.
So, if you’re searching for an easy and simple voice-changing app to use, look no further than Voicemod!
Part 2: How To Fix Voicemod Not Working Discord?
Is your voice changer Voicemod not working on Discord? No worries, you can troubleshoot the issues with a few basic steps.
Here are some ways you can use to fix Voicemod not working in Discord:
Method 1: Restart Your Windows PC/Mac
Though it’s not a technical solution, restarting your desktop computer fixes incorrect settings by rebooting them and solves many problems connected with your computer system, programs, and hardware.
So, when your Voicemod suddenly ceases to work in Discord, make sure to restart your Windows PC/Mac before going any further, as it’s the first step in fixing voice issues.
If restarting doesn’t help, slide to the next step!
Method 2: Make Sure The Mic Is Properly Set
The next step is to check if the mic works correctly. This is because faulty settings may stop voice changer Voicemod from operating correctly.
Just follow the steps below to resolve it:
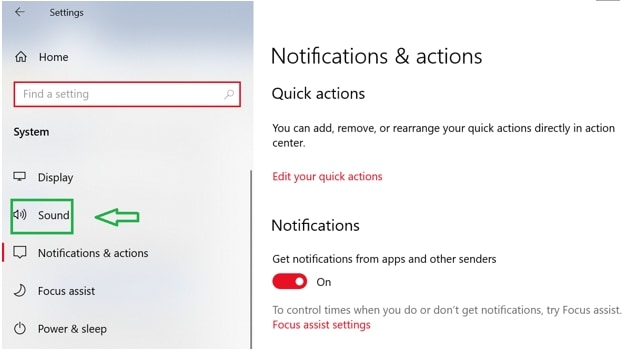
- On the keyboard, press the “Win” logo and the “I” key simultaneously to open Windows settings. Click “System.”
- On the left, you’ll see the option “Sound.” Click it.
- First, you have to test the microphone! To do so, choose the “Headset” option rather than the Voicemod microphone under the “Input” section
- Click “Device properties & test microphone”
- Make sure to uncheck the “disable” box and keep the volume section 100
- Click the “Start test” button and speak into the microphone
- After that, click “Stop test.” If the greatest value it shows is above “0”, then your microphone works correctly
Now, restart your Voicemod app to see if it’s working properly or not! If the issue still persists, jump to the next solution.
Method 3: Install Windows Updates
If you use Windows 10, it has two kinds of updates that offer performance boost and security patches. Sometimes, an update can fix a few driver and software conflicts automatically.
You can quickly solve the voice chat problem by simply updating the system settings. Here’s how to update your Windows 10:
- Open your windows setting by pressing the “Windows button” and the “I” key together.
- Click on “Update and Security”
- Click the “Check for Updates” button. If an update is found, it will install automatically on the system
Make sure to repeat this process until it says you’re up-to-date. Then, restart the PC. Check whether the Vociemod is properly working or not!
If not, try our next option!
Method 4:Re-Install Voice Changer Voicemod Drivers
In many instances, the issue signifies that you’re using outdated or faulty drivers. To troubleshoot this, simply re-install your Voicemod driver, and you’ll be good to go!
First, uninstall your Voicemod driver from the windows PC/Mac. Here’s how to do it:
- On the keyboard, press the “Windows button” as well as the “I” key to bring up the “Run box”
- Paste or type “devmgmt.msc” and click “OK.” This will open the “Device Manager”
- Click the “expand” option of “Audio Inputs & Outputs.”
- Click the “Microphone WMD” and choose the “Uninstall device” option
- A pop-up window will appear. Click the “Uninstall” button
- Restart the PC
Install the voice changer Voicemod again, whether automatically or manually, and see if it works!
Part 3: How To Change Voice For Discord On Mobile?
“Voicemod clips” is the version for both Apple and Android devices. The app will help you make high-quality content using its wide selection of one-of-a-kind effects, which will change your voice so much that you won’t recognize yourself!
In addition to that, you can add filters, which are connected to your cell phone’s camera to create funny, interesting videos.
Additionally, you’ll have the option to choose from 10 different voices. Plus, you can also make unlimited videos and audio from the humorous to the terrifying.
Some of the Voicemod voices on mobile include male-to-female, different robot effects, famous celebrities, scary voices, and much more. In short, everything is based on how you would like to modify your voice!
Not just that, you can also cross-share creative videos and audio to popular social networking platforms such as Facebook, Twitter, Instagram, TikTok, and Snapchat using your smartphone.
Curious to know how to change your voice for Discord on mobile? Here are step-by-step instructions:
- Make sure the Voicemod app is downloaded on your Apple or Android device and appropriately configured
- Open Discord
- Tap the “cogwheel icon” near your name and avatar
- You’ll see the “settings” page
- Within it, tap the “Voice & Video” option
- Tap Voicemod under the “Input Device” option and the headset under the “Output Device” option and tap escape. You’ll have access to numerous exciting sounds
Richard Bennett
Richard Bennett is a writer and a lover of all things video.
Follow @Richard Bennett
Richard Bennett
Mar 27, 2024• Proven solutions
A voice changer will allow you to prank friends, create content, and most of all, secure your presence by maintaining anonymity. With it, you can turn your voice into several unique and exciting voices to serve any purpose you deem fit.
And when it comes to voice changers, none is as easy to operate as the Voicemod in Discord. Its claim to fame is that it features numerous voice options to choose from.
With Vociemod, you have to simply run the program in the background and select your desired voice!
Read on as we discuss how to use Voicemod on Discord in detail:
In this article
Part 1: How To Use Voice Changer Voicemod For Discord On Desktop Computer
Part 2: How To Fix Voicemod Not Working Discord?
Part 3: How To Change Voice For Discord On Mobile?
Part 1: How To Use Voice Changer Voicemod For Discord On Desktop Computer
Voicemod is arguably one of the best voice changer tools available on the internet for its excellent features.
But before we jump straight into using Voicemod for Discord, you must know how to install one on your desktop Mac/PC.
Here’s how to install Voicemod
- Visit the Voicemod website to begin the download process.
- You’ll see the button “Get Voicemod Free” on the screen. Click it!
- Upon clicking, the site will ask you to sign in to your account from Discord, Twitch, to Google. Use your Discord login details to sign in.
- After you’re signed in, the “.exe” file will be downloaded to your PC/Mac’s download folder. Open the “.exe” file the moment it’s downloaded.
- An install wizard will open up. Navigate through the wizard’s installation process to install the program on your PC/Mac.
- After installation is complete, the installation wizard will ask to restart your windows’ Mac or PC.
You can skip it, but it’s best to restart it for smooth operations.
Once your Mac/PC restarts, you’ll see the Voicemod app icon on your desktop screen.
Now that you have successfully installed the voice changer Voicemod app into your desktop computer, let’s dive into knowing how to use Voicemod on Discord!
Here’s how to use voice changer on Discord
- Click the Vociemod icon on the desktop to open the app. If you can’t find it there, click the “windows icon” located at the screen’s bottom-left. Just type “Voicemod,” and the program will show up. Double click it to get it opened.
- When the app opens up, you’ll have to choose the output and input it will use. If you’re wondering, why the output? This is to give you an insight into what your voice will sound like on each filter.
Once it’s done, you can play around with different filters!
Every day, you’ll get new free filters to use; however, to unlock and access all filters, you need to upgrade to the “pro-version” of voice changer Voicemod.
On the other hand, if you only need a few filters, the “basic-version” should suffice.
Apart from that, you can unlock an additional free filter in your app by sharing it on your social media accounts.
Step 1
To set up Voicemod with Discord, open your discord account and go to the settings (gear icon) placed at the screen’s bottom-left corner.
Step 2
Click the “Voice and Video” option right under the app settings.
Step 3
To make Voicemod usable, you’ll have to change Voice settings. Within the “Input Device” option, select the option that says “Microphone Voicemod Virtual Audio.”
Step 4
After you have changed settings, you can easily change the voice within the program. Not only this, but other users can also hear your audio alteration.
Step 5
With the “basic version,” you’ll have seven free voice choices that will change each day. On the contrary, with the “pro-version,” you’ll gain access to more than 80 different voice options.
So, if you’re searching for an easy and simple voice-changing app to use, look no further than Voicemod!
Part 2: How To Fix Voicemod Not Working Discord?
Is your voice changer Voicemod not working on Discord? No worries, you can troubleshoot the issues with a few basic steps.
Here are some ways you can use to fix Voicemod not working in Discord:
Method 1: Restart Your Windows PC/Mac
Though it’s not a technical solution, restarting your desktop computer fixes incorrect settings by rebooting them and solves many problems connected with your computer system, programs, and hardware.
So, when your Voicemod suddenly ceases to work in Discord, make sure to restart your Windows PC/Mac before going any further, as it’s the first step in fixing voice issues.
If restarting doesn’t help, slide to the next step!
Method 2: Make Sure The Mic Is Properly Set
The next step is to check if the mic works correctly. This is because faulty settings may stop voice changer Voicemod from operating correctly.
Just follow the steps below to resolve it:
- On the keyboard, press the “Win” logo and the “I” key simultaneously to open Windows settings. Click “System.”
- On the left, you’ll see the option “Sound.” Click it.
- First, you have to test the microphone! To do so, choose the “Headset” option rather than the Voicemod microphone under the “Input” section
- Click “Device properties & test microphone”
- Make sure to uncheck the “disable” box and keep the volume section 100
- Click the “Start test” button and speak into the microphone
- After that, click “Stop test.” If the greatest value it shows is above “0”, then your microphone works correctly
Now, restart your Voicemod app to see if it’s working properly or not! If the issue still persists, jump to the next solution.
Method 3: Install Windows Updates
If you use Windows 10, it has two kinds of updates that offer performance boost and security patches. Sometimes, an update can fix a few driver and software conflicts automatically.
You can quickly solve the voice chat problem by simply updating the system settings. Here’s how to update your Windows 10:
- Open your windows setting by pressing the “Windows button” and the “I” key together.
- Click on “Update and Security”
- Click the “Check for Updates” button. If an update is found, it will install automatically on the system
Make sure to repeat this process until it says you’re up-to-date. Then, restart the PC. Check whether the Vociemod is properly working or not!
If not, try our next option!
Method 4:Re-Install Voice Changer Voicemod Drivers
In many instances, the issue signifies that you’re using outdated or faulty drivers. To troubleshoot this, simply re-install your Voicemod driver, and you’ll be good to go!
First, uninstall your Voicemod driver from the windows PC/Mac. Here’s how to do it:
- On the keyboard, press the “Windows button” as well as the “I” key to bring up the “Run box”
- Paste or type “devmgmt.msc” and click “OK.” This will open the “Device Manager”
- Click the “expand” option of “Audio Inputs & Outputs.”
- Click the “Microphone WMD” and choose the “Uninstall device” option
- A pop-up window will appear. Click the “Uninstall” button
- Restart the PC
Install the voice changer Voicemod again, whether automatically or manually, and see if it works!
Part 3: How To Change Voice For Discord On Mobile?
“Voicemod clips” is the version for both Apple and Android devices. The app will help you make high-quality content using its wide selection of one-of-a-kind effects, which will change your voice so much that you won’t recognize yourself!
In addition to that, you can add filters, which are connected to your cell phone’s camera to create funny, interesting videos.
Additionally, you’ll have the option to choose from 10 different voices. Plus, you can also make unlimited videos and audio from the humorous to the terrifying.
Some of the Voicemod voices on mobile include male-to-female, different robot effects, famous celebrities, scary voices, and much more. In short, everything is based on how you would like to modify your voice!
Not just that, you can also cross-share creative videos and audio to popular social networking platforms such as Facebook, Twitter, Instagram, TikTok, and Snapchat using your smartphone.
Curious to know how to change your voice for Discord on mobile? Here are step-by-step instructions:
- Make sure the Voicemod app is downloaded on your Apple or Android device and appropriately configured
- Open Discord
- Tap the “cogwheel icon” near your name and avatar
- You’ll see the “settings” page
- Within it, tap the “Voice & Video” option
- Tap Voicemod under the “Input Device” option and the headset under the “Output Device” option and tap escape. You’ll have access to numerous exciting sounds
Richard Bennett
Richard Bennett is a writer and a lover of all things video.
Follow @Richard Bennett
Mastering Video Sharing via Discord Channels
How to Send Videos on Discord
Richard Bennett
Mar 27, 2024• Proven solutions
The whole point of Discord is to bring together communities of like-minded people to talk, share ideas and have fun together. And this isn’t just limited to chatting but sometimes you’re going to want to share content, including videos.
So, whether it’s a compilation of your best gaming moments that you’ve carefully edited together, a home movie that you want to share with friends, or just a funny clip that someone’s sent you that you want to pass on, here we’ll take you through how to send videos on Discord both on PC and mobile, and the likely issues you might face.
- Part 1: How to Send Videos on Discord PC
- Part 2: How to Send Videos on Discord Mobile
- Part 3: How to Send Long Videos on Discord That Are More Than 8MB
- Part 4: FAQs About Uploading Videos to Discord
Part 1: How to Send Videos on Discord PC
It’s actually pretty simple to send videos on Discord when using a PC, providing they aren’t too large a file size.
Firstly, you just need to navigate to the channel or private message where you want to send the video. Just find the right option on the list of servers you’re a member of, or head to your message inbox to find the user you want to send it to privately.
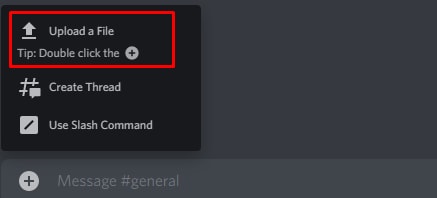
Once you’re in the right place, click on the plus (+) icon that you’ll find to the left of the chatbox at the bottom of the screen where you’d normally type your message.
You’ll then just need to find the file on your computer, and double click on it. It’ll then bring up a pop-up for the video where you can add a comment, which will sit above the video (ideal if you need to give context on why you’re sharing it). You can also mark it as a spoiler – useful if you’re sharing a gaming tip but you don’t want to spoil the story for anyone who’s not reached that point yet.
From there, it’s as simple as clicking the upload button. Once it’s ready, the video will be in the chat window for anyone in the server to watch, or for your friend if you’ve sent it privately. And if they want to download it, they’ll just need to click the download button (a downward-facing arrow) at the top right of the video.
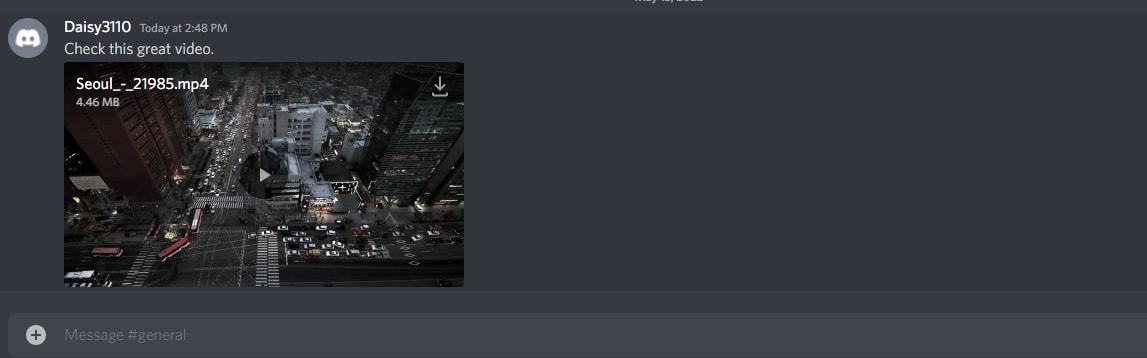
It’s worth noting that, while Discord will play most video formats, it can’t manage everything. If you upload a format that Discord isn’t compatible with, then it won’t show a video player – instead, the file will just be uploaded. Other people can still download it to watch on their own devices.
Also, there’s a strict file limit of 8MB. This isn’t huge at all – while there’s no definitive file size for video (as it depends on file type, resolution, compression, etc) it’s unlikely to be more than 60 seconds of footage, and could just be a few seconds. If the video you want to upload is more than 8MB, carry on reading below to find out how.
Part 2: How to Send Videos on Discord Mobile
The process to send video on Discord Mobile is pretty similar both with iOS and Android, but with just a few minor tweaks.
Firstly, you still need to navigate to either the server or inbox where you want to share the video. You can then click the ‘Photo Selector’ button directly to the left of the chatbox.
This will open your phone’s gallery, but it’ll only be searching for photos. You instead want the File Selector, which will be the third icon along – it looks like a text document with a folded-over corner.
Click this and it’ll give you the option to directly upload a video from your phone’s Downloads folder. To send a video that’s stored elsewhere, click on the Expand arrow at the top left of the menu. This will send you to your phone’s file navigation system where you can find the video you want.
Once you’ve selected the video, just hit the blue Send icon to send your video to the chat. Again you can add a message as a caption, but this time it’ll just be in the normal message box rather than a dedicated comment box before you hit upload.
Part 3: How to Send Long Videos on Discord That Are More Than 8MB
So as we’ve said above, there is a file size limit when you’re using a free Discord account of just 8MB, which isn’t much at all. There are a few ways around this, so take your pick from the one that sounds best for you.
1. Update to Discord Nitro to Upload 100MB
The first option is possibly the simplest but it’s definitely not the cheapest, and that’s to pay for an upgrade to Discord Nitro. The paid version of Discord has a number of benefits, one of which is the increased file upload size of 100MB. It costs $4.99 per month or $49.99 per year, so if you’re likely to be regularly uploading videos that are lower than this limit, it might make sense.
2. Cut Unwanted Clips/Compress Video with Filmora Video Editor
The second choice would be to take your video and cut it into pieces, sending them one at a time. This might sound time-consuming but with Filmora’s Instant Cutter Tool, it’s really simple.
All you need to do is open a video in Filmora by clicking the arrow next to Import and then choosing ‘Import with Instant Cutter Tool’.
This will open the Instant Cutter window where you can click Open File to add your video. From here you can trim your files and export them in multiple sections. There are different ways that you can do this, and while each is a simple process, there are still a few steps to follow.


For more detail, check out this post for a step-by-step guide on the different ways you can trim a video in Filmora.
You can also try to compress your video size, which may let you keep the whole video at the expense of some of the quality. Again, using Filmora, this is easy. But also again, there are different ways to go about it.
You could literally crop the video in order to trim some of the data, as the reduced viewing screen won’t be as big a file. You can also reduce the resolution, or convert your video to a format that uses fewer data. You’ll need to test it though, as converting to some video formats might result in blurry footage.
There are advanced settings you can tinker with too, such as lowering the frame rate or the bit rate. Again, rather than go through all of those options in an epic article here, it’s easier to head to a post dedicated to these steps about compress videos with Filmora .
3. Upload to YouTube/Vimeo/Google Drive/Dropbox
The final option is to upload your video to an online player or storage site, and link to it, rather than having Discord host the file. YouTube and Vimeo are the obvious options, but Streamable is another popular choice too with a free membership. YouTube’s maximum video uploads are 128GB, which is huge, while other sites like Streamable cap free accounts to 500MB per video.
So, if you want to upload massive files, you’ll need to decide whether to choose YouTube or pay for an upgraded membership elsewhere. Wherever you host your video, once it’s online just grab the link and paste it into Discord to share your content.
The only drawback to this option is that it stops other users from being able to download the video directly, and you may need to look at a file sharing alternative such as Dropbox if you want to send the actual file.
FAQs About Uploading Videos to Discord
Which Kind of Video Formats Can I Upload to Discord?
You can send any filetype to another user on Discord, so that they can download it and watch it on their own device. But if you want to upload a video so that Discord embeds it, and makes it playable within the chat, you’re limited to only mp4 and WebM filetypes.
You can also use MOV files, but not everyone will be able to play them, and FLAC files are supported on desktop only but not on mobile.
How Can I Upload Saved Videos to Discord?
If you find a video on Discord that you want to share on a different server or in a private DM, you can use the download icon to save it locally. Then, follow the steps above to upload the video to the server or DM chat window where you want to share it.
Richard Bennett
Richard Bennett is a writer and a lover of all things video.
Follow @Richard Bennett
Richard Bennett
Mar 27, 2024• Proven solutions
The whole point of Discord is to bring together communities of like-minded people to talk, share ideas and have fun together. And this isn’t just limited to chatting but sometimes you’re going to want to share content, including videos.
So, whether it’s a compilation of your best gaming moments that you’ve carefully edited together, a home movie that you want to share with friends, or just a funny clip that someone’s sent you that you want to pass on, here we’ll take you through how to send videos on Discord both on PC and mobile, and the likely issues you might face.
- Part 1: How to Send Videos on Discord PC
- Part 2: How to Send Videos on Discord Mobile
- Part 3: How to Send Long Videos on Discord That Are More Than 8MB
- Part 4: FAQs About Uploading Videos to Discord
Part 1: How to Send Videos on Discord PC
It’s actually pretty simple to send videos on Discord when using a PC, providing they aren’t too large a file size.
Firstly, you just need to navigate to the channel or private message where you want to send the video. Just find the right option on the list of servers you’re a member of, or head to your message inbox to find the user you want to send it to privately.
Once you’re in the right place, click on the plus (+) icon that you’ll find to the left of the chatbox at the bottom of the screen where you’d normally type your message.
You’ll then just need to find the file on your computer, and double click on it. It’ll then bring up a pop-up for the video where you can add a comment, which will sit above the video (ideal if you need to give context on why you’re sharing it). You can also mark it as a spoiler – useful if you’re sharing a gaming tip but you don’t want to spoil the story for anyone who’s not reached that point yet.
From there, it’s as simple as clicking the upload button. Once it’s ready, the video will be in the chat window for anyone in the server to watch, or for your friend if you’ve sent it privately. And if they want to download it, they’ll just need to click the download button (a downward-facing arrow) at the top right of the video.
It’s worth noting that, while Discord will play most video formats, it can’t manage everything. If you upload a format that Discord isn’t compatible with, then it won’t show a video player – instead, the file will just be uploaded. Other people can still download it to watch on their own devices.
Also, there’s a strict file limit of 8MB. This isn’t huge at all – while there’s no definitive file size for video (as it depends on file type, resolution, compression, etc) it’s unlikely to be more than 60 seconds of footage, and could just be a few seconds. If the video you want to upload is more than 8MB, carry on reading below to find out how.
Part 2: How to Send Videos on Discord Mobile
The process to send video on Discord Mobile is pretty similar both with iOS and Android, but with just a few minor tweaks.
Firstly, you still need to navigate to either the server or inbox where you want to share the video. You can then click the ‘Photo Selector’ button directly to the left of the chatbox.
This will open your phone’s gallery, but it’ll only be searching for photos. You instead want the File Selector, which will be the third icon along – it looks like a text document with a folded-over corner.
Click this and it’ll give you the option to directly upload a video from your phone’s Downloads folder. To send a video that’s stored elsewhere, click on the Expand arrow at the top left of the menu. This will send you to your phone’s file navigation system where you can find the video you want.
Once you’ve selected the video, just hit the blue Send icon to send your video to the chat. Again you can add a message as a caption, but this time it’ll just be in the normal message box rather than a dedicated comment box before you hit upload.
Part 3: How to Send Long Videos on Discord That Are More Than 8MB
So as we’ve said above, there is a file size limit when you’re using a free Discord account of just 8MB, which isn’t much at all. There are a few ways around this, so take your pick from the one that sounds best for you.
1. Update to Discord Nitro to Upload 100MB
The first option is possibly the simplest but it’s definitely not the cheapest, and that’s to pay for an upgrade to Discord Nitro. The paid version of Discord has a number of benefits, one of which is the increased file upload size of 100MB. It costs $4.99 per month or $49.99 per year, so if you’re likely to be regularly uploading videos that are lower than this limit, it might make sense.
2. Cut Unwanted Clips/Compress Video with Filmora Video Editor
The second choice would be to take your video and cut it into pieces, sending them one at a time. This might sound time-consuming but with Filmora’s Instant Cutter Tool, it’s really simple.
All you need to do is open a video in Filmora by clicking the arrow next to Import and then choosing ‘Import with Instant Cutter Tool’.
This will open the Instant Cutter window where you can click Open File to add your video. From here you can trim your files and export them in multiple sections. There are different ways that you can do this, and while each is a simple process, there are still a few steps to follow.
For more detail, check out this post for a step-by-step guide on the different ways you can trim a video in Filmora.
You can also try to compress your video size, which may let you keep the whole video at the expense of some of the quality. Again, using Filmora, this is easy. But also again, there are different ways to go about it.
You could literally crop the video in order to trim some of the data, as the reduced viewing screen won’t be as big a file. You can also reduce the resolution, or convert your video to a format that uses fewer data. You’ll need to test it though, as converting to some video formats might result in blurry footage.
There are advanced settings you can tinker with too, such as lowering the frame rate or the bit rate. Again, rather than go through all of those options in an epic article here, it’s easier to head to a post dedicated to these steps about compress videos with Filmora .
3. Upload to YouTube/Vimeo/Google Drive/Dropbox
The final option is to upload your video to an online player or storage site, and link to it, rather than having Discord host the file. YouTube and Vimeo are the obvious options, but Streamable is another popular choice too with a free membership. YouTube’s maximum video uploads are 128GB, which is huge, while other sites like Streamable cap free accounts to 500MB per video.
So, if you want to upload massive files, you’ll need to decide whether to choose YouTube or pay for an upgraded membership elsewhere. Wherever you host your video, once it’s online just grab the link and paste it into Discord to share your content.
The only drawback to this option is that it stops other users from being able to download the video directly, and you may need to look at a file sharing alternative such as Dropbox if you want to send the actual file.
FAQs About Uploading Videos to Discord
Which Kind of Video Formats Can I Upload to Discord?
You can send any filetype to another user on Discord, so that they can download it and watch it on their own device. But if you want to upload a video so that Discord embeds it, and makes it playable within the chat, you’re limited to only mp4 and WebM filetypes.
You can also use MOV files, but not everyone will be able to play them, and FLAC files are supported on desktop only but not on mobile.
How Can I Upload Saved Videos to Discord?
If you find a video on Discord that you want to share on a different server or in a private DM, you can use the download icon to save it locally. Then, follow the steps above to upload the video to the server or DM chat window where you want to share it.
Richard Bennett
Richard Bennett is a writer and a lover of all things video.
Follow @Richard Bennett
Also read:
- 2024 Approved Personalize Your Discord Presence Adding Custom Emojis Easily
- Leveraging Discord's Features for High-Quality Streaming
- [Updated] 2024 Approved Streamlining Discord's Message Management with Bulk Deletion
- Affordable Audio Capture Software The Best of Discord's Offers for 2024
- [New] Simplifying Video Distribution A Discord Insider's Approach for 2024
- [New] In 2024, Setting Up a Stream Discord Edition 101
- In 2024, Step-by-Step to Stunning Discord Profiles
- [Updated] 2024 Approved Unlocking the Power of Discord Spoiler Labels
- The Essential Guide Crafting a Standout Discord Profile with Custom Emojis
- Navigating the Nuances of Discord Identity Shifts for 2024
- From Novice to Noteworthy A Step-by-Step Guide for Verified Partnership
- [Updated] 2024 Approved The 5 Best Social Brands Dynamic Illustrations
- Crafting an Eye-Catching Discord Avatar Picture for 2024
- [Updated] In 2024, Leading Custom Font Apps - Perfect for Discord Chat Rooms
- [New] How To Get Discord Partner And Be Verified
- In 2024, Securely Connect A Step-by-Step Guide to Discord Calls
- 2024 Approved Building a Captivating Virtual Persona with Discord's Pfps
- [New] Mastering Discord Inserting Emojis Into Your Status Bar
- [New] 2024 Approved Elevate Online Engagement Unlocking the Potential of VoiceMod on Discord
- Discover BetterDiscord's Top 10 Trending Themes for 2024
- In 2024, Incorporating Leadership in Your Discord Network
- Tackling Tech Challenges Flawless Discord Screen Broadcasts
- 2024 Approved The Right Ways to Address Abuse Efficient Steps for Dispute Documentation on Discord
- Personalized Visuals A Complete User Imagery Guide on Discord
- Colorful Canvas The Ultimate 10 BestDiscord Theme Gallery for 2024
- [New] Achieving Perfection The Art of Live Broadcasting on Discord for 2024
- In 2024, Essential Knowledge on Discord Stickers
- [Updated] 2024 Approved Powerful Presentations Elevate Your Screen Share on Discord
- Unleashing Popularity The Best Discord Screen Names Ever for 2024
- Overview of the Best Vivo V29e Screen Mirroring App | Dr.fone
- [Updated] Mastering Stealth Watch Instagram Stories Without Profile Links [PC, Android, iOS]
- How Do You Unlock your Apple iPhone XS Max? Learn All 4 Methods | Dr.fone
- 5 Ways to Reset Xiaomi 14 Ultra Without Volume Buttons | Dr.fone
- [Updated] FB Moments Snappy Storytime
- How to Remove the Activation Lock On your iPad and iPhone 15 Pro Max without Apple Account
- Downloading SamFw FRP Tool 3.0 for Itel P55 5G
- [New] Pros & Cons of VSDC The Ultimate Guide
- 2024 Approved Have You Tried Using a Craig Bot on Discord to Record Audio? Do You Have an Idea of Using a Discord Craig Bot Is Safe? Get Answers to These Questions and More From This Article as You Continue Reading
- [New] The Comprehensible Guide to Leveraging Videos for Social Media Success
- In 2024, How To Do Honor X7b Screen Sharing | Dr.fone
- Restore Missing App Icon on Honor X7b Step-by-Step Solutions | Dr.fone
- 3uTools Virtual Location Not Working On Realme 12 Pro+ 5G? Fix Now | Dr.fone
- From Concept to Reality The 10 Best Music Video Agencies for 2024
- Detailed guide of ispoofer for pogo installation On Nokia C12 Plus | Dr.fone
- New In 2024, Top 7 Online Audio Cutters for Efficient and Hassle-Free File Management
- Why does the pokemon go battle league not available On Vivo X Flip | Dr.fone
- [New] In 2024, Bridging FB Videos to Home Screens A Prospect
- [New] In 2024, Breaking Boundaries on Twittersphere New Hits
- Title: "In 2024, Clearer, Louder, Better Your Discord Audio Revamped by VoiceMod"
- Author: Timothy
- Created at : 2024-05-23 22:47:35
- Updated at : 2024-05-24 22:47:35
- Link: https://discord-videos.techidaily.com/in-2024-clearer-louder-better-your-discord-audio-revamped-by-voicemod/
- License: This work is licensed under CC BY-NC-SA 4.0.
