
:max_bytes(150000):strip_icc()/GettyImages-163487467-d8687e19afcd430eaaabf62c550177a6.jpg)
In 2024, Taking Audio to the Next Level on Desktop & Mobile Discord with VoiceMod
Taking Audio to the Next Level on Desktop & Mobile Discord with VoiceMod
How To Use Voicemod On Discord

Richard Bennett
Mar 27, 2024• Proven solutions
A voice changer will allow you to prank friends, create content, and most of all, secure your presence by maintaining anonymity. With it, you can turn your voice into several unique and exciting voices to serve any purpose you deem fit.
And when it comes to voice changers, none is as easy to operate as the Voicemod in Discord. Its claim to fame is that it features numerous voice options to choose from.
With Vociemod, you have to simply run the program in the background and select your desired voice!
Read on as we discuss how to use Voicemod on Discord in detail:
In this article
Part 1: How To Use Voice Changer Voicemod For Discord On Desktop Computer
Part 2: How To Fix Voicemod Not Working Discord?
Part 3: How To Change Voice For Discord On Mobile?
Part 1: How To Use Voice Changer Voicemod For Discord On Desktop Computer
Voicemod is arguably one of the best voice changer tools available on the internet for its excellent features.
But before we jump straight into using Voicemod for Discord, you must know how to install one on your desktop Mac/PC.
Here’s how to install Voicemod
- Visit the Voicemod website to begin the download process.
- You’ll see the button “Get Voicemod Free” on the screen. Click it!
- Upon clicking, the site will ask you to sign in to your account from Discord, Twitch, to Google. Use your Discord login details to sign in.
- After you’re signed in, the “.exe” file will be downloaded to your PC/Mac’s download folder. Open the “.exe” file the moment it’s downloaded.
- An install wizard will open up. Navigate through the wizard’s installation process to install the program on your PC/Mac.
- After installation is complete, the installation wizard will ask to restart your windows’ Mac or PC.
You can skip it, but it’s best to restart it for smooth operations.
Once your Mac/PC restarts, you’ll see the Voicemod app icon on your desktop screen.
Now that you have successfully installed the voice changer Voicemod app into your desktop computer, let’s dive into knowing how to use Voicemod on Discord!
Here’s how to use voice changer on Discord
- Click the Vociemod icon on the desktop to open the app. If you can’t find it there, click the “windows icon” located at the screen’s bottom-left. Just type “Voicemod,” and the program will show up. Double click it to get it opened.
- When the app opens up, you’ll have to choose the output and input it will use. If you’re wondering, why the output? This is to give you an insight into what your voice will sound like on each filter.
Once it’s done, you can play around with different filters!
Every day, you’ll get new free filters to use; however, to unlock and access all filters, you need to upgrade to the “pro-version” of voice changer Voicemod.
On the other hand, if you only need a few filters, the “basic-version” should suffice.
Apart from that, you can unlock an additional free filter in your app by sharing it on your social media accounts.

Step 1
To set up Voicemod with Discord, open your discord account and go to the settings (gear icon) placed at the screen’s bottom-left corner.
Step 2
Click the “Voice and Video” option right under the app settings.
Step 3
To make Voicemod usable, you’ll have to change Voice settings. Within the “Input Device” option, select the option that says “Microphone Voicemod Virtual Audio.”
Step 4
After you have changed settings, you can easily change the voice within the program. Not only this, but other users can also hear your audio alteration.
Step 5
With the “basic version,” you’ll have seven free voice choices that will change each day. On the contrary, with the “pro-version,” you’ll gain access to more than 80 different voice options.
So, if you’re searching for an easy and simple voice-changing app to use, look no further than Voicemod!
Part 2: How To Fix Voicemod Not Working Discord?
Is your voice changer Voicemod not working on Discord? No worries, you can troubleshoot the issues with a few basic steps.
Here are some ways you can use to fix Voicemod not working in Discord:
Method 1: Restart Your Windows PC/Mac
Though it’s not a technical solution, restarting your desktop computer fixes incorrect settings by rebooting them and solves many problems connected with your computer system, programs, and hardware.
So, when your Voicemod suddenly ceases to work in Discord, make sure to restart your Windows PC/Mac before going any further, as it’s the first step in fixing voice issues.
If restarting doesn’t help, slide to the next step!
Method 2: Make Sure The Mic Is Properly Set
The next step is to check if the mic works correctly. This is because faulty settings may stop voice changer Voicemod from operating correctly.
Just follow the steps below to resolve it:
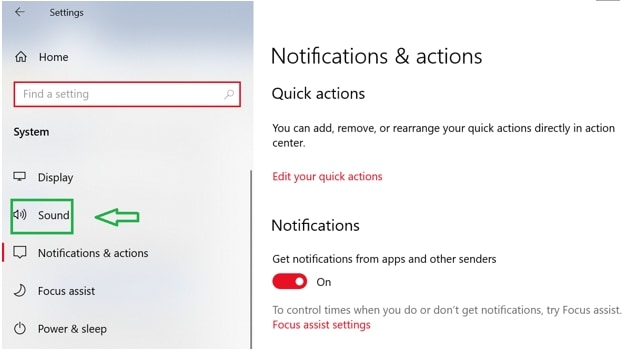
- On the keyboard, press the “Win” logo and the “I” key simultaneously to open Windows settings. Click “System.”
- On the left, you’ll see the option “Sound.” Click it.
- First, you have to test the microphone! To do so, choose the “Headset” option rather than the Voicemod microphone under the “Input” section
- Click “Device properties & test microphone”
- Make sure to uncheck the “disable” box and keep the volume section 100
- Click the “Start test” button and speak into the microphone
- After that, click “Stop test.” If the greatest value it shows is above “0”, then your microphone works correctly
Now, restart your Voicemod app to see if it’s working properly or not! If the issue still persists, jump to the next solution.
Method 3: Install Windows Updates
If you use Windows 10, it has two kinds of updates that offer performance boost and security patches. Sometimes, an update can fix a few driver and software conflicts automatically.
You can quickly solve the voice chat problem by simply updating the system settings. Here’s how to update your Windows 10:
- Open your windows setting by pressing the “Windows button” and the “I” key together.
- Click on “Update and Security”
- Click the “Check for Updates” button. If an update is found, it will install automatically on the system
Make sure to repeat this process until it says you’re up-to-date. Then, restart the PC. Check whether the Vociemod is properly working or not!
If not, try our next option!
Method 4:Re-Install Voice Changer Voicemod Drivers
In many instances, the issue signifies that you’re using outdated or faulty drivers. To troubleshoot this, simply re-install your Voicemod driver, and you’ll be good to go!
First, uninstall your Voicemod driver from the windows PC/Mac. Here’s how to do it:
- On the keyboard, press the “Windows button” as well as the “I” key to bring up the “Run box”
- Paste or type “devmgmt.msc” and click “OK.” This will open the “Device Manager”
- Click the “expand” option of “Audio Inputs & Outputs.”
- Click the “Microphone WMD” and choose the “Uninstall device” option
- A pop-up window will appear. Click the “Uninstall” button
- Restart the PC
Install the voice changer Voicemod again, whether automatically or manually, and see if it works!
Part 3: How To Change Voice For Discord On Mobile?
“Voicemod clips” is the version for both Apple and Android devices. The app will help you make high-quality content using its wide selection of one-of-a-kind effects, which will change your voice so much that you won’t recognize yourself!
In addition to that, you can add filters, which are connected to your cell phone’s camera to create funny, interesting videos.
Additionally, you’ll have the option to choose from 10 different voices. Plus, you can also make unlimited videos and audio from the humorous to the terrifying.
Some of the Voicemod voices on mobile include male-to-female, different robot effects, famous celebrities, scary voices, and much more. In short, everything is based on how you would like to modify your voice!
Not just that, you can also cross-share creative videos and audio to popular social networking platforms such as Facebook, Twitter, Instagram, TikTok, and Snapchat using your smartphone.
Curious to know how to change your voice for Discord on mobile? Here are step-by-step instructions:
- Make sure the Voicemod app is downloaded on your Apple or Android device and appropriately configured
- Open Discord
- Tap the “cogwheel icon” near your name and avatar
- You’ll see the “settings” page
- Within it, tap the “Voice & Video” option
- Tap Voicemod under the “Input Device” option and the headset under the “Output Device” option and tap escape. You’ll have access to numerous exciting sounds
Richard Bennett
Richard Bennett is a writer and a lover of all things video.
Follow @Richard Bennett
Richard Bennett
Mar 27, 2024• Proven solutions
A voice changer will allow you to prank friends, create content, and most of all, secure your presence by maintaining anonymity. With it, you can turn your voice into several unique and exciting voices to serve any purpose you deem fit.
And when it comes to voice changers, none is as easy to operate as the Voicemod in Discord. Its claim to fame is that it features numerous voice options to choose from.
With Vociemod, you have to simply run the program in the background and select your desired voice!
Read on as we discuss how to use Voicemod on Discord in detail:
In this article
Part 1: How To Use Voice Changer Voicemod For Discord On Desktop Computer
Part 2: How To Fix Voicemod Not Working Discord?
Part 3: How To Change Voice For Discord On Mobile?
Part 1: How To Use Voice Changer Voicemod For Discord On Desktop Computer
Voicemod is arguably one of the best voice changer tools available on the internet for its excellent features.
But before we jump straight into using Voicemod for Discord, you must know how to install one on your desktop Mac/PC.
Here’s how to install Voicemod
- Visit the Voicemod website to begin the download process.
- You’ll see the button “Get Voicemod Free” on the screen. Click it!
- Upon clicking, the site will ask you to sign in to your account from Discord, Twitch, to Google. Use your Discord login details to sign in.
- After you’re signed in, the “.exe” file will be downloaded to your PC/Mac’s download folder. Open the “.exe” file the moment it’s downloaded.
- An install wizard will open up. Navigate through the wizard’s installation process to install the program on your PC/Mac.
- After installation is complete, the installation wizard will ask to restart your windows’ Mac or PC.
You can skip it, but it’s best to restart it for smooth operations.
Once your Mac/PC restarts, you’ll see the Voicemod app icon on your desktop screen.
Now that you have successfully installed the voice changer Voicemod app into your desktop computer, let’s dive into knowing how to use Voicemod on Discord!
Here’s how to use voice changer on Discord
- Click the Vociemod icon on the desktop to open the app. If you can’t find it there, click the “windows icon” located at the screen’s bottom-left. Just type “Voicemod,” and the program will show up. Double click it to get it opened.
- When the app opens up, you’ll have to choose the output and input it will use. If you’re wondering, why the output? This is to give you an insight into what your voice will sound like on each filter.
Once it’s done, you can play around with different filters!
Every day, you’ll get new free filters to use; however, to unlock and access all filters, you need to upgrade to the “pro-version” of voice changer Voicemod.
On the other hand, if you only need a few filters, the “basic-version” should suffice.
Apart from that, you can unlock an additional free filter in your app by sharing it on your social media accounts.
Step 1
To set up Voicemod with Discord, open your discord account and go to the settings (gear icon) placed at the screen’s bottom-left corner.
Step 2
Click the “Voice and Video” option right under the app settings.
Step 3
To make Voicemod usable, you’ll have to change Voice settings. Within the “Input Device” option, select the option that says “Microphone Voicemod Virtual Audio.”
Step 4
After you have changed settings, you can easily change the voice within the program. Not only this, but other users can also hear your audio alteration.
Step 5
With the “basic version,” you’ll have seven free voice choices that will change each day. On the contrary, with the “pro-version,” you’ll gain access to more than 80 different voice options.
So, if you’re searching for an easy and simple voice-changing app to use, look no further than Voicemod!
Part 2: How To Fix Voicemod Not Working Discord?
Is your voice changer Voicemod not working on Discord? No worries, you can troubleshoot the issues with a few basic steps.
Here are some ways you can use to fix Voicemod not working in Discord:
Method 1: Restart Your Windows PC/Mac
Though it’s not a technical solution, restarting your desktop computer fixes incorrect settings by rebooting them and solves many problems connected with your computer system, programs, and hardware.
So, when your Voicemod suddenly ceases to work in Discord, make sure to restart your Windows PC/Mac before going any further, as it’s the first step in fixing voice issues.
If restarting doesn’t help, slide to the next step!
Method 2: Make Sure The Mic Is Properly Set
The next step is to check if the mic works correctly. This is because faulty settings may stop voice changer Voicemod from operating correctly.
Just follow the steps below to resolve it:
- On the keyboard, press the “Win” logo and the “I” key simultaneously to open Windows settings. Click “System.”
- On the left, you’ll see the option “Sound.” Click it.
- First, you have to test the microphone! To do so, choose the “Headset” option rather than the Voicemod microphone under the “Input” section
- Click “Device properties & test microphone”
- Make sure to uncheck the “disable” box and keep the volume section 100
- Click the “Start test” button and speak into the microphone
- After that, click “Stop test.” If the greatest value it shows is above “0”, then your microphone works correctly
Now, restart your Voicemod app to see if it’s working properly or not! If the issue still persists, jump to the next solution.
Method 3: Install Windows Updates
If you use Windows 10, it has two kinds of updates that offer performance boost and security patches. Sometimes, an update can fix a few driver and software conflicts automatically.
You can quickly solve the voice chat problem by simply updating the system settings. Here’s how to update your Windows 10:
- Open your windows setting by pressing the “Windows button” and the “I” key together.
- Click on “Update and Security”
- Click the “Check for Updates” button. If an update is found, it will install automatically on the system
Make sure to repeat this process until it says you’re up-to-date. Then, restart the PC. Check whether the Vociemod is properly working or not!
If not, try our next option!
Method 4:Re-Install Voice Changer Voicemod Drivers
In many instances, the issue signifies that you’re using outdated or faulty drivers. To troubleshoot this, simply re-install your Voicemod driver, and you’ll be good to go!
First, uninstall your Voicemod driver from the windows PC/Mac. Here’s how to do it:
- On the keyboard, press the “Windows button” as well as the “I” key to bring up the “Run box”
- Paste or type “devmgmt.msc” and click “OK.” This will open the “Device Manager”
- Click the “expand” option of “Audio Inputs & Outputs.”
- Click the “Microphone WMD” and choose the “Uninstall device” option
- A pop-up window will appear. Click the “Uninstall” button
- Restart the PC
Install the voice changer Voicemod again, whether automatically or manually, and see if it works!
Part 3: How To Change Voice For Discord On Mobile?
“Voicemod clips” is the version for both Apple and Android devices. The app will help you make high-quality content using its wide selection of one-of-a-kind effects, which will change your voice so much that you won’t recognize yourself!
In addition to that, you can add filters, which are connected to your cell phone’s camera to create funny, interesting videos.
Additionally, you’ll have the option to choose from 10 different voices. Plus, you can also make unlimited videos and audio from the humorous to the terrifying.
Some of the Voicemod voices on mobile include male-to-female, different robot effects, famous celebrities, scary voices, and much more. In short, everything is based on how you would like to modify your voice!
Not just that, you can also cross-share creative videos and audio to popular social networking platforms such as Facebook, Twitter, Instagram, TikTok, and Snapchat using your smartphone.
Curious to know how to change your voice for Discord on mobile? Here are step-by-step instructions:
- Make sure the Voicemod app is downloaded on your Apple or Android device and appropriately configured
- Open Discord
- Tap the “cogwheel icon” near your name and avatar
- You’ll see the “settings” page
- Within it, tap the “Voice & Video” option
- Tap Voicemod under the “Input Device” option and the headset under the “Output Device” option and tap escape. You’ll have access to numerous exciting sounds
Richard Bennett
Richard Bennett is a writer and a lover of all things video.
Follow @Richard Bennett
Advanced Control: Enhancing Your Live Broadcast Experience
How to Stream on Discord
Richard Bennett
Mar 27, 2024• Proven solutions
Discord has completely transformed online communication, becoming the preferred platform for gamers, streamers, and reviewers alike.
As of late, it has started integrating with other gaming and streaming services, giving us the streamer mode. With streaming’s growing popularity, it’s essential to know what the streamer mode is all about.
If you’re a gamer, Discord’s streamer mode allows you to stream your gaming session to viewers by broadcasting your game to your friends, fans, and even a closed community of enthusiasts.
Many e-gaming professionals have taken up streaming, offering original and valuable content for like-minded individuals. This mode helps them streamline all their communications in one place.
If you’re new to Discord’s streamer mode, you need to know what it is, how you can use it to engage with other community members, and the primary security concerns you need to be aware of.
- Part 1: How to Stream on Discord from Desktop Computers?
- Part 2: How to Stream on Discord from Chromebook?
- Part 3: How to Stream on Discord from iPhone And Android?
- Part 4: How to Watch Discord Streaming?
- Part 5: Discord Streaming Tips
We have compiled a list of steps to help you learn how to conduct Discord streaming from the most prominent platforms: Windows, Mac, Chromebook, iPhone, Android.
Part 1: How to Stream on Discord from Desktop Computers
How to Stream on Discord from Windows
Discord allows for streaming through its Windows desktop client. You can stream games, podcasts, and any other kind of content through it.
However, it is crucial to remember that you can only stream in 480p and 720p resolutions in the free version. If you want higher resolution streaming, subscribe to Discord Nitro, which costs $9.99 a month.
With that said, follow these steps to start Discord streaming:
- Start the game that you want to stream and then switch back to Discord
- You will find an icon at the bottom left of the window displaying the name of the game you started and a stream icon resembling a camera next to it. Click on this icon to begin streaming
- The Screen Share menu will pop-up displaying the game you have started, and from the ‘Select a voice channel’ drop-down, select the channel you want to stream with
- Adjust your screen resolution and frame rates according to your choice
- After you’ve made all the adjustments, you can hit the ‘Go Live’ button at the bottom right of the window to start streaming.
If you wish to stop streaming, click on the ‘Stop Streaming’ icon at the app’s bottom-left corner
Additionally, if you wish to stream voice and video calls on your Discord server, you can do so as well. To make a call to your friends through Discord:
- Open the Discord app on your Windows PC and then select the server you want to use
- Click the General Voice channel to place a voice connection with Discord
- On the bottom left of the window, you will see a Voice Connected entry. If you wish to video call, click on the ‘Video’ button; otherwise, click on the ‘Screen’ button for screen sharing
- When you click ‘Video,’ your screen’s center will switch to conversation mode, and you will be able to see your camera feed
- If you click on the screen, a pop-up window shows up, allowing you to select the application you want to share
- After setting this up, your friends can join your call by clicking on the General channel
When you want to end the call, click on the red Disconnect icon
How to Stream on Discord from Mac
To achieve the same result with Discord on a Mac:
- Open the Discord app on your Macintosh and then find and join a voice channel that allows you to stream (you can find out which channels will let you stream by joining the channel and checking if you can click on ‘Video’ or ‘Screen’ at the bottom of the window)
- Once you’ve made sure that the channel allows you to stream, you can choose whether you want to stream from your webcam or share your computer screen. Click on the option you want
- If you’ve selected the ‘Video’ option, this will turn on your webcam after a prompt, and it will start streaming immediately
- If you’ve selected the screen-sharing option, choose the window you’d like to share, and it will start broadcasting the specific window
- You can either share your entire screen or specific windows, depending on your choice
- Choose a resolution and frame rate for the stream, but remember that higher resolutions and frame rates take up more bandwidth
- If you’re streaming from your desktop, you can even stream in sound. Toggle the sound button to the right, and you will be able to access your microphone for the stream
- When you’ve decided all the parameters and feel you’re ready to stream, click on ‘Go Live’
Part 2: How to Stream on Discord from Chromebook
Chromebooks have a customized Android operating software that can fit the laptop, functioning seamlessly with its requirements.
However, because Chromebooks use a restrictive OS, the Discord app functions like it would on a smartphone or tablet.
Therefore, for Discord streaming on a Chromebook, you will have to:
- Select a voice channel and then join it
- Press the Video camera icon to share your screen
- Allow the program camera access
- Begin streaming
However, it is slightly challenging to join voice channels using the app. To do this, you will have to:
- Locate the voice channel and click on it
- Upon clicking, you will see a window appear at the bottom
- Scroll to the bottom of the menu, and click on the ‘Join Channel’ button
- To join with the camera, click on the camcorder icon
Part 3: How to Stream on Discord from iPhone And Android
Although Discord does not allow users to broadcast content from the Discord Mobile app, they can still share their screen to stream games and videos. To do so, they must:
- Select a voice channel and join it
- Press the Video camera icon for screen-sharing
- Then allow permission to third-party apps on the mobile to access your camera
- Press the Camera icon to allow the program access to your camera
- Once this is done, you are now streaming live
It is important to note that while sharing your screen on Discord, make sure you are not divulging any crucial details with other users in the form of notifications.
To avoid incoming notifications, put your mobile on airplane mode.
Part 4: How to Watch Discord Streaming
Aside from broadcasting streams, you can also watch other users streaming their content on Discord. To watch someone’s stream, you will need to:
- Go to the voice channel where someone is streaming and click on their name
- If you’ve decided you want to join their stream, click on ‘Join Stream’
- You can also click on ‘Watch Stream’ from the main chat screen on your Discord
When someone is streaming content on Discord, you can see a red ‘Live’ icon next to their name. Knowing this will make it easier to tell when your favorite users are streaming.
Part 5: Discord Streaming Tips
To help you get the max out of your Discord streaming experience, we’ve compiled a couple of tips:
Tip 1: How to Stream Without Lag On Discord
Do you experience lag while streaming games and videos on your Discord server? Don’t worry; streaming is often demanding for casual internet connections, and lags can happen!
Here are some quick fixes to get rid of it:
Close Unnecessary Programs
If you’re running multiple programs on your computer while using Discord, they can cause lag. To solve this, close all unnecessary programs.
Turn Off Hardware Acceleration
To do this:
- Go to the ‘Settings’ option in your Discord app,
- Click on ‘Appearance’ and toggle off the ‘Hardware Acceleration’ option
- Press ‘OK’ to confirm and restart the application
Clear Discord Cache Files
Too many accumulated caches files can cause lag in your Discord. To fix this, you will need to clear the Discord cache from the File Explorer:
- Open the ‘Run’ window
- Enter ‘%APPDATA%/Discord/Cache’ to open the cache folder
- Press ‘Ctrl+A’ to delete the files
Reset Discord Voice Settings
To do this:
- Go to the ‘Settings’ option on your Discord app
- Select the ‘Voice & Video’ option in the left pane
- Click on the ‘Reset Voice Settings’ in the right pane
- Press OK to confirm and restart the application
Reinstall Discord
If none of the above methods seem to fix lag, you might have to reinstall your Discord. To uninstall it: first
- Go to the Discord Panel,
- Select ‘View by: Category’
- Click ‘Uninstall a program’
- Right-click Discord
- Click Uninstall
- After it is uninstalled, reinstall it once again
Tip 2: How to Add A Game to Discord Go Live
If you can’t get access to the game you want to stream through the ‘Go Live’ icon, you can access it manually. All you have to do is:
- Click on the cog icon in the bottom left
- Open the Settings menu
- Click on the ‘Game Activity’ tab on the left
- Click ‘Add It’
- Choose your game
- Go back to your server
- Click the ‘Go Live’ button
Richard Bennett
Richard Bennett is a writer and a lover of all things video.
Follow @Richard Bennett
Richard Bennett
Mar 27, 2024• Proven solutions
Discord has completely transformed online communication, becoming the preferred platform for gamers, streamers, and reviewers alike.
As of late, it has started integrating with other gaming and streaming services, giving us the streamer mode. With streaming’s growing popularity, it’s essential to know what the streamer mode is all about.
If you’re a gamer, Discord’s streamer mode allows you to stream your gaming session to viewers by broadcasting your game to your friends, fans, and even a closed community of enthusiasts.
Many e-gaming professionals have taken up streaming, offering original and valuable content for like-minded individuals. This mode helps them streamline all their communications in one place.
If you’re new to Discord’s streamer mode, you need to know what it is, how you can use it to engage with other community members, and the primary security concerns you need to be aware of.
- Part 1: How to Stream on Discord from Desktop Computers?
- Part 2: How to Stream on Discord from Chromebook?
- Part 3: How to Stream on Discord from iPhone And Android?
- Part 4: How to Watch Discord Streaming?
- Part 5: Discord Streaming Tips
We have compiled a list of steps to help you learn how to conduct Discord streaming from the most prominent platforms: Windows, Mac, Chromebook, iPhone, Android.
Part 1: How to Stream on Discord from Desktop Computers
How to Stream on Discord from Windows
Discord allows for streaming through its Windows desktop client. You can stream games, podcasts, and any other kind of content through it.
However, it is crucial to remember that you can only stream in 480p and 720p resolutions in the free version. If you want higher resolution streaming, subscribe to Discord Nitro, which costs $9.99 a month.
With that said, follow these steps to start Discord streaming:
- Start the game that you want to stream and then switch back to Discord
- You will find an icon at the bottom left of the window displaying the name of the game you started and a stream icon resembling a camera next to it. Click on this icon to begin streaming
- The Screen Share menu will pop-up displaying the game you have started, and from the ‘Select a voice channel’ drop-down, select the channel you want to stream with
- Adjust your screen resolution and frame rates according to your choice
- After you’ve made all the adjustments, you can hit the ‘Go Live’ button at the bottom right of the window to start streaming.
If you wish to stop streaming, click on the ‘Stop Streaming’ icon at the app’s bottom-left corner
Additionally, if you wish to stream voice and video calls on your Discord server, you can do so as well. To make a call to your friends through Discord:
- Open the Discord app on your Windows PC and then select the server you want to use
- Click the General Voice channel to place a voice connection with Discord
- On the bottom left of the window, you will see a Voice Connected entry. If you wish to video call, click on the ‘Video’ button; otherwise, click on the ‘Screen’ button for screen sharing
- When you click ‘Video,’ your screen’s center will switch to conversation mode, and you will be able to see your camera feed
- If you click on the screen, a pop-up window shows up, allowing you to select the application you want to share
- After setting this up, your friends can join your call by clicking on the General channel
When you want to end the call, click on the red Disconnect icon
How to Stream on Discord from Mac
To achieve the same result with Discord on a Mac:
- Open the Discord app on your Macintosh and then find and join a voice channel that allows you to stream (you can find out which channels will let you stream by joining the channel and checking if you can click on ‘Video’ or ‘Screen’ at the bottom of the window)
- Once you’ve made sure that the channel allows you to stream, you can choose whether you want to stream from your webcam or share your computer screen. Click on the option you want
- If you’ve selected the ‘Video’ option, this will turn on your webcam after a prompt, and it will start streaming immediately
- If you’ve selected the screen-sharing option, choose the window you’d like to share, and it will start broadcasting the specific window
- You can either share your entire screen or specific windows, depending on your choice
- Choose a resolution and frame rate for the stream, but remember that higher resolutions and frame rates take up more bandwidth
- If you’re streaming from your desktop, you can even stream in sound. Toggle the sound button to the right, and you will be able to access your microphone for the stream
- When you’ve decided all the parameters and feel you’re ready to stream, click on ‘Go Live’
Part 2: How to Stream on Discord from Chromebook
Chromebooks have a customized Android operating software that can fit the laptop, functioning seamlessly with its requirements.
However, because Chromebooks use a restrictive OS, the Discord app functions like it would on a smartphone or tablet.
Therefore, for Discord streaming on a Chromebook, you will have to:
- Select a voice channel and then join it
- Press the Video camera icon to share your screen
- Allow the program camera access
- Begin streaming
However, it is slightly challenging to join voice channels using the app. To do this, you will have to:
- Locate the voice channel and click on it
- Upon clicking, you will see a window appear at the bottom
- Scroll to the bottom of the menu, and click on the ‘Join Channel’ button
- To join with the camera, click on the camcorder icon
Part 3: How to Stream on Discord from iPhone And Android
Although Discord does not allow users to broadcast content from the Discord Mobile app, they can still share their screen to stream games and videos. To do so, they must:
- Select a voice channel and join it
- Press the Video camera icon for screen-sharing
- Then allow permission to third-party apps on the mobile to access your camera
- Press the Camera icon to allow the program access to your camera
- Once this is done, you are now streaming live
It is important to note that while sharing your screen on Discord, make sure you are not divulging any crucial details with other users in the form of notifications.
To avoid incoming notifications, put your mobile on airplane mode.
Part 4: How to Watch Discord Streaming
Aside from broadcasting streams, you can also watch other users streaming their content on Discord. To watch someone’s stream, you will need to:
- Go to the voice channel where someone is streaming and click on their name
- If you’ve decided you want to join their stream, click on ‘Join Stream’
- You can also click on ‘Watch Stream’ from the main chat screen on your Discord
When someone is streaming content on Discord, you can see a red ‘Live’ icon next to their name. Knowing this will make it easier to tell when your favorite users are streaming.
Part 5: Discord Streaming Tips
To help you get the max out of your Discord streaming experience, we’ve compiled a couple of tips:
Tip 1: How to Stream Without Lag On Discord
Do you experience lag while streaming games and videos on your Discord server? Don’t worry; streaming is often demanding for casual internet connections, and lags can happen!
Here are some quick fixes to get rid of it:
Close Unnecessary Programs
If you’re running multiple programs on your computer while using Discord, they can cause lag. To solve this, close all unnecessary programs.
Turn Off Hardware Acceleration
To do this:
- Go to the ‘Settings’ option in your Discord app,
- Click on ‘Appearance’ and toggle off the ‘Hardware Acceleration’ option
- Press ‘OK’ to confirm and restart the application
Clear Discord Cache Files
Too many accumulated caches files can cause lag in your Discord. To fix this, you will need to clear the Discord cache from the File Explorer:
- Open the ‘Run’ window
- Enter ‘%APPDATA%/Discord/Cache’ to open the cache folder
- Press ‘Ctrl+A’ to delete the files
Reset Discord Voice Settings
To do this:
- Go to the ‘Settings’ option on your Discord app
- Select the ‘Voice & Video’ option in the left pane
- Click on the ‘Reset Voice Settings’ in the right pane
- Press OK to confirm and restart the application
Reinstall Discord
If none of the above methods seem to fix lag, you might have to reinstall your Discord. To uninstall it: first
- Go to the Discord Panel,
- Select ‘View by: Category’
- Click ‘Uninstall a program’
- Right-click Discord
- Click Uninstall
- After it is uninstalled, reinstall it once again
Tip 2: How to Add A Game to Discord Go Live
If you can’t get access to the game you want to stream through the ‘Go Live’ icon, you can access it manually. All you have to do is:
- Click on the cog icon in the bottom left
- Open the Settings menu
- Click on the ‘Game Activity’ tab on the left
- Click ‘Add It’
- Choose your game
- Go back to your server
- Click the ‘Go Live’ button
Richard Bennett
Richard Bennett is a writer and a lover of all things video.
Follow @Richard Bennett
Also read:
- [Updated] Inside Secrets Everything About Discord Stickers
- [Updated] In 2024, Top Choices in Custom Discord Fonts - Mobile Devices
- [New] 2024 Approved How to Get Free Animated Emojis on Discord [With/Without Nitro]
- [Updated] 2024 Approved Tackling Toxicity Head-On The Definitive Guide to Reporting Users on Discord
- 2024 Approved Simplifying Server Removal for Desktop/Mobile Use
- How to Spice Up Your Discord Conversations with Interactive Content Like GIFs
- [Updated] 2024 Approved How to Speak Clearly on Discord via TTS
- [Updated] Unbeatable Deal Get Top-Quality Discord Icons FREE
- Discovery of All Discord Sticker Essentials for 2024
- Leading the Way with the Best Applications for Crafting Discord Emojis for 2024
- [Updated] Disengage From Discord Services for 2024
- Revealing the Masters Behind Discord's Most Beloved Glyphs for 2024
- The Ultimate Tutorial for Adding Discord Server Roles
- [New] In 2024, Unbeatable Deal Get Top-Quality Discord Icons FREE
- [New] 2024 Approved Crafting Memorable Pfps in Discord with Ease and Style
- [New] In 2024, Finding Fellowship Adding Friends in Discord
- [Updated] Unparalleled Screenshot Solutions for Discord Users
- Tailoring Your Text The Discord Formatting Handbook
- [Updated] 2024 Approved Harmonious Integration Spotify Meets Discord
- [Updated] 2024 Approved Unveiling the Best Top 10 for Dating in Discord
- [New] DiscoEmote Studio - Crafting the Ultimate Emojis
- The Ultimate Path to Charming Your Digital Self-Portrait for 2024
- In 2024, Audiophile's Guide to Text-to-Speech on Discord
- [Updated] In 2024, Discord's Best Servers for Finding a Mate
- In 2024, Seamless Social Setup From Desktops to Phones
- [Updated] In 2024, Hot 30 Discord Handles That Turn Heads Fast
- [New] 2024 Approved 30 Dynamic Discord Tags to Make You Stand Out Now
- [New] 2024 Approved Transform Your Discord Sessions Best 10 Enhancing Tools
- [Updated] In 2024, The Ultimate Path to Charming Your Digital Self-Portrait
- 2024 Approved Pioneering Role Additions on Your Discord Server
- Inside Top 15 Emotes A Look at the Masters of Creation for 2024
- How To Create Stunning Pfp in Discord
- [New] 2024 Approved Key Strategies for Efficient Screenshare Experience with Discord
- 2024 Approved Inside DiscoNitro Understanding and Obtaining Entry Passes
- 2024 Approved Achieve Clear Communication in Discord Using VoiceMod Techniques
- In 2024, Techniques for Swiftly Removing Multiple Messages in Discord
- [New] 2024 Approved Embellish Your Discord Conversations Like a Pro
- [Updated] Standout 5 Dynamic Social Platform Logo Movements for 2024
- In 2024, A Step-by-Step Guide to Designing Memorable Discord Avatars
- [Updated] Navigating the In-App Interface for Smooth Streaming for 2024
- Disengage From Discord Services for 2024
- [Updated] Sweep Your Server Bulk Delete Feature for Discord Users
- Unleash Your Creativity Designing Intriguing Pfp in Discord
- [New] 2024 Approved Techniques for Efficient DiscoScreen Sharing
- [New] Mastering the Certification Journey Becoming a Verified Disco Member
- [New] Navigating Discord's Streaming Features (Desktop/Mobile)
- In 2024, Step-By-Step Guide to Fashionable Pfps on Discord Platform
- New 2024 Approved Exploring Key Components and Creation Process of AI Face Generators
- Fixing the Full-Screen Freeze in OBS for 2024
- New In 2024, Loop It! Best Free GIF Makers for Endless Animation
- Fake the Location to Get Around the MLB Blackouts on Tecno Phantom V Flip | Dr.fone
- In 2024, The Platform Face-Off Going Live with OBS/Twitch
- How to Unlock SIM Card on Nokia C12 Pro online without jailbreak
- [Updated] 2024 Approved Effortless Photo Transformations Using Instagram's Green Screen
- [New] Striking Visuals that Move Us Top 20 Instagram Photos
- [Updated] 2024 Approved Top Screen Grabber Software in the Windows 10 Arena
- 9 Solutions to Fix Nubia Z50 Ultra System Crash Issue | Dr.fone
- [New] In 2024, The Ultimate Guide to Hash Trackers FB, Twt & IG Networks
- Does find my friends work on Google Pixel Fold | Dr.fone
- Recover lost data from Samsung Galaxy M54 5G
- New S Top-Rated Free Music Recording Programs A Comprehensive List
- 2024 Approved Slow Down and Savor How to Add Slow Motion Effects in Windows Live Movie Maker
- 10 Easy-to-Use FRP Bypass Tools for Unlocking Google Accounts On Honor 90 GT
- Updated In 2024, Create Stunning Slow-Mo Videos with Windows Live Movie Maker Updated 2023
- In 2024, How to Come up With the Best Pokemon Team On Realme V30T? | Dr.fone
- [Updated] In 2024, Affordable OBS Adjustments and Tweaks
- [Updated] In 2024, Transforming Online Meetings Choose From These Top 5 Recorders
- How to Resolve Samsung Galaxy S24 Screen Not Working | Dr.fone
- Recover your pictures after Motorola Moto G14 has been deleted.
- Capture Music From Facebook Streams for 2024
- How to Recover Deleted Photos from Android Gallery App on Itel S23+
- In 2024, Ways to trade pokemon go from far away On Google Pixel 8 Pro? | Dr.fone
- In 2024, The Ultimate Guide to Unlocking Your Apple iPhone 14 Plus on MetroPCS
- [New] 5 Proven Ways to Record and Save Your Roblox Adventures (Mac Edition)
- You Have a Chromebook and Want to Edit Videos but Are Not Sure Which Video Editor Works on Chromebook Perfectly? Dont Worry, Here Is a List of the Best Video Editors for Chromebook for 2024
- 10 Exceptional Explainer Video Creation Platforms for 2024
- Title: In 2024, Taking Audio to the Next Level on Desktop & Mobile Discord with VoiceMod
- Author: Timothy
- Created at : 2024-05-23 22:47:54
- Updated at : 2024-05-24 22:47:54
- Link: https://discord-videos.techidaily.com/in-2024-taking-audio-to-the-next-level-on-desktop-and-mobile-discord-with-voicemod/
- License: This work is licensed under CC BY-NC-SA 4.0.
