
:max_bytes(150000):strip_icc()/Mediacomoutagemap-067f88aca591414eb04b103a36693e0c.JPG)
"Navigating the Nuances of Network-Based Video Sharing on Discord"
Navigating the Nuances of Network-Based Video Sharing on Discord
How to Send Videos on Discord

Richard Bennett
Mar 27, 2024• Proven solutions
The whole point of Discord is to bring together communities of like-minded people to talk, share ideas and have fun together. And this isn’t just limited to chatting but sometimes you’re going to want to share content, including videos.
So, whether it’s a compilation of your best gaming moments that you’ve carefully edited together, a home movie that you want to share with friends, or just a funny clip that someone’s sent you that you want to pass on, here we’ll take you through how to send videos on Discord both on PC and mobile, and the likely issues you might face.
- Part 1: How to Send Videos on Discord PC
- Part 2: How to Send Videos on Discord Mobile
- Part 3: How to Send Long Videos on Discord That Are More Than 8MB
- Part 4: FAQs About Uploading Videos to Discord
Part 1: How to Send Videos on Discord PC
It’s actually pretty simple to send videos on Discord when using a PC, providing they aren’t too large a file size.
Firstly, you just need to navigate to the channel or private message where you want to send the video. Just find the right option on the list of servers you’re a member of, or head to your message inbox to find the user you want to send it to privately.
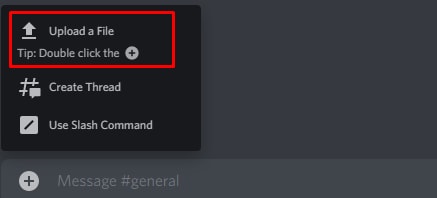
Once you’re in the right place, click on the plus (+) icon that you’ll find to the left of the chatbox at the bottom of the screen where you’d normally type your message.
You’ll then just need to find the file on your computer, and double click on it. It’ll then bring up a pop-up for the video where you can add a comment, which will sit above the video (ideal if you need to give context on why you’re sharing it). You can also mark it as a spoiler – useful if you’re sharing a gaming tip but you don’t want to spoil the story for anyone who’s not reached that point yet.
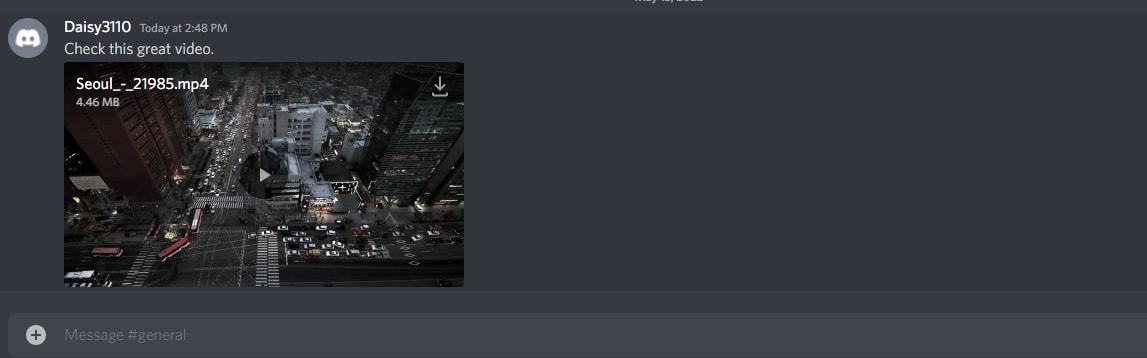
From there, it’s as simple as clicking the upload button. Once it’s ready, the video will be in the chat window for anyone in the server to watch, or for your friend if you’ve sent it privately. And if they want to download it, they’ll just need to click the download button (a downward-facing arrow) at the top right of the video.
It’s worth noting that, while Discord will play most video formats, it can’t manage everything. If you upload a format that Discord isn’t compatible with, then it won’t show a video player – instead, the file will just be uploaded. Other people can still download it to watch on their own devices.
Also, there’s a strict file limit of 8MB. This isn’t huge at all – while there’s no definitive file size for video (as it depends on file type, resolution, compression, etc) it’s unlikely to be more than 60 seconds of footage, and could just be a few seconds. If the video you want to upload is more than 8MB, carry on reading below to find out how.
Part 2: How to Send Videos on Discord Mobile
The process to send video on Discord Mobile is pretty similar both with iOS and Android, but with just a few minor tweaks.
Firstly, you still need to navigate to either the server or inbox where you want to share the video. You can then click the ‘Photo Selector’ button directly to the left of the chatbox.
This will open your phone’s gallery, but it’ll only be searching for photos. You instead want the File Selector, which will be the third icon along – it looks like a text document with a folded-over corner.
Click this and it’ll give you the option to directly upload a video from your phone’s Downloads folder. To send a video that’s stored elsewhere, click on the Expand arrow at the top left of the menu. This will send you to your phone’s file navigation system where you can find the video you want.
Once you’ve selected the video, just hit the blue Send icon to send your video to the chat. Again you can add a message as a caption, but this time it’ll just be in the normal message box rather than a dedicated comment box before you hit upload.
Part 3: How to Send Long Videos on Discord That Are More Than 8MB
So as we’ve said above, there is a file size limit when you’re using a free Discord account of just 8MB, which isn’t much at all. There are a few ways around this, so take your pick from the one that sounds best for you.
1. Update to Discord Nitro to Upload 100MB
The first option is possibly the simplest but it’s definitely not the cheapest, and that’s to pay for an upgrade to Discord Nitro. The paid version of Discord has a number of benefits, one of which is the increased file upload size of 100MB. It costs $4.99 per month or $49.99 per year, so if you’re likely to be regularly uploading videos that are lower than this limit, it might make sense.
2. Cut Unwanted Clips/Compress Video with Filmora Video Editor
The second choice would be to take your video and cut it into pieces, sending them one at a time. This might sound time-consuming but with Filmora’s Instant Cutter Tool, it’s really simple.
All you need to do is open a video in Filmora by clicking the arrow next to Import and then choosing ‘Import with Instant Cutter Tool’.
This will open the Instant Cutter window where you can click Open File to add your video. From here you can trim your files and export them in multiple sections. There are different ways that you can do this, and while each is a simple process, there are still a few steps to follow.


For more detail, check out this post for a step-by-step guide on the different ways you can trim a video in Filmora.
You can also try to compress your video size, which may let you keep the whole video at the expense of some of the quality. Again, using Filmora, this is easy. But also again, there are different ways to go about it.
You could literally crop the video in order to trim some of the data, as the reduced viewing screen won’t be as big a file. You can also reduce the resolution, or convert your video to a format that uses fewer data. You’ll need to test it though, as converting to some video formats might result in blurry footage.
There are advanced settings you can tinker with too, such as lowering the frame rate or the bit rate. Again, rather than go through all of those options in an epic article here, it’s easier to head to a post dedicated to these steps about compress videos with Filmora .
3. Upload to YouTube/Vimeo/Google Drive/Dropbox
The final option is to upload your video to an online player or storage site, and link to it, rather than having Discord host the file. YouTube and Vimeo are the obvious options, but Streamable is another popular choice too with a free membership. YouTube’s maximum video uploads are 128GB, which is huge, while other sites like Streamable cap free accounts to 500MB per video.
So, if you want to upload massive files, you’ll need to decide whether to choose YouTube or pay for an upgraded membership elsewhere. Wherever you host your video, once it’s online just grab the link and paste it into Discord to share your content.
The only drawback to this option is that it stops other users from being able to download the video directly, and you may need to look at a file sharing alternative such as Dropbox if you want to send the actual file.
FAQs About Uploading Videos to Discord
Which Kind of Video Formats Can I Upload to Discord?
You can send any filetype to another user on Discord, so that they can download it and watch it on their own device. But if you want to upload a video so that Discord embeds it, and makes it playable within the chat, you’re limited to only mp4 and WebM filetypes.
You can also use MOV files, but not everyone will be able to play them, and FLAC files are supported on desktop only but not on mobile.
How Can I Upload Saved Videos to Discord?
If you find a video on Discord that you want to share on a different server or in a private DM, you can use the download icon to save it locally. Then, follow the steps above to upload the video to the server or DM chat window where you want to share it.
Richard Bennett
Richard Bennett is a writer and a lover of all things video.
Follow @Richard Bennett
Richard Bennett
Mar 27, 2024• Proven solutions
The whole point of Discord is to bring together communities of like-minded people to talk, share ideas and have fun together. And this isn’t just limited to chatting but sometimes you’re going to want to share content, including videos.
So, whether it’s a compilation of your best gaming moments that you’ve carefully edited together, a home movie that you want to share with friends, or just a funny clip that someone’s sent you that you want to pass on, here we’ll take you through how to send videos on Discord both on PC and mobile, and the likely issues you might face.
- Part 1: How to Send Videos on Discord PC
- Part 2: How to Send Videos on Discord Mobile
- Part 3: How to Send Long Videos on Discord That Are More Than 8MB
- Part 4: FAQs About Uploading Videos to Discord
Part 1: How to Send Videos on Discord PC
It’s actually pretty simple to send videos on Discord when using a PC, providing they aren’t too large a file size.
Firstly, you just need to navigate to the channel or private message where you want to send the video. Just find the right option on the list of servers you’re a member of, or head to your message inbox to find the user you want to send it to privately.
Once you’re in the right place, click on the plus (+) icon that you’ll find to the left of the chatbox at the bottom of the screen where you’d normally type your message.
You’ll then just need to find the file on your computer, and double click on it. It’ll then bring up a pop-up for the video where you can add a comment, which will sit above the video (ideal if you need to give context on why you’re sharing it). You can also mark it as a spoiler – useful if you’re sharing a gaming tip but you don’t want to spoil the story for anyone who’s not reached that point yet.
From there, it’s as simple as clicking the upload button. Once it’s ready, the video will be in the chat window for anyone in the server to watch, or for your friend if you’ve sent it privately. And if they want to download it, they’ll just need to click the download button (a downward-facing arrow) at the top right of the video.
It’s worth noting that, while Discord will play most video formats, it can’t manage everything. If you upload a format that Discord isn’t compatible with, then it won’t show a video player – instead, the file will just be uploaded. Other people can still download it to watch on their own devices.
Also, there’s a strict file limit of 8MB. This isn’t huge at all – while there’s no definitive file size for video (as it depends on file type, resolution, compression, etc) it’s unlikely to be more than 60 seconds of footage, and could just be a few seconds. If the video you want to upload is more than 8MB, carry on reading below to find out how.
Part 2: How to Send Videos on Discord Mobile
The process to send video on Discord Mobile is pretty similar both with iOS and Android, but with just a few minor tweaks.
Firstly, you still need to navigate to either the server or inbox where you want to share the video. You can then click the ‘Photo Selector’ button directly to the left of the chatbox.
This will open your phone’s gallery, but it’ll only be searching for photos. You instead want the File Selector, which will be the third icon along – it looks like a text document with a folded-over corner.
Click this and it’ll give you the option to directly upload a video from your phone’s Downloads folder. To send a video that’s stored elsewhere, click on the Expand arrow at the top left of the menu. This will send you to your phone’s file navigation system where you can find the video you want.
Once you’ve selected the video, just hit the blue Send icon to send your video to the chat. Again you can add a message as a caption, but this time it’ll just be in the normal message box rather than a dedicated comment box before you hit upload.
Part 3: How to Send Long Videos on Discord That Are More Than 8MB
So as we’ve said above, there is a file size limit when you’re using a free Discord account of just 8MB, which isn’t much at all. There are a few ways around this, so take your pick from the one that sounds best for you.
1. Update to Discord Nitro to Upload 100MB
The first option is possibly the simplest but it’s definitely not the cheapest, and that’s to pay for an upgrade to Discord Nitro. The paid version of Discord has a number of benefits, one of which is the increased file upload size of 100MB. It costs $4.99 per month or $49.99 per year, so if you’re likely to be regularly uploading videos that are lower than this limit, it might make sense.
2. Cut Unwanted Clips/Compress Video with Filmora Video Editor
The second choice would be to take your video and cut it into pieces, sending them one at a time. This might sound time-consuming but with Filmora’s Instant Cutter Tool, it’s really simple.
All you need to do is open a video in Filmora by clicking the arrow next to Import and then choosing ‘Import with Instant Cutter Tool’.
This will open the Instant Cutter window where you can click Open File to add your video. From here you can trim your files and export them in multiple sections. There are different ways that you can do this, and while each is a simple process, there are still a few steps to follow.
For more detail, check out this post for a step-by-step guide on the different ways you can trim a video in Filmora.
You can also try to compress your video size, which may let you keep the whole video at the expense of some of the quality. Again, using Filmora, this is easy. But also again, there are different ways to go about it.
You could literally crop the video in order to trim some of the data, as the reduced viewing screen won’t be as big a file. You can also reduce the resolution, or convert your video to a format that uses fewer data. You’ll need to test it though, as converting to some video formats might result in blurry footage.
There are advanced settings you can tinker with too, such as lowering the frame rate or the bit rate. Again, rather than go through all of those options in an epic article here, it’s easier to head to a post dedicated to these steps about compress videos with Filmora .
3. Upload to YouTube/Vimeo/Google Drive/Dropbox
The final option is to upload your video to an online player or storage site, and link to it, rather than having Discord host the file. YouTube and Vimeo are the obvious options, but Streamable is another popular choice too with a free membership. YouTube’s maximum video uploads are 128GB, which is huge, while other sites like Streamable cap free accounts to 500MB per video.
So, if you want to upload massive files, you’ll need to decide whether to choose YouTube or pay for an upgraded membership elsewhere. Wherever you host your video, once it’s online just grab the link and paste it into Discord to share your content.
The only drawback to this option is that it stops other users from being able to download the video directly, and you may need to look at a file sharing alternative such as Dropbox if you want to send the actual file.
FAQs About Uploading Videos to Discord
Which Kind of Video Formats Can I Upload to Discord?
You can send any filetype to another user on Discord, so that they can download it and watch it on their own device. But if you want to upload a video so that Discord embeds it, and makes it playable within the chat, you’re limited to only mp4 and WebM filetypes.
You can also use MOV files, but not everyone will be able to play them, and FLAC files are supported on desktop only but not on mobile.
How Can I Upload Saved Videos to Discord?
If you find a video on Discord that you want to share on a different server or in a private DM, you can use the download icon to save it locally. Then, follow the steps above to upload the video to the server or DM chat window where you want to share it.
Richard Bennett
Richard Bennett is a writer and a lover of all things video.
Follow @Richard Bennett
Discord Flag Artists: Masterpieces and Your Profile Coverage Ideas
Top 9 Discord Banner Makers and How to Make One Easily
Richard Bennett
Mar 27, 2024• Proven solutions
A Discord banner is best to customize your Discord account and make it more convincing. It allows you to improvise your profile icon with one of your favorite movies, games, memes, or anime characters. You can even decorate the space with your face.
Before looking at the steps to create a Discord profile banner, it’s crucial to note that only Nitro users can use this feature. You’ll have to settle for a limited list of 10-15 pre-made banners if you’ve not yet accessed the Nitro plan. These Discord banners feature solid colors and basic designs. What’s more, you can’t modify your banner for Discord on the Discord mobile apps. It’s only accessible via desktop versions.
In this article, we’ll discuss the top 9 Discord banner makers, plus a helpful section on how to create your Discord banner.
- Part 1: Top 9 Discord Banner Makers in 2022 [with free templates]
- Part 2: How to Create a Discord Banner with Kapwing
- Part 3: FAQs about Discord Banner
Part 1: Top 9 Discord Banner Makers in 2022 [with free templates]
1. Visme
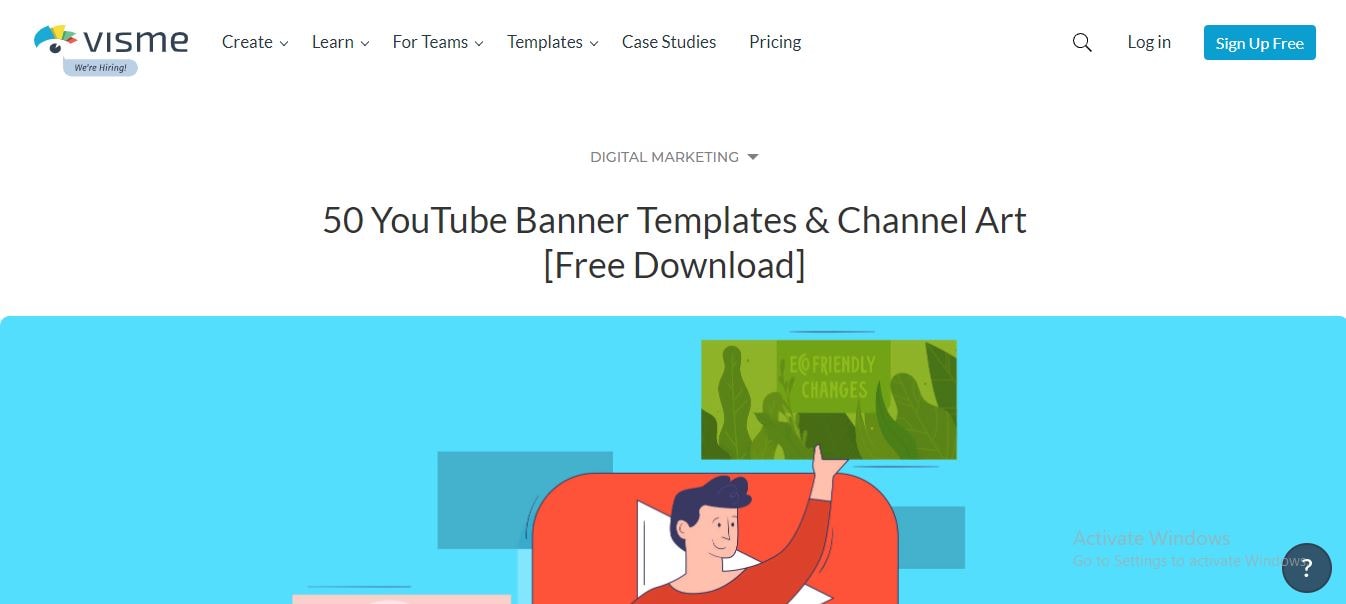
Visme offers 50 plus free channel art editable templates through their online graphics service. However, it has a bit more complex UI than some of the other makers on this list, but the free templates are wonderful, and you can upload your images to edit with them.
2. Fotor
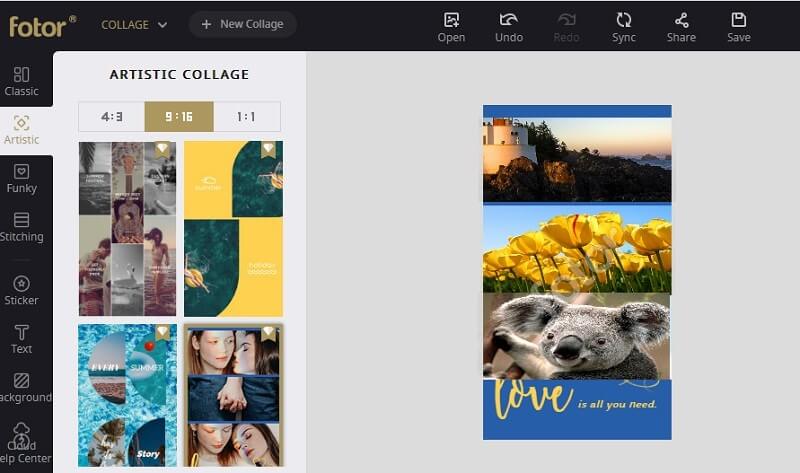
Another graphics program with free templates is Fotor. It is easy to use – perhaps the most accessible program on this list. You click on the element in your template and then click on what you want to replace it with, and thus you don’t even have to use the drag and drop feature in the ‘background’ tab. Of course, you can upload your photos as well.
There are subscription options in Fotor. Thus, you get a watermark for your project unless you pay for premium services, but there are enough free options to satisfy most creators.
3. Snappa
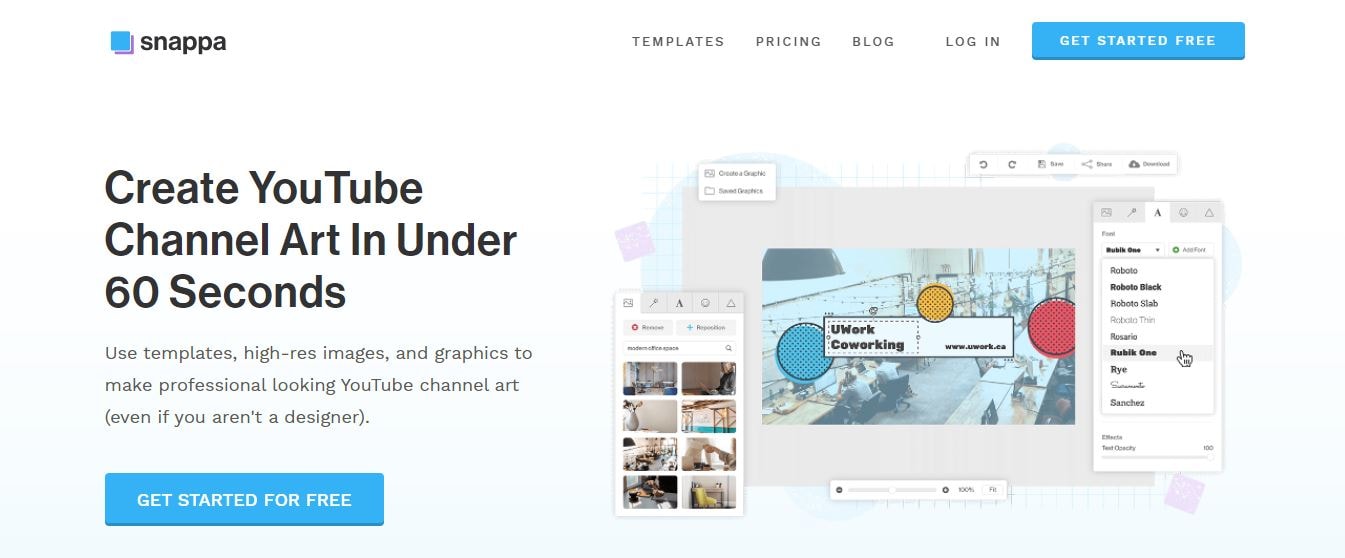
If you want to get something quick in design, Snappa is the right choice. First, choose one of the free templates under the YouTube Channel Art under the Headers tab. Then it’s just a matter of elements swapping in the template with ones that suit your channel.
Snappa shows you the ideal placement section for different devices while you edit.
4. Crello
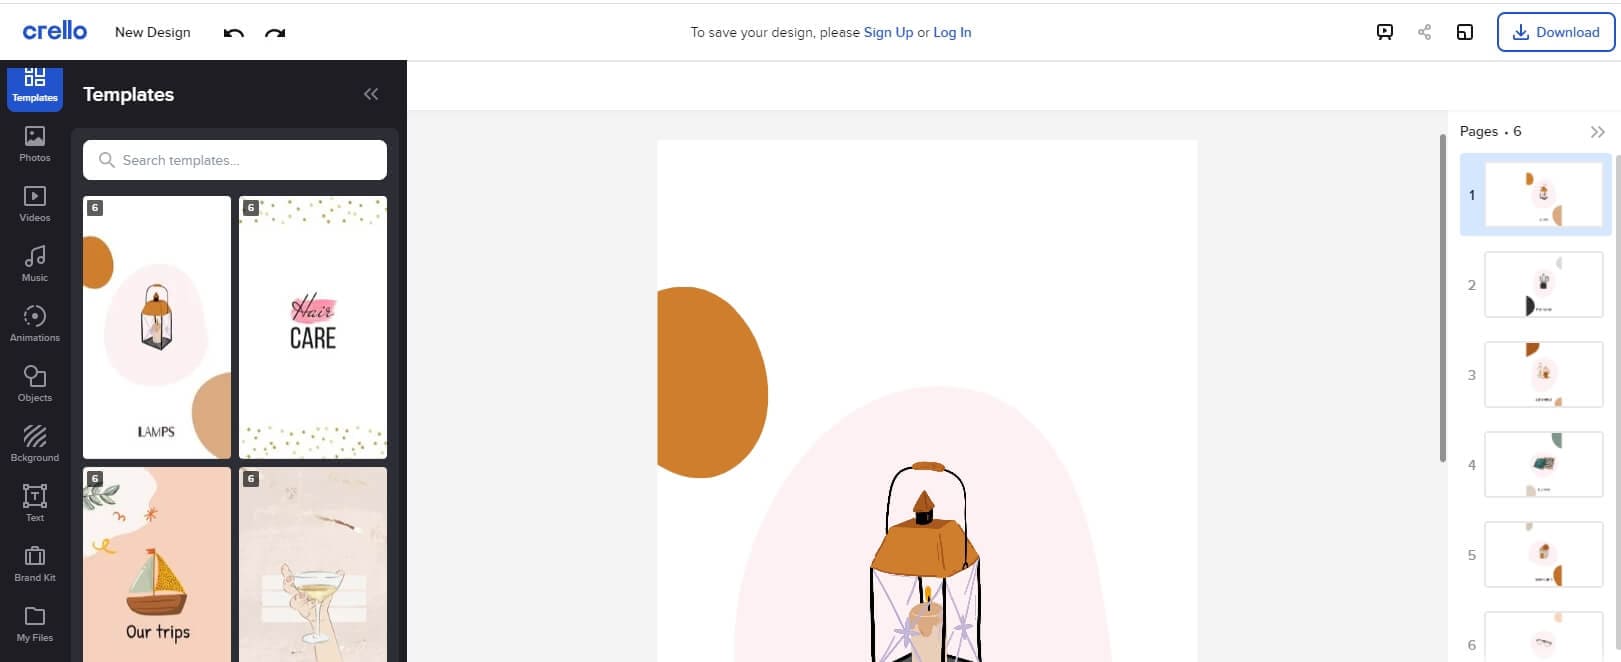
Crello provides ten free examples of channel art templates through their blog, and you can rightly edit them on the site.
Crello is a simple visual editor designed for social media and marketing creators, meaning that non-design people can quickly jump into this platform. Beyond the free text options and templates, however, most of their backgrounds and stock photos cost $1. You’re required to use the default images to use Crello for free or upload your own.
5. Design Wizard
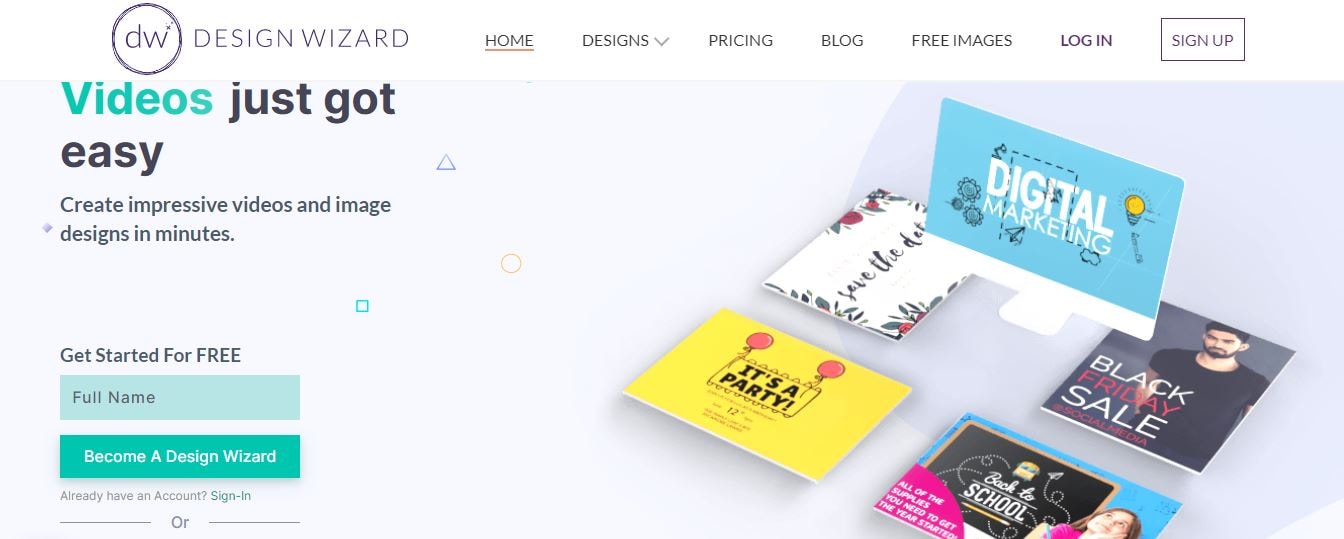
This is another Discord banner maker with a few free templates to design or craft anything out through personalization. One of the best valuable abilities of the design wizard is that it will display the ‘safe zone’ – the area of your Discord banner that will show up on any device screen – so you can design keeping those dimensions in mind.
Also, make sure to delete the safe zone marker before you export.
6. Canva
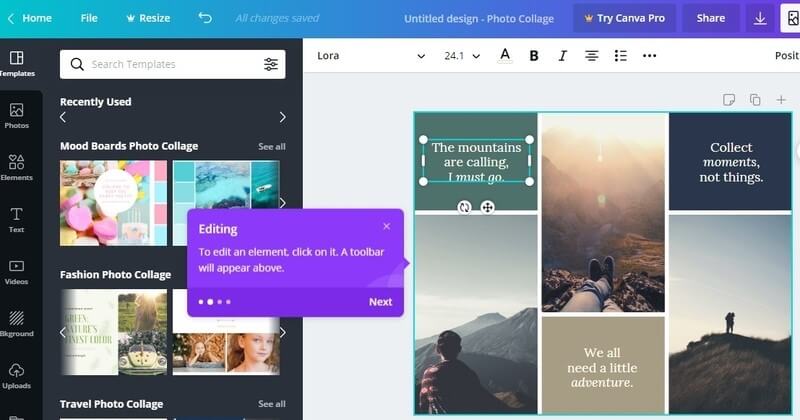
Canva is one of the famous and free channel art makers. It is simple with a drag-and-drop editor. Also, the program will automatically resize images to adjust easily within the Discord banner space. It has a variety of free resources like stock photos. Some resources are paid ($1), but most of them are free.
7. Adobe Spark
While editing the Discord banner templates via Adobe Spark, click on the resources in the template and then select the images/fonts/etc., that you want to use. Resources like filters are also very accessible.
The only drawback of Spark is that the watermarks are in free downloads. However, the watermark is quite small, meaning that it won’t show up for viewers as it is placed in the bottom-right corner watching your channel on either mobile devices or computers.
Note: Whenever you click ‘Create your YouTube channel art,’ it will show you a thumbnail template instead of a banner template. Hit the Resize button in the side menu and switch to your exported images or the channel art.
8. BeFunky
This is a graphics creator platform that doubles as a Discord profile banner maker as well. You need to head towards BeFunky’s ‘Designer’ tool and look for the channel art templates under ‘YouTube’ and ‘Social Media Headers.’ However, we won’t find here any free art templates.
9. Wondershare PixStudio
Wondershare PixStudio has certain unique features to erase the image background. With a single tap only, you can quickly remove the image background; then, you can use your image flexibly. And, it’s just a subscription of $7.99 per month to use the features.
Part 2: How to Create a Discord Banner with Kapwing
Since your server banner will take up an important place in your Discord server, you must make yours look just right. You have to consider the dimensions, formatting, and arrangement of the Discord profile banner.
- Use optimal dimensions
- Make sure the important parts are visible
- How to upload your banner image
Step 1: Use Optimal Dimensions
Discord recommends that your image have optimal dimensions of 960x540 at least, which is different than 16:9 images. You can use a slightly larger 16:9 aspect ratio for great appearances, like 1920x1080 or even 2560x1440.
With Kapwing Studio, you can crop any photo to a 16:9 aspect ratio and resize it to the given dimensions. Visit Kapwing.com in your browser, click Start Editing, and paste the link to a photo you found online or upload your image directly on the Studio.
Now, click the Crop tool to make your photo 16:9, and head towards the Output Size options to make your aspect ratio larger than 960x540.
Step 2: Make Sure the Important Parts Are Visible
This is the essential part of setting up your Discord banner – making sure your banner is properly visible on the Discord.
Your banner image’s safe zone is that you should keep ideal sections out of the top 28% since that’s where your server’s options and name button will show.
The portion is a bit covered with text about the top 22% of your Discord banner photo. So, keep important sections and the text of your image below the top 120 pixels on a 960x540 Discord banner.

Source: kapwing.com
Now, you must note that the Discord profile banner will display as it starts fading about halfway down until merging in with the bottom-edge dark grey area of Discord.
And, you can smoothly edit any design elements, titles, text, or essential visuals at the bottom of the Discord profile banner. You should relocate them closer to the frame’s center to be visible.

Source: kapwing.com
Hit the Crop button in the Kapwing Studio to add text boxes for banner personalization and horizontally flip your images to keep elements aside from the upper left corner. Hit the green Export Image button after you are over with cropping, then the Download button to save your banner to your device.
Step 3: Upload Your Banner Image
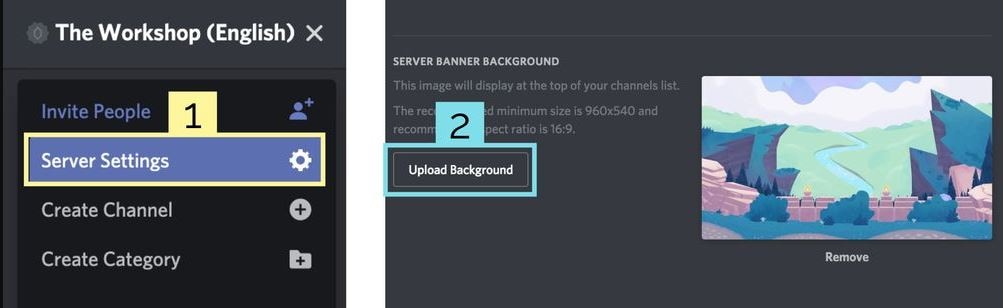
Adding a Discord profile banner is intuitive once your server boosts enough to reach level 2. Just open your server dropdown menu and hit the Server Settings, then choose “Upload Background.”
Source: kapwing.com
Here, look for the image in your camera roll or files and upload it to your Discord channel server. It’s that simple!
Part 3: FAQs about Discord Banner
1 - How do you make a banner on Discord?
You can consider various banner makers mentioned above to make a banner on Discord. However, you have to ensure compliance with Discord banner size requirements.
2 - How do I get free Discord banners?
You can find free custom Discord Banner images already optimized and cropped for the Discord banner. Browse thousands of profile banners in categories like animated, meme, etc., on pfps.gg website to get free discord banners.
3 – Can the Discord banner be GIF?
Yes, uploading a Discord banner in GIF format is allowed.
Conclusion
The ability to set a Discord banner is part of the Discord update called “Custom Profiles Premium.”
The feature is live on Discord, which means that everyone can modify or set Discord profile banners as per their likes and preferences. However, you must have access to Discord Nitro to change your profile banner. And, users who don’t have Discord Nitro are not allowed to set a profile banner.
Richard Bennett
Richard Bennett is a writer and a lover of all things video.
Follow @Richard Bennett
Richard Bennett
Mar 27, 2024• Proven solutions
A Discord banner is best to customize your Discord account and make it more convincing. It allows you to improvise your profile icon with one of your favorite movies, games, memes, or anime characters. You can even decorate the space with your face.
Before looking at the steps to create a Discord profile banner, it’s crucial to note that only Nitro users can use this feature. You’ll have to settle for a limited list of 10-15 pre-made banners if you’ve not yet accessed the Nitro plan. These Discord banners feature solid colors and basic designs. What’s more, you can’t modify your banner for Discord on the Discord mobile apps. It’s only accessible via desktop versions.
In this article, we’ll discuss the top 9 Discord banner makers, plus a helpful section on how to create your Discord banner.
- Part 1: Top 9 Discord Banner Makers in 2022 [with free templates]
- Part 2: How to Create a Discord Banner with Kapwing
- Part 3: FAQs about Discord Banner
Part 1: Top 9 Discord Banner Makers in 2022 [with free templates]
1. Visme
Visme offers 50 plus free channel art editable templates through their online graphics service. However, it has a bit more complex UI than some of the other makers on this list, but the free templates are wonderful, and you can upload your images to edit with them.
2. Fotor
Another graphics program with free templates is Fotor. It is easy to use – perhaps the most accessible program on this list. You click on the element in your template and then click on what you want to replace it with, and thus you don’t even have to use the drag and drop feature in the ‘background’ tab. Of course, you can upload your photos as well.
There are subscription options in Fotor. Thus, you get a watermark for your project unless you pay for premium services, but there are enough free options to satisfy most creators.
3. Snappa
If you want to get something quick in design, Snappa is the right choice. First, choose one of the free templates under the YouTube Channel Art under the Headers tab. Then it’s just a matter of elements swapping in the template with ones that suit your channel.
Snappa shows you the ideal placement section for different devices while you edit.
4. Crello
Crello provides ten free examples of channel art templates through their blog, and you can rightly edit them on the site.
Crello is a simple visual editor designed for social media and marketing creators, meaning that non-design people can quickly jump into this platform. Beyond the free text options and templates, however, most of their backgrounds and stock photos cost $1. You’re required to use the default images to use Crello for free or upload your own.
5. Design Wizard
This is another Discord banner maker with a few free templates to design or craft anything out through personalization. One of the best valuable abilities of the design wizard is that it will display the ‘safe zone’ – the area of your Discord banner that will show up on any device screen – so you can design keeping those dimensions in mind.
Also, make sure to delete the safe zone marker before you export.
6. Canva
Canva is one of the famous and free channel art makers. It is simple with a drag-and-drop editor. Also, the program will automatically resize images to adjust easily within the Discord banner space. It has a variety of free resources like stock photos. Some resources are paid ($1), but most of them are free.
7. Adobe Spark
While editing the Discord banner templates via Adobe Spark, click on the resources in the template and then select the images/fonts/etc., that you want to use. Resources like filters are also very accessible.
The only drawback of Spark is that the watermarks are in free downloads. However, the watermark is quite small, meaning that it won’t show up for viewers as it is placed in the bottom-right corner watching your channel on either mobile devices or computers.
Note: Whenever you click ‘Create your YouTube channel art,’ it will show you a thumbnail template instead of a banner template. Hit the Resize button in the side menu and switch to your exported images or the channel art.
8. BeFunky
This is a graphics creator platform that doubles as a Discord profile banner maker as well. You need to head towards BeFunky’s ‘Designer’ tool and look for the channel art templates under ‘YouTube’ and ‘Social Media Headers.’ However, we won’t find here any free art templates.
9. Wondershare PixStudio
Wondershare PixStudio has certain unique features to erase the image background. With a single tap only, you can quickly remove the image background; then, you can use your image flexibly. And, it’s just a subscription of $7.99 per month to use the features.
Part 2: How to Create a Discord Banner with Kapwing
Since your server banner will take up an important place in your Discord server, you must make yours look just right. You have to consider the dimensions, formatting, and arrangement of the Discord profile banner.
- Use optimal dimensions
- Make sure the important parts are visible
- How to upload your banner image
Step 1: Use Optimal Dimensions
Discord recommends that your image have optimal dimensions of 960x540 at least, which is different than 16:9 images. You can use a slightly larger 16:9 aspect ratio for great appearances, like 1920x1080 or even 2560x1440.
With Kapwing Studio, you can crop any photo to a 16:9 aspect ratio and resize it to the given dimensions. Visit Kapwing.com in your browser, click Start Editing, and paste the link to a photo you found online or upload your image directly on the Studio.
Now, click the Crop tool to make your photo 16:9, and head towards the Output Size options to make your aspect ratio larger than 960x540.
Step 2: Make Sure the Important Parts Are Visible
This is the essential part of setting up your Discord banner – making sure your banner is properly visible on the Discord.
Your banner image’s safe zone is that you should keep ideal sections out of the top 28% since that’s where your server’s options and name button will show.
The portion is a bit covered with text about the top 22% of your Discord banner photo. So, keep important sections and the text of your image below the top 120 pixels on a 960x540 Discord banner.
Source: kapwing.com
Now, you must note that the Discord profile banner will display as it starts fading about halfway down until merging in with the bottom-edge dark grey area of Discord.
And, you can smoothly edit any design elements, titles, text, or essential visuals at the bottom of the Discord profile banner. You should relocate them closer to the frame’s center to be visible.
Source: kapwing.com
Hit the Crop button in the Kapwing Studio to add text boxes for banner personalization and horizontally flip your images to keep elements aside from the upper left corner. Hit the green Export Image button after you are over with cropping, then the Download button to save your banner to your device.
Step 3: Upload Your Banner Image
Adding a Discord profile banner is intuitive once your server boosts enough to reach level 2. Just open your server dropdown menu and hit the Server Settings, then choose “Upload Background.”
Source: kapwing.com
Here, look for the image in your camera roll or files and upload it to your Discord channel server. It’s that simple!
Part 3: FAQs about Discord Banner
1 - How do you make a banner on Discord?
You can consider various banner makers mentioned above to make a banner on Discord. However, you have to ensure compliance with Discord banner size requirements.
2 - How do I get free Discord banners?
You can find free custom Discord Banner images already optimized and cropped for the Discord banner. Browse thousands of profile banners in categories like animated, meme, etc., on pfps.gg website to get free discord banners.
3 – Can the Discord banner be GIF?
Yes, uploading a Discord banner in GIF format is allowed.
Conclusion
The ability to set a Discord banner is part of the Discord update called “Custom Profiles Premium.”
The feature is live on Discord, which means that everyone can modify or set Discord profile banners as per their likes and preferences. However, you must have access to Discord Nitro to change your profile banner. And, users who don’t have Discord Nitro are not allowed to set a profile banner.
Richard Bennett
Richard Bennett is a writer and a lover of all things video.
Follow @Richard Bennett
Also read:
- 2024 Approved Discord for Music Lovers Adding Spotify Support
- [New] In 2024, Foremost Innovative Logos for Social Platforms' Animations
- [Updated] 2024 Approved Discover the Leading 10 Plugins to Enhance Discord Usage
- [New] 2024 Approved Enterprise Communication Showdown Slack Versus Discord?
- Streamlined Approach to Role Assignments on Discord Servers
- [Updated] 2024 Approved Expertly Engineered Virtual Assistants (Discord)
- [New] Premium Emoji Creation Software for Discord Users
- Designing an Attractive Pfp for Discord Chat Rooms for 2024
- [New] 2024 Approved The Ultimate Discord User Manual
- 2024 Approved Navigating the End of an Online Chapter in Discord
- Pinpointing Perfect Workplace Messengers Is Slack Surpassing Discord, In 2024
- [New] 2024 Approved Navigate to 8 Free Emoji Resources on the Web Today
- [New] In 2024, From Silence to Significance Replying in Discord Chats
- [New] 2024 Approved Advanced Strategies for Mass Message Purge on Discord Networks
- 2024 Approved Message Mastery for Discord Users (Desktop/Mobile)
- 2023 Guide Selecting No-Charge FB Video & Photo Artists for 2024
- How can I get more stardust in pokemon go On Xiaomi Civi 3? | Dr.fone
- Hassle-Free Ways to Remove FRP Lock from Motorola Phones with/without a PC
- New Top-Rated Online Trailer Editing Services
- In 2024, How to Lock Apps on Motorola Edge 40 Neo to Protect Your Individual Information
- [Updated] In 2024, The Ultimate List of Trending Instagram Hashtags for Success
- Updated In 2024, Introduction
- List of Pokémon Go Joysticks On Sony Xperia 10 V | Dr.fone
- Updated In 2024, For Efficient Workflow, the Keyboard Shortcuts Cannot Be Beaten. So Here I List Top 20 Adobe Premiere Shortcuts You Will Use when Editing Video
- [New] Crafting Engaging Bio Stories – A Guide to Stand Out on FB for 2024
- Title: "Navigating the Nuances of Network-Based Video Sharing on Discord"
- Author: Timothy
- Created at : 2024-05-23 22:47:29
- Updated at : 2024-05-24 22:47:29
- Link: https://discord-videos.techidaily.com/navigating-the-nuances-of-network-based-video-sharing-on-discord/
- License: This work is licensed under CC BY-NC-SA 4.0.
