
!["[New] 2024 Approved Incorporating Leadership in Your Discord Network"](https://thmb.techidaily.com/848032c0813eed1e619997cdd0bea2d2fe7603582b1ae72dd2c30508b513eea6.png)
"[New] 2024 Approved Incorporating Leadership in Your Discord Network"
Incorporating Leadership in Your Discord Network
How to Add Roles in Discord?

Richard Bennett
Mar 27, 2024• Proven solutions
Having a Discord server for you and your friends is a fun experience. And for gamers, Discord is a necessity. You can customize it with bots, connect real-time over voice channels, and even add rooms for chat forums.
Obviously, creating and managing a Discord server can get difficult. Especially when the server gets crammed with members, it is no longer a one-person show. You need help with monitoring and moderation. And let’s face it – you cannot watch your server round the clock.
So, let us learn the art of delegation on Discord! This guide will help you with – How to add roles in Discord and how to assign them to members. This includes creating roles, deleting them, and granting appropriate permissions.
- Part 1: Discord Server Permissions Introduction
- Part 2: How to Make and Add Roles in Discord on Computer
- Part 3: How to Manage Roles in Discord?
- Part 4: How to Delete Roles in Discord?
- Part 5: How to Add Roles on Discord Mobile?
- Part 6: Adding Roles to Discord FAQs
Part 1: Discord Server Permissions You Can Set Up
To give you a heads-up, there are around 29 permissions that you can adjust over a Discord server. More specifically, there are 7 voice permissions, 9 permissions related to texts, and about 13 permissions dealing with the server.
1. General server permission
Administrator – this is the highest permission that you can grant to a user. Think twice before giving this authority to anyone.
View Audit Log – with this permission, a user can read the server’s audits.
Manage Server – this permission enables a user to change the server’s name or shift it to another region.
Manage Roles – a user with this authority can make new roles or modify the roles without this permission.
Manage Channels – with this; a user can make, edit, or remove channels on a server.
Manage emojis – users with this authority can manage emotes.
Manage Webhooks – if you have this authority, you can add, modify, and remove webhooks.
Read Text Channels & See Voice Channels – a user with this permission can read text channels.
2. Membership permissions
Ban Members – a member with permission, can ban members from the server.
Create Instant Invite – users with this permission can invite people to the server.
Change Nickname – you can change your nickname anytime if this permission is enabled.
Manage Nicknames – if enabled, a user can change other’s nicknames.
Kick Members – a user with this authority can remove members from the server.
3. Text channel permissions
Send Messages – with this; users can send texts on chats.
Send TTS Messages – this enables users to send text-to-speech texts.
Manage Messages – with this; a user can remove or pin texts of other users.
Embed Links – enables users to embed hyperlinks in texts.
Attach Files – with this; users can attach files in the texts.
Read Message History – enables users to access earlier texts.
Mention Everyone – you can send push notifications on the channel if this permission is enabled.
Use External Emojis – if enabled, users can send emojis from other servers.
Add Reactions – with this; users can add new reactions to a text.
4. Voice channel permissions
Connect – enables users to connect themselves over the voice channel.
Speak – users can talk over the voice channel.
Mute Members – turn off other user’s speech.
Deafen Members – turn off hearing on the channel for a user.
Move Members – enables a user to shift members from one channel to a different channel.
Use Voice Activity – a member can talk without using Push-to-Talk, with this permission.
Priority Speaker – when this permission is turned on for a user, other’s
this permission allows the user to reduce the volume of other users when this user is speaking so that their words are louder on the channel.
5. Advanced permissions
Includes the ‘Administrator’ permission, which by default enables all the permissions to the assigned user.
Part 2: How to Make and Add Roles in Discord on Computer
The desktop app and Browser resemble the mobile apple a lot. The process of assigning roles and configuring members is more or less the same across devices. First, you need to create roles and define their authority before assigning these roles to some members.
How to create roles in Discord?
Before you can assign roles, you need a server. Once you have created your Discord server, start crafting the structure.
- Open your server and right-click on it.
- From the menu that appears, tap server settings.
- Name the role suitably. It should be descriptive of the authority.
- Tap on the plus sign that appears on the top right of the page.
- Here, you can change the title off the roll and even choose the color.
- Now comes the time to grant some permissions. These are basically the authority that you gave to every profile.
- When you are done, save the changes.
How to Assign Roles to Members in Discord?
To be able to assign roles, you should first create them
- Once again, hit that right button on your server and go to server settings.
- From the menu that appears to the left, ‘choose members’ under user management.
- Here, you will see the list of all the members on your server, tap the Plus sign that is right beside the username.
- From the drop-down menu that appears, select a role you want to assign to that member.
- You will notice that the color changes as per your settings. And this is how you assign roles to a server.
Part 3: How to Manage Roles in Discord?
After you learn how to make roles in Discord, you might want to manage them.
If you have got the hang of creating roles, then managing them is no different. Whenever the server gets crowded, you can create more roles or modify the existing ones. A smaller server can run smoothly with just an admin and an ‘everyone’ role.
The quickest and easiest way to manage your bloating server is to let all members be ‘everyone’ and adjust permissions accordingly. So, whenever members enter your server, they will automatically be assigned the common role.
Further, you can easily figure out what roles you have assigned to whom. Due to these colors, the other members can identify moderators, admins, or other roles.
Part 4: How to Delete Roles in Discord?
Honestly, removing Discord roles easier than setting them up. There are hardly a few steps that you need to follow for role removal.
- place the cursor on the server, and hit the right-click.
- From the list, choose server settings. Then click on roles.
- From the roles window, tap on the role that you wish to delete.
- Towards the bottom, you will see the option to delete the role.
- Press ok to confirm.
Part 5: How to Add Roles on Discord Mobile?
Like we mentioned earlier, the user interface of Discord is similar across devices. So, there is little difference between the process of creating and managing roles. But it can be baffling for beginners, so here’s a brief!
1. How to create roles in Discord mobile app?
Before you can assign roles, you have to create them.
- Open your server.
- Tap on the arrow beside the server’s title. A drop-down menu will appear. Select ‘server settings’ from that.
- Tap on ‘Roles.’ A common role, ‘everyone’ is assigned to all the members who have basic permissions enabled for everyone.
- Tap the plus sign and add a role.
- Give the role a color and describe it in a few words.
- Go through the permissions and enable the ones that fit the role.
- Save the changes.
You can repeat this multiple times to create more roles.
2. How to Assign Roles in Discord mobile app?
- Head over to settings and select ‘Members.’
- Select the members you want to assign roles to.
- Tick the boxes beside each member’s name for the roles you are assigning them.
Save the changes, and you are good to go! You can assign multiple roles to a member.
Part 6: FAQs about Discord Server Roles
Just some obvious things you might wonder about.
- How to make someone admin on Discord?
Making someone admin is the same as assigning other roles. Open your server and go to server settings.
- From there, select ‘roles’ from the left pane.
- Create a new role.
- Name the role ‘admin’ or an equivalent title.
- Adjust the setting related to sorting out role members with other members.
- Go to general permissions and tick the ‘Administrator’ option.
- Hit the ‘save changes’ button at the bottom.
- Now it’s time to assign the role to someone. Right-click on the user that you want to assign the role.
- Choose ‘roles’ from the drop-down list and select ‘Admin.’
And now your server has an admin!
- How can I assign roles to new users in Discord automatically?
By default, every member gets the role of ‘everyone’ on the server. However, you can customize this and add the MEE6 bot for automatic role allocation.
- Why can’t I manage the server even I am an admin on the server?
This is likely to happen if the server owner gave you the role of admin, but the permissions are disabled. You can ask the owner to enable the permissions for your user ID.
Richard Bennett
Richard Bennett is a writer and a lover of all things video.
Follow @Richard Bennett
Richard Bennett
Mar 27, 2024• Proven solutions
Having a Discord server for you and your friends is a fun experience. And for gamers, Discord is a necessity. You can customize it with bots, connect real-time over voice channels, and even add rooms for chat forums.
Obviously, creating and managing a Discord server can get difficult. Especially when the server gets crammed with members, it is no longer a one-person show. You need help with monitoring and moderation. And let’s face it – you cannot watch your server round the clock.
So, let us learn the art of delegation on Discord! This guide will help you with – How to add roles in Discord and how to assign them to members. This includes creating roles, deleting them, and granting appropriate permissions.
- Part 1: Discord Server Permissions Introduction
- Part 2: How to Make and Add Roles in Discord on Computer
- Part 3: How to Manage Roles in Discord?
- Part 4: How to Delete Roles in Discord?
- Part 5: How to Add Roles on Discord Mobile?
- Part 6: Adding Roles to Discord FAQs
Part 1: Discord Server Permissions You Can Set Up
To give you a heads-up, there are around 29 permissions that you can adjust over a Discord server. More specifically, there are 7 voice permissions, 9 permissions related to texts, and about 13 permissions dealing with the server.
1. General server permission
Administrator – this is the highest permission that you can grant to a user. Think twice before giving this authority to anyone.
View Audit Log – with this permission, a user can read the server’s audits.
Manage Server – this permission enables a user to change the server’s name or shift it to another region.
Manage Roles – a user with this authority can make new roles or modify the roles without this permission.
Manage Channels – with this; a user can make, edit, or remove channels on a server.
Manage emojis – users with this authority can manage emotes.
Manage Webhooks – if you have this authority, you can add, modify, and remove webhooks.
Read Text Channels & See Voice Channels – a user with this permission can read text channels.
2. Membership permissions
Ban Members – a member with permission, can ban members from the server.
Create Instant Invite – users with this permission can invite people to the server.
Change Nickname – you can change your nickname anytime if this permission is enabled.
Manage Nicknames – if enabled, a user can change other’s nicknames.
Kick Members – a user with this authority can remove members from the server.
3. Text channel permissions
Send Messages – with this; users can send texts on chats.
Send TTS Messages – this enables users to send text-to-speech texts.
Manage Messages – with this; a user can remove or pin texts of other users.
Embed Links – enables users to embed hyperlinks in texts.
Attach Files – with this; users can attach files in the texts.
Read Message History – enables users to access earlier texts.
Mention Everyone – you can send push notifications on the channel if this permission is enabled.
Use External Emojis – if enabled, users can send emojis from other servers.
Add Reactions – with this; users can add new reactions to a text.
4. Voice channel permissions
Connect – enables users to connect themselves over the voice channel.
Speak – users can talk over the voice channel.
Mute Members – turn off other user’s speech.
Deafen Members – turn off hearing on the channel for a user.
Move Members – enables a user to shift members from one channel to a different channel.
Use Voice Activity – a member can talk without using Push-to-Talk, with this permission.
Priority Speaker – when this permission is turned on for a user, other’s
this permission allows the user to reduce the volume of other users when this user is speaking so that their words are louder on the channel.
5. Advanced permissions
Includes the ‘Administrator’ permission, which by default enables all the permissions to the assigned user.
Part 2: How to Make and Add Roles in Discord on Computer
The desktop app and Browser resemble the mobile apple a lot. The process of assigning roles and configuring members is more or less the same across devices. First, you need to create roles and define their authority before assigning these roles to some members.
How to create roles in Discord?
Before you can assign roles, you need a server. Once you have created your Discord server, start crafting the structure.
- Open your server and right-click on it.
- From the menu that appears, tap server settings.
- Name the role suitably. It should be descriptive of the authority.
- Tap on the plus sign that appears on the top right of the page.
- Here, you can change the title off the roll and even choose the color.
- Now comes the time to grant some permissions. These are basically the authority that you gave to every profile.
- When you are done, save the changes.
How to Assign Roles to Members in Discord?
To be able to assign roles, you should first create them
- Once again, hit that right button on your server and go to server settings.
- From the menu that appears to the left, ‘choose members’ under user management.
- Here, you will see the list of all the members on your server, tap the Plus sign that is right beside the username.
- From the drop-down menu that appears, select a role you want to assign to that member.
- You will notice that the color changes as per your settings. And this is how you assign roles to a server.
Part 3: How to Manage Roles in Discord?
After you learn how to make roles in Discord, you might want to manage them.
If you have got the hang of creating roles, then managing them is no different. Whenever the server gets crowded, you can create more roles or modify the existing ones. A smaller server can run smoothly with just an admin and an ‘everyone’ role.
The quickest and easiest way to manage your bloating server is to let all members be ‘everyone’ and adjust permissions accordingly. So, whenever members enter your server, they will automatically be assigned the common role.
Further, you can easily figure out what roles you have assigned to whom. Due to these colors, the other members can identify moderators, admins, or other roles.
Part 4: How to Delete Roles in Discord?
Honestly, removing Discord roles easier than setting them up. There are hardly a few steps that you need to follow for role removal.
- place the cursor on the server, and hit the right-click.
- From the list, choose server settings. Then click on roles.
- From the roles window, tap on the role that you wish to delete.
- Towards the bottom, you will see the option to delete the role.
- Press ok to confirm.
Part 5: How to Add Roles on Discord Mobile?
Like we mentioned earlier, the user interface of Discord is similar across devices. So, there is little difference between the process of creating and managing roles. But it can be baffling for beginners, so here’s a brief!
1. How to create roles in Discord mobile app?
Before you can assign roles, you have to create them.
- Open your server.
- Tap on the arrow beside the server’s title. A drop-down menu will appear. Select ‘server settings’ from that.
- Tap on ‘Roles.’ A common role, ‘everyone’ is assigned to all the members who have basic permissions enabled for everyone.
- Tap the plus sign and add a role.
- Give the role a color and describe it in a few words.
- Go through the permissions and enable the ones that fit the role.
- Save the changes.
You can repeat this multiple times to create more roles.
2. How to Assign Roles in Discord mobile app?
- Head over to settings and select ‘Members.’
- Select the members you want to assign roles to.
- Tick the boxes beside each member’s name for the roles you are assigning them.
Save the changes, and you are good to go! You can assign multiple roles to a member.
Part 6: FAQs about Discord Server Roles
Just some obvious things you might wonder about.
- How to make someone admin on Discord?
Making someone admin is the same as assigning other roles. Open your server and go to server settings.
- From there, select ‘roles’ from the left pane.
- Create a new role.
- Name the role ‘admin’ or an equivalent title.
- Adjust the setting related to sorting out role members with other members.
- Go to general permissions and tick the ‘Administrator’ option.
- Hit the ‘save changes’ button at the bottom.
- Now it’s time to assign the role to someone. Right-click on the user that you want to assign the role.
- Choose ‘roles’ from the drop-down list and select ‘Admin.’
And now your server has an admin!
- How can I assign roles to new users in Discord automatically?
By default, every member gets the role of ‘everyone’ on the server. However, you can customize this and add the MEE6 bot for automatic role allocation.
- Why can’t I manage the server even I am an admin on the server?
This is likely to happen if the server owner gave you the role of admin, but the permissions are disabled. You can ask the owner to enable the permissions for your user ID.
Richard Bennett
Richard Bennett is a writer and a lover of all things video.
Follow @Richard Bennett
Top Free Designer for Discord Emblems - Download Links Included
Best Free Discord Logo Maker | Updated 2024
Richard Bennett
Mar 27, 2024• Proven solutions
Discord’s a great tool for getting together with people who share your interests and sharing content, ideas and discussions. The only thing is, most people have quite a few interests, and so your server is likely to be fighting for attention amongst many other servers. Users can join up to 100, after all. So, a good Discord server logo is essential, as it makes it easier for your server to stand out and be found. This article will look at the best free Discord server logo makers.
- Part 1: Best Free Discord Server Logo Maker
- Part 2: Discord Logos and Icons - Free Download Sites
- Part 3: Making A Logo for Your Discord Server Channel Tips
- Part 4: FAQs about Discord Logo and Icon
Part 1: Best Free Discord Server Logo Maker
We’ve picked out some of the best free logo makers, so you can customize your own Discord server logo.
1 Logo.Bot
Logo.Bot uses AI to generate your logo for you, so that you don’t need to worry about drawing anything. It can create a professional logo that you can easily download to use for your Discord server.
Firstly, it’ll ask for your ‘Company’ information – just use the name and description of your Discord server.
![]()
You’ll then be asked to choose a colour scheme, so pick one that is either relevant to your server or that you simply like. You can pick up at most 3 colors.
![]()
Next, it’ll give you a list of icons to choose from based on your details already entered, but you can still search for new keywords if you want. Choose up to five icons.
![]()
Logo Bot will then generate 3 logos based on the information provided before. You can then edit your favourite options using the site’s built-in tools.
![]()
Once you’re done, you can download a free version of your logo as a low-resolution JPG. The problem is that it’ll come with a watermark. If you want the version that is best suited to Discord without a watermark, you’ll need to pay a one-off fee of $20.
![]()
2 MyBrandNewLogo
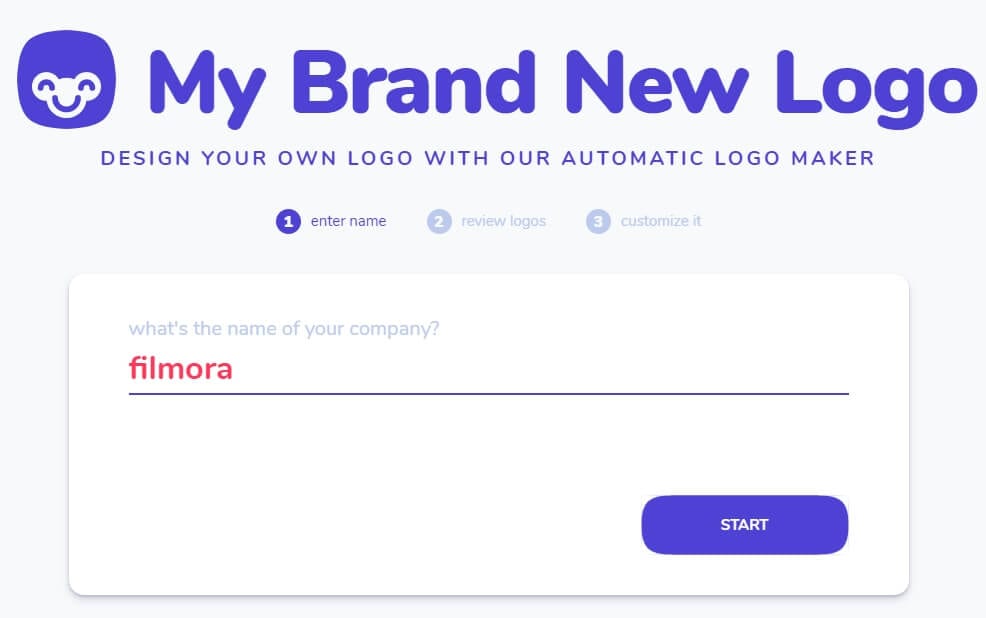
MyBrandNewLogo is another option that makes it simple to create Discord logos. They even have a specialist tool just for Discord. You’ll start by giving the name of your server (‘Company’) again.
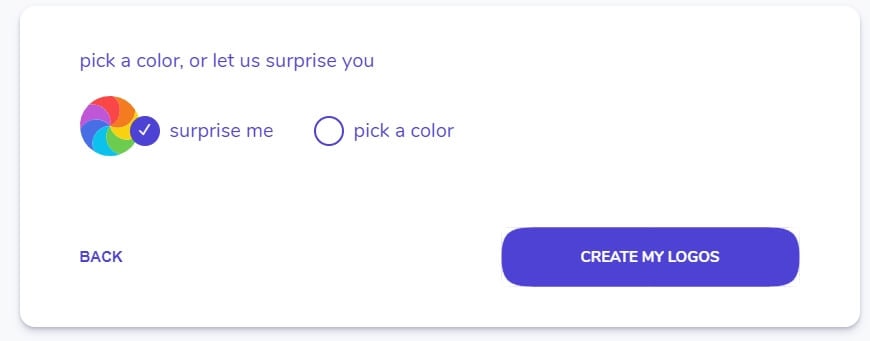
Then, you can enter some keywords to help it choose the icons to use as part of your logo.
With MyBrandNewLogo, the colour options are slightly more limited than with Logo.Bot, but you can also ask it to surprise you if you aren’t too fussed about the colour to use.
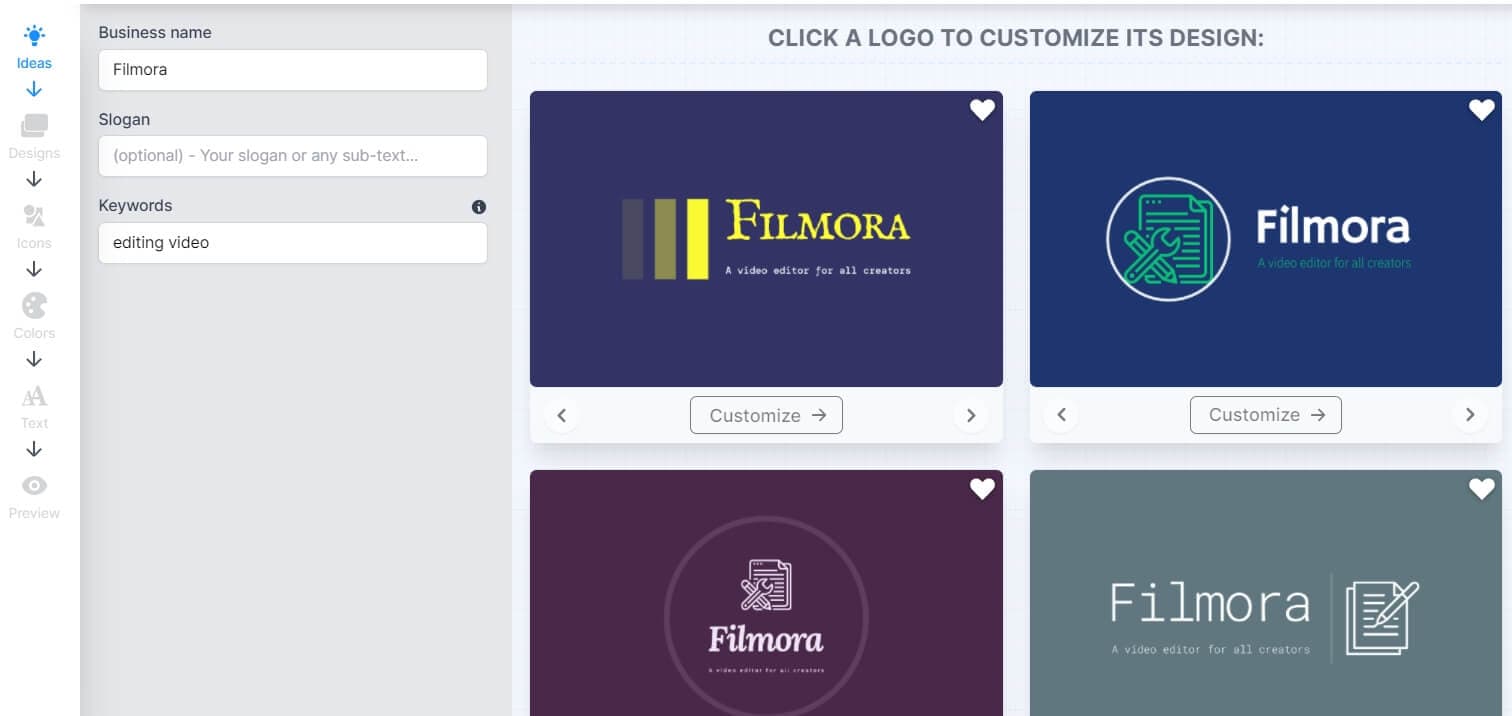
From there, you’ll again be shown a mix of icons and fonts combined to create a logo. You can then edit the layout of your logo, the background, add a slogan, change the icon and more to tailor it to your exact specifications.

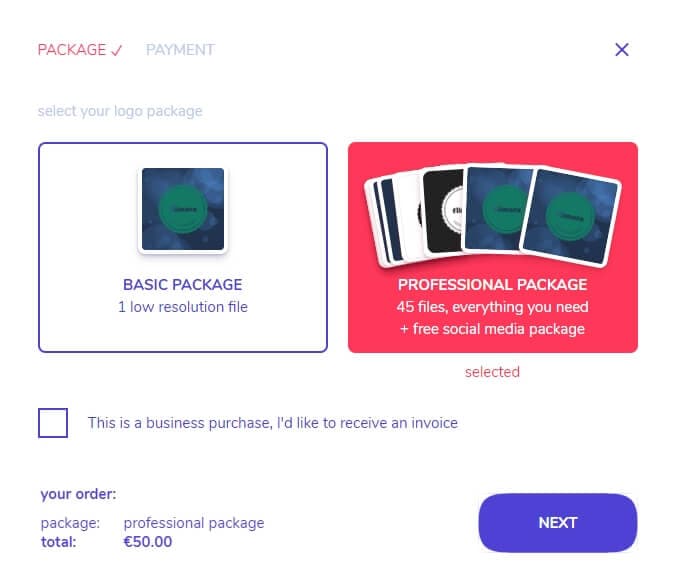
Unfortunately again you do need to sign up and pay to download your logo. A basic package with one low-res file is €20, while the Professional pack costs €50.
3 Logo.com
The third option is https://logo.com/ . Here you dive straight in – as soon as you’ve entered your Discord server name. You will see a list of logos that you can use as a base design. So it automatically reads your server name and searches for icons related to the term. For the generated logo files, click the Custmoize button to adjust.
You can then work your way down the list on the left, editing the icons to decide where you want it to live, and how big it should be. You can adjust its design, the icons on the logo, the color and the colour themes of your logo, the text, including the font and any changes to how it’s displayed.
![]()
Once done, you can then preview your final logo. And yet again, you need to pay to download the full version. It’s $19.99 for a high-res PNG and JPG, but if you want a scalable Vector you need to pay $59.99 for the Starter Kit.
4 BrandCrowd
BrandCrowd is another logo creation site you could use, where again you simply enter your Discord server name and it’ll instantly generate icons for you to customize. Unlike Logo.com it doesn’t have a simple step-by-step editor, but instead it’s a lot more powerful, with various tools you can use to adjust shadows, layers and more.
![]()
Once you’ve played with the editor, you can click Preview to see how it’ll look on a dummy website (or even on merch), then Download to sign up and access the files…but again they are hidden behind a paywall. BrandCrowd is one of the more expensive options too – a one off fee is $45 to get the high res PNG and JPG as well as vector files, or you can subscribe for $15 per month to unlock unlimited edits and downloads. The previews are watermarked to prevent you from just taking them.
![]()
5 Kapwing
The final recommendation is Kapwing . Kapwing is, by far, the most comprehensive tool we’ve suggested so far. It isn’t just for creating logos, but working on all kinds of exportable content. The link we’ve included will take you straight to a dedicated workspace for Discord logos, but you’ll then need to upload all of your own imagery (although you can search Kapwing’s own resource collection) and make changes. It requires more skill, but the end results are more professional.
Using the menu at the top, you can play with text, add extra elements, or use the image tool to upload your own files or search Kapwing’s database.
![]()
Once you’ve edited your logo, it’s already pre-set to download at 512 x 512. You’ll just need to create an account to access your download without a watermark, but it is free. The only drawback is that files are only available as JPG or GIF – so you can’t use a PNG with a transparent background.
Unfortunately, most of the ‘free’ online tools for creating Discord server logos aren’t actually free, or they come with limitations. There are other options than using online tools to create a logo however.
Part 2: Discord Logos and Icons - Free Download Sites
Rather than creating your own logo, you might want a helping hand – these download sites let you choose an existing icon, and edit it to your own tastes.
1 Icons8
Icons8 is by far the best option of all the free icon download sites. It’s really easy to use, with clear categorization to make finding the perfect logo easier. You can download each icon in PNG or SVG format (or even PDF, if you wanted to for some reason) and customize the size. You can embed the HTML directly and, if you download the Lunacy editor, make tweaks to it before you download it. It’s super simple, and the only minor drawback is you’ll need to register an account, but it’s free.
![]()
2 Iconfinder
Iconfinder is also relatively easy to navigate, and it also lets you download a PNG or SVG version of the file in a size that you prefer. You can’t edit, nor can you embed the HTML, and many of the icons are behind a paywall. However when you do find a free one, you can download it without a subscription.
![]()
3 BrandEPS
BrandEPS is another popular name for icon downloading but it specializes in existing brand logos. If you want something distinct and unique, you won’t find it here. But if your Discord server is about an existing brand, you can probably download its logo here in either a vector EPS or as part of a zip file with SVG, PNG and JPG versions. No need to sign up.
![]()
4 FreePNGLogos
FreePNGLogos is another database of existing company icons and logos, and as you can probably guess from the name, they’re available to download as PNG files. The sizes are limited to the size it’s been uploaded as, and there’s no easy way to browse, you’ll need to search using key terms and hope you find something suitable.
![]()
5 SeekLogo
Finally, SeekLogo has a large database of corporate logos but they’re not optimized icons, they’re full size logos including full business names. Downloads are mainly in SVG format, and again the option to browse is minimal, you’ll be relying on search terms and the categorization of icons isn’t the most intuitive.
Part 3: Making A Logo for Your Discord Server Channel - Tips
When you’re naming your server, a longer name might be harder to remember. If you can create a name that you can then abbreviate, you can include the abbreviation in your logo design, so it’s even easier to find your server. Even better, if it can be an acronym (an abbreviation that also forms its own short word) then it’ll be even more memorable.
The other key tip when creating your Discord server logo is to embrace your creativity! Don’t be scared to really make your logo stand out, especially when it’s around a topic that other Discord servers may exist for. You need to make it easy for your server logo to be understood and remembered, and a bold logo is ideal.
FAQs
1. What is a Discord Logo?
A Discord logo is an icon that’s associated with your Discord server. For any Discord user, the servers they’re a member of are listed by logo, so making a distinctive one that is clearly associated with your server is important for helping people to easily find the server they’re looking for.
2. What is the Best Size for Discord Channel Logos?
The size of your Discord logo is important, because if it’s too small then it means the logo will be poor quality, while if it’s too large then finer details just won’t be visible – the logo is only ever shown as a small icon. Aim for 512 x 512 pixels.
3. What is the Best Discord Logo Shape?
Discord logos are displayed as circles, so the easiest way to make sure your logo is properly displayed is to create it as a circle. If you upload a logo in a different shape, you risk having part of your logo cut off, or it being centered incorrectly.
4. How to Change the Server Logo on Discord?
When you first create your Discord server, you’ll be shown a ‘Getting started’ list where one of the actions is to personalize the server with an icon.
If you’ve already established your Discord server and no longer see this option, then you can simply right-click on your server to find a menu option for the server settings, where you’ll also find the option to update your server logo.
![]()
Richard Bennett
Richard Bennett is a writer and a lover of all things video.
Follow @Richard Bennett
Richard Bennett
Mar 27, 2024• Proven solutions
Discord’s a great tool for getting together with people who share your interests and sharing content, ideas and discussions. The only thing is, most people have quite a few interests, and so your server is likely to be fighting for attention amongst many other servers. Users can join up to 100, after all. So, a good Discord server logo is essential, as it makes it easier for your server to stand out and be found. This article will look at the best free Discord server logo makers.
- Part 1: Best Free Discord Server Logo Maker
- Part 2: Discord Logos and Icons - Free Download Sites
- Part 3: Making A Logo for Your Discord Server Channel Tips
- Part 4: FAQs about Discord Logo and Icon
Part 1: Best Free Discord Server Logo Maker
We’ve picked out some of the best free logo makers, so you can customize your own Discord server logo.
1 Logo.Bot
Logo.Bot uses AI to generate your logo for you, so that you don’t need to worry about drawing anything. It can create a professional logo that you can easily download to use for your Discord server.
Firstly, it’ll ask for your ‘Company’ information – just use the name and description of your Discord server.
![]()
You’ll then be asked to choose a colour scheme, so pick one that is either relevant to your server or that you simply like. You can pick up at most 3 colors.
![]()
Next, it’ll give you a list of icons to choose from based on your details already entered, but you can still search for new keywords if you want. Choose up to five icons.
![]()
Logo Bot will then generate 3 logos based on the information provided before. You can then edit your favourite options using the site’s built-in tools.
![]()
Once you’re done, you can download a free version of your logo as a low-resolution JPG. The problem is that it’ll come with a watermark. If you want the version that is best suited to Discord without a watermark, you’ll need to pay a one-off fee of $20.
![]()
2 MyBrandNewLogo
MyBrandNewLogo is another option that makes it simple to create Discord logos. They even have a specialist tool just for Discord. You’ll start by giving the name of your server (‘Company’) again.
Then, you can enter some keywords to help it choose the icons to use as part of your logo.
With MyBrandNewLogo, the colour options are slightly more limited than with Logo.Bot, but you can also ask it to surprise you if you aren’t too fussed about the colour to use.
From there, you’ll again be shown a mix of icons and fonts combined to create a logo. You can then edit the layout of your logo, the background, add a slogan, change the icon and more to tailor it to your exact specifications.
Unfortunately again you do need to sign up and pay to download your logo. A basic package with one low-res file is €20, while the Professional pack costs €50.
3 Logo.com
The third option is https://logo.com/ . Here you dive straight in – as soon as you’ve entered your Discord server name. You will see a list of logos that you can use as a base design. So it automatically reads your server name and searches for icons related to the term. For the generated logo files, click the Custmoize button to adjust.
You can then work your way down the list on the left, editing the icons to decide where you want it to live, and how big it should be. You can adjust its design, the icons on the logo, the color and the colour themes of your logo, the text, including the font and any changes to how it’s displayed.
![]()
Once done, you can then preview your final logo. And yet again, you need to pay to download the full version. It’s $19.99 for a high-res PNG and JPG, but if you want a scalable Vector you need to pay $59.99 for the Starter Kit.
4 BrandCrowd
BrandCrowd is another logo creation site you could use, where again you simply enter your Discord server name and it’ll instantly generate icons for you to customize. Unlike Logo.com it doesn’t have a simple step-by-step editor, but instead it’s a lot more powerful, with various tools you can use to adjust shadows, layers and more.
![]()
Once you’ve played with the editor, you can click Preview to see how it’ll look on a dummy website (or even on merch), then Download to sign up and access the files…but again they are hidden behind a paywall. BrandCrowd is one of the more expensive options too – a one off fee is $45 to get the high res PNG and JPG as well as vector files, or you can subscribe for $15 per month to unlock unlimited edits and downloads. The previews are watermarked to prevent you from just taking them.
![]()
5 Kapwing
The final recommendation is Kapwing . Kapwing is, by far, the most comprehensive tool we’ve suggested so far. It isn’t just for creating logos, but working on all kinds of exportable content. The link we’ve included will take you straight to a dedicated workspace for Discord logos, but you’ll then need to upload all of your own imagery (although you can search Kapwing’s own resource collection) and make changes. It requires more skill, but the end results are more professional.
Using the menu at the top, you can play with text, add extra elements, or use the image tool to upload your own files or search Kapwing’s database.
![]()
Once you’ve edited your logo, it’s already pre-set to download at 512 x 512. You’ll just need to create an account to access your download without a watermark, but it is free. The only drawback is that files are only available as JPG or GIF – so you can’t use a PNG with a transparent background.
Unfortunately, most of the ‘free’ online tools for creating Discord server logos aren’t actually free, or they come with limitations. There are other options than using online tools to create a logo however.
Part 2: Discord Logos and Icons - Free Download Sites
Rather than creating your own logo, you might want a helping hand – these download sites let you choose an existing icon, and edit it to your own tastes.
1 Icons8
Icons8 is by far the best option of all the free icon download sites. It’s really easy to use, with clear categorization to make finding the perfect logo easier. You can download each icon in PNG or SVG format (or even PDF, if you wanted to for some reason) and customize the size. You can embed the HTML directly and, if you download the Lunacy editor, make tweaks to it before you download it. It’s super simple, and the only minor drawback is you’ll need to register an account, but it’s free.
![]()
2 Iconfinder
Iconfinder is also relatively easy to navigate, and it also lets you download a PNG or SVG version of the file in a size that you prefer. You can’t edit, nor can you embed the HTML, and many of the icons are behind a paywall. However when you do find a free one, you can download it without a subscription.
![]()
3 BrandEPS
BrandEPS is another popular name for icon downloading but it specializes in existing brand logos. If you want something distinct and unique, you won’t find it here. But if your Discord server is about an existing brand, you can probably download its logo here in either a vector EPS or as part of a zip file with SVG, PNG and JPG versions. No need to sign up.
![]()
4 FreePNGLogos
FreePNGLogos is another database of existing company icons and logos, and as you can probably guess from the name, they’re available to download as PNG files. The sizes are limited to the size it’s been uploaded as, and there’s no easy way to browse, you’ll need to search using key terms and hope you find something suitable.
![]()
5 SeekLogo
Finally, SeekLogo has a large database of corporate logos but they’re not optimized icons, they’re full size logos including full business names. Downloads are mainly in SVG format, and again the option to browse is minimal, you’ll be relying on search terms and the categorization of icons isn’t the most intuitive.
Part 3: Making A Logo for Your Discord Server Channel - Tips
When you’re naming your server, a longer name might be harder to remember. If you can create a name that you can then abbreviate, you can include the abbreviation in your logo design, so it’s even easier to find your server. Even better, if it can be an acronym (an abbreviation that also forms its own short word) then it’ll be even more memorable.
The other key tip when creating your Discord server logo is to embrace your creativity! Don’t be scared to really make your logo stand out, especially when it’s around a topic that other Discord servers may exist for. You need to make it easy for your server logo to be understood and remembered, and a bold logo is ideal.
FAQs
1. What is a Discord Logo?
A Discord logo is an icon that’s associated with your Discord server. For any Discord user, the servers they’re a member of are listed by logo, so making a distinctive one that is clearly associated with your server is important for helping people to easily find the server they’re looking for.
2. What is the Best Size for Discord Channel Logos?
The size of your Discord logo is important, because if it’s too small then it means the logo will be poor quality, while if it’s too large then finer details just won’t be visible – the logo is only ever shown as a small icon. Aim for 512 x 512 pixels.
3. What is the Best Discord Logo Shape?
Discord logos are displayed as circles, so the easiest way to make sure your logo is properly displayed is to create it as a circle. If you upload a logo in a different shape, you risk having part of your logo cut off, or it being centered incorrectly.
4. How to Change the Server Logo on Discord?
When you first create your Discord server, you’ll be shown a ‘Getting started’ list where one of the actions is to personalize the server with an icon.
If you’ve already established your Discord server and no longer see this option, then you can simply right-click on your server to find a menu option for the server settings, where you’ll also find the option to update your server logo.
![]()
Richard Bennett
Richard Bennett is a writer and a lover of all things video.
Follow @Richard Bennett
Also read:
- [New] Fabricate Iconic Disco Flags Tailoring Them for Your Account Display for 2024
- Premier Font Design Software for Discord Platforms
- 2024 Approved Mastering Emoji Integration for a More Engaging Discord Statue
- [Updated] Choosing the Ideal Chat App for Businesses Discord vs Skype
- [Updated] 2024 Approved Explore Nitro A Deep Dive Into Discord's Elite Service
- [New] In 2024, A Comprehensive Overview of Adding Roles in Discord
- [Updated] Becoming a Pro at Discord Message Aesthetics
- [New] Elite Discord Capture Apps On-the-Go Recording Made Easy
- [New] Unlock Partner Status A Step-by-Step Guide to Discord Verification for 2024
- Mastering Your DiscoVoice Experience 2023'S Leading Tools Reviewed
- [Updated] In 2024, Elevate Conversational Impact How to Pin Messages Wisely in Discord
- Daredevil Daters Unite on Discord for 2024
- Step-by-Step How to Delete a Discord Server
- [Updated] In-Depth Tutorial Effortlessly Posting Videos on Discord
- Powerful Presentations Elevate Your Screen Share on Discord
- [Updated] Unveiling the Secrets of Effective Dispute Resolution on Discord
- In 2024, Deciphering Disco's Nitro VIP Benefits & Securing Your Own Version
- [Updated] Enhancing Conversations The Essential Guide to Using GIFs on Discord
- [Updated] Comparative Review Finding Your Team's Preferred Chat Application - Slack or Discord, In 2024
- In 2024, Perfecting Pitch & Volume in Discord Chats via VoiceMod Adjustments
- [New] Designing an Attractive Pfp for Discord Chat Rooms
- [New] Enabling Cross-Platform Play A Step-by-Step Guide for 2024
- [New] In 2024, Inside Look Everything About Discord Stickers
- [Updated] Effective Communication in Live Discovers with Our Guide for 2024
- Updated Top-Rated Vocal Transformer & Harmonizer Tool for Performers
- What to Do if Google Play Services Keeps Stopping on Vivo V29e | Dr.fone
- Unlock the Potential of Your Feed with Mass Photo & Video Posting for 2024
- [New] 2024 Approved How to Use Filters on Instagram 2023?
- In 2024, A Quick Guide to Motorola Razr 40 FRP Bypass Instantly
- 2024 Approved Detecting Phony Instagram Connections Efficiently
- Updated In 2024, Trimming Videos Online? Heres How to Do It with Kapwing
- Unlock Your iPhone 8 Plus in Minutes with ICCID Code Everything You Need to Know
- [Updated] In 2024, Harness the Power of Instagram's Hidden Features
- In 2024, How to Unlock iCloud lock from your Apple iPhone 6 and iPad?
- Updated In 2024, A Vacation Slideshow Is a Great Way to Relive the Vacation Memories and Also Share Them with Your Loved Ones. If You Are Looking for Ways to Create a Slideshow in Just a Few Minutes, We Will Help You with the Best Tool
- New In 2024, Syncing Audiovisual Elements Adding Soundtracks to Video in Adobe Premiere
- Updated Calculate Aspect Ratios with Ease Top 5 Online Tools for 2024
- Updated 12+ Stunning Instagram GIF Stickers
- In 2024, How to Mirror PC Screen to Honor 90 Lite Phones? | Dr.fone
- Complete Guide to Hard Reset Your Xiaomi Redmi Note 13 Pro 5G | Dr.fone
- Title: "[New] 2024 Approved Incorporating Leadership in Your Discord Network"
- Author: Timothy
- Created at : 2024-06-20 01:40:48
- Updated at : 2024-06-21 01:40:48
- Link: https://discord-videos.techidaily.com/new-2024-approved-incorporating-leadership-in-your-discord-network/
- License: This work is licensed under CC BY-NC-SA 4.0.
