
[New] Top 9 Discord Banner Makers and How to Make a Profile Banner
Top 9 Discord Banner Makers and How to Make a Profile Banner
Top 9 Discord Banner Makers and How to Make One Easily

Richard Bennett
Mar 27, 2024• Proven solutions
A Discord banner is best to customize your Discord account and make it more convincing. It allows you to improvise your profile icon with one of your favorite movies, games, memes, or anime characters. You can even decorate the space with your face.
Before looking at the steps to create a Discord profile banner, it’s crucial to note that only Nitro users can use this feature. You’ll have to settle for a limited list of 10-15 pre-made banners if you’ve not yet accessed the Nitro plan. These Discord banners feature solid colors and basic designs. What’s more, you can’t modify your banner for Discord on the Discord mobile apps. It’s only accessible via desktop versions.
In this article, we’ll discuss the top 9 Discord banner makers, plus a helpful section on how to create your Discord banner.
- Part 1: Top 9 Discord Banner Makers in 2022 [with free templates]
- Part 2: How to Create a Discord Banner with Kapwing
- Part 3: FAQs about Discord Banner
Part 1: Top 9 Discord Banner Makers in 2022 [with free templates]
1. Visme
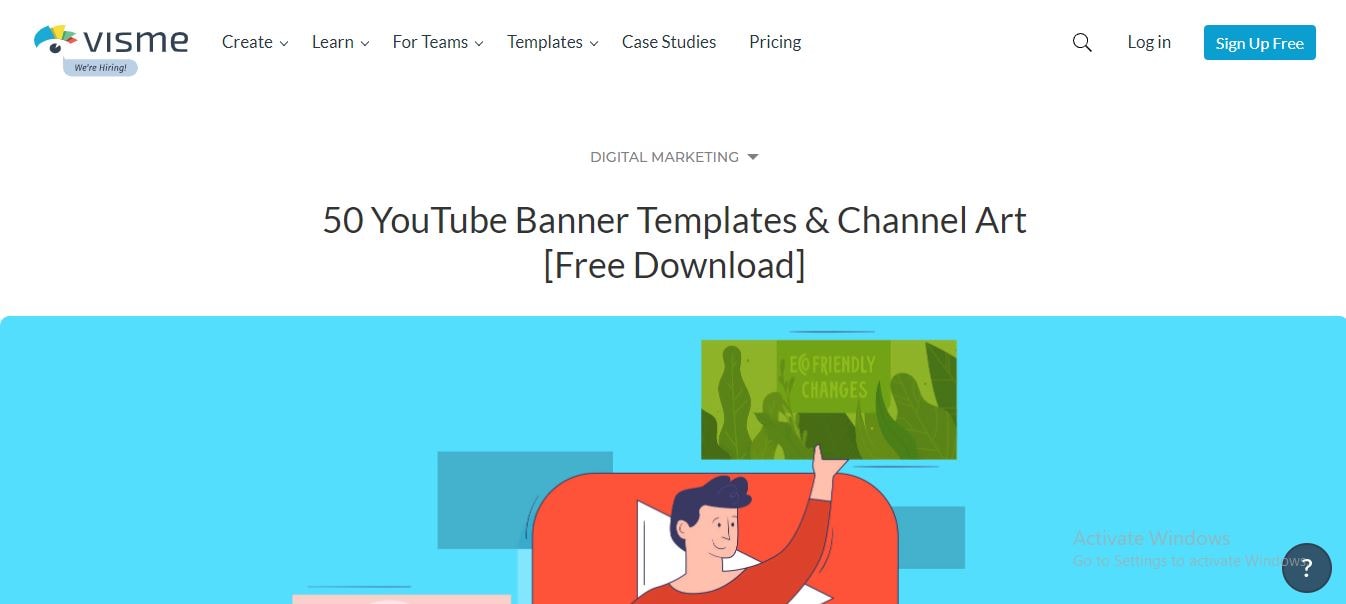
Visme offers 50 plus free channel art editable templates through their online graphics service. However, it has a bit more complex UI than some of the other makers on this list, but the free templates are wonderful, and you can upload your images to edit with them.
2. Fotor
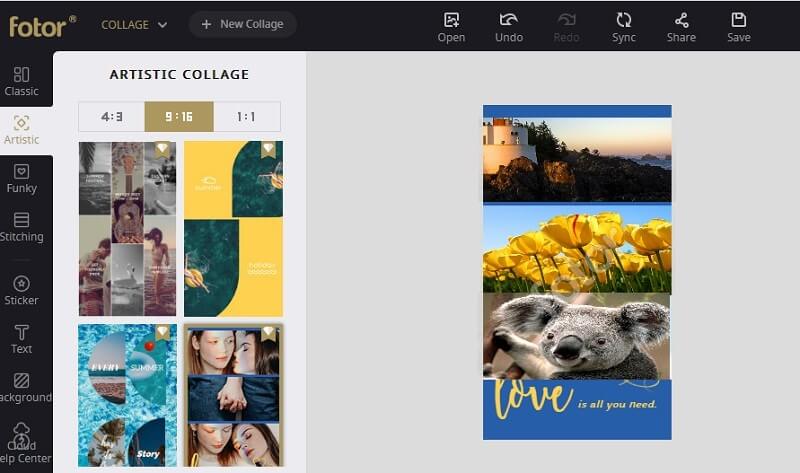
Another graphics program with free templates is Fotor. It is easy to use – perhaps the most accessible program on this list. You click on the element in your template and then click on what you want to replace it with, and thus you don’t even have to use the drag and drop feature in the ‘background’ tab. Of course, you can upload your photos as well.
There are subscription options in Fotor. Thus, you get a watermark for your project unless you pay for premium services, but there are enough free options to satisfy most creators.
3. Snappa
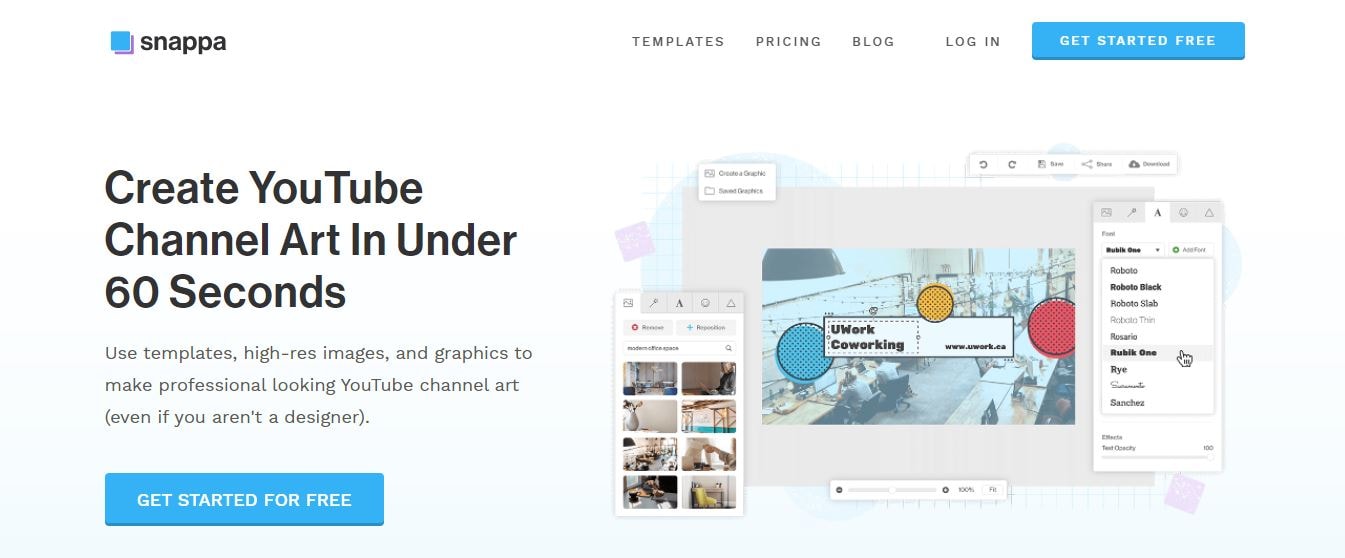
If you want to get something quick in design, Snappa is the right choice. First, choose one of the free templates under the YouTube Channel Art under the Headers tab. Then it’s just a matter of elements swapping in the template with ones that suit your channel.
Snappa shows you the ideal placement section for different devices while you edit.
4. Crello
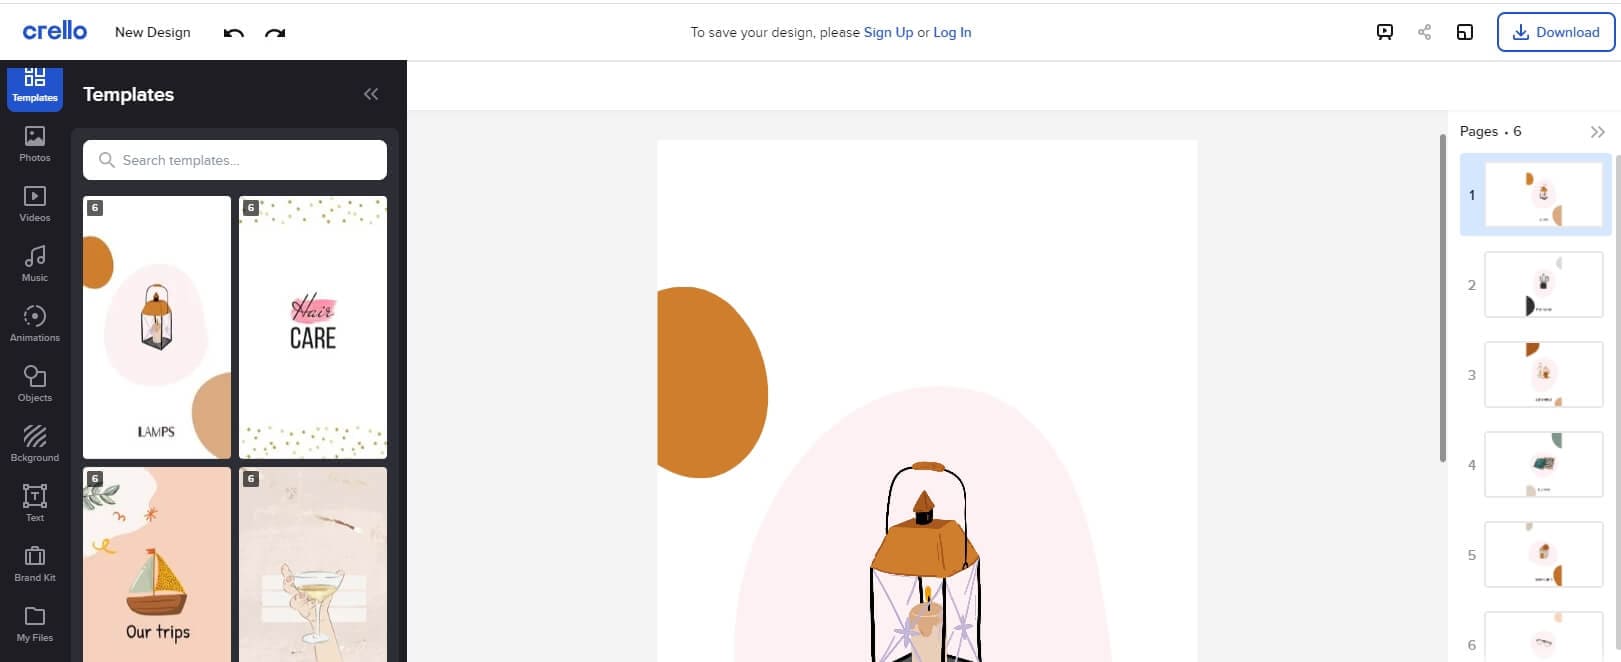
Crello provides ten free examples of channel art templates through their blog, and you can rightly edit them on the site.
Crello is a simple visual editor designed for social media and marketing creators, meaning that non-design people can quickly jump into this platform. Beyond the free text options and templates, however, most of their backgrounds and stock photos cost $1. You’re required to use the default images to use Crello for free or upload your own.
5. Design Wizard
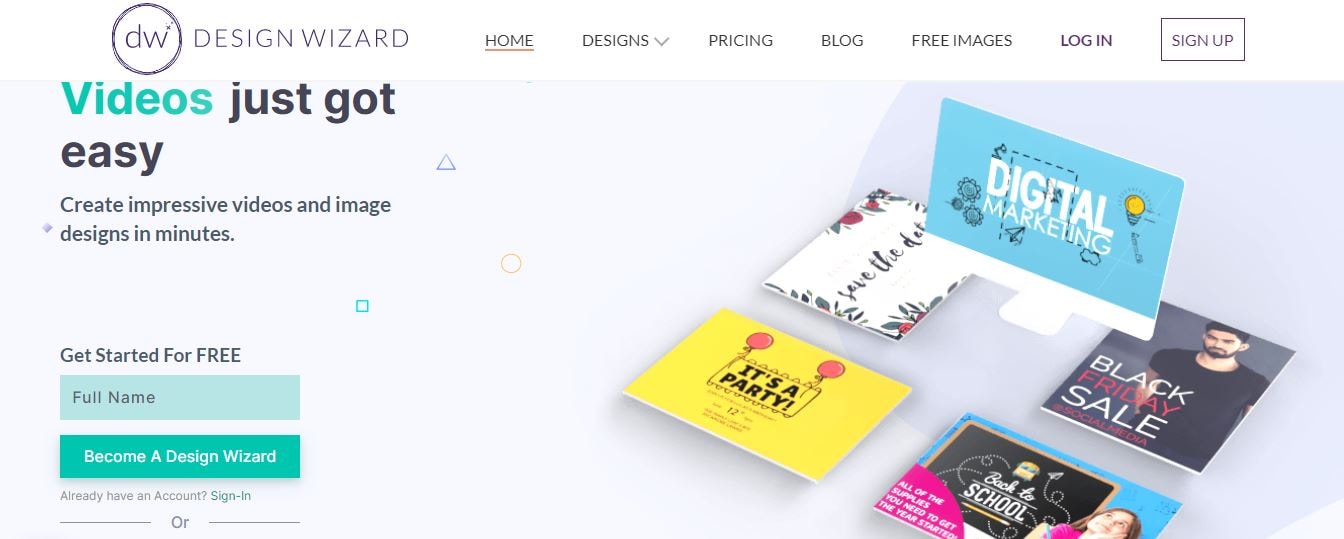
This is another Discord banner maker with a few free templates to design or craft anything out through personalization. One of the best valuable abilities of the design wizard is that it will display the ‘safe zone’ – the area of your Discord banner that will show up on any device screen – so you can design keeping those dimensions in mind.
Also, make sure to delete the safe zone marker before you export.
6. Canva
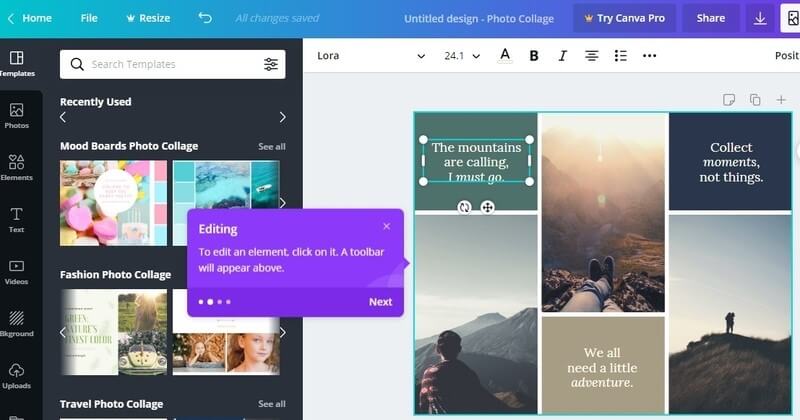
Canva is one of the famous and free channel art makers. It is simple with a drag-and-drop editor. Also, the program will automatically resize images to adjust easily within the Discord banner space. It has a variety of free resources like stock photos. Some resources are paid ($1), but most of them are free.
7. Adobe Spark
While editing the Discord banner templates via Adobe Spark, click on the resources in the template and then select the images/fonts/etc., that you want to use. Resources like filters are also very accessible.
The only drawback of Spark is that the watermarks are in free downloads. However, the watermark is quite small, meaning that it won’t show up for viewers as it is placed in the bottom-right corner watching your channel on either mobile devices or computers.
Note: Whenever you click ‘Create your YouTube channel art,’ it will show you a thumbnail template instead of a banner template. Hit the Resize button in the side menu and switch to your exported images or the channel art.
8. BeFunky
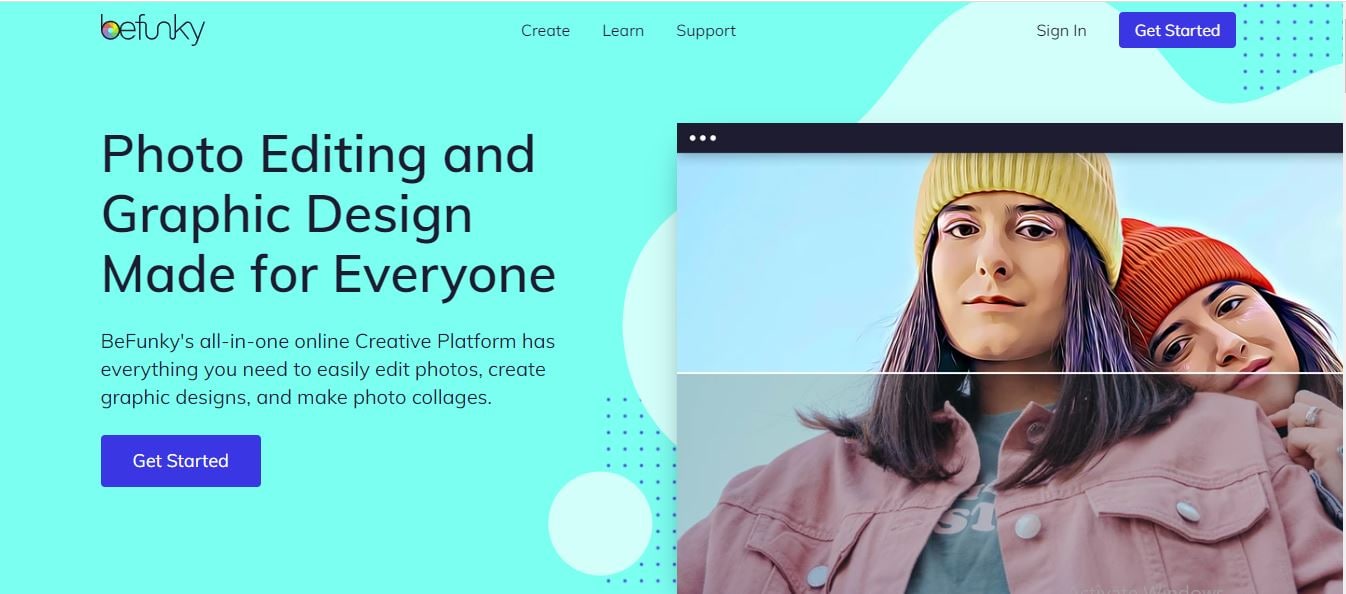
This is a graphics creator platform that doubles as a Discord profile banner maker as well. You need to head towards BeFunky’s ‘Designer’ tool and look for the channel art templates under ‘YouTube’ and ‘Social Media Headers.’ However, we won’t find here any free art templates.
9. Wondershare PixStudio
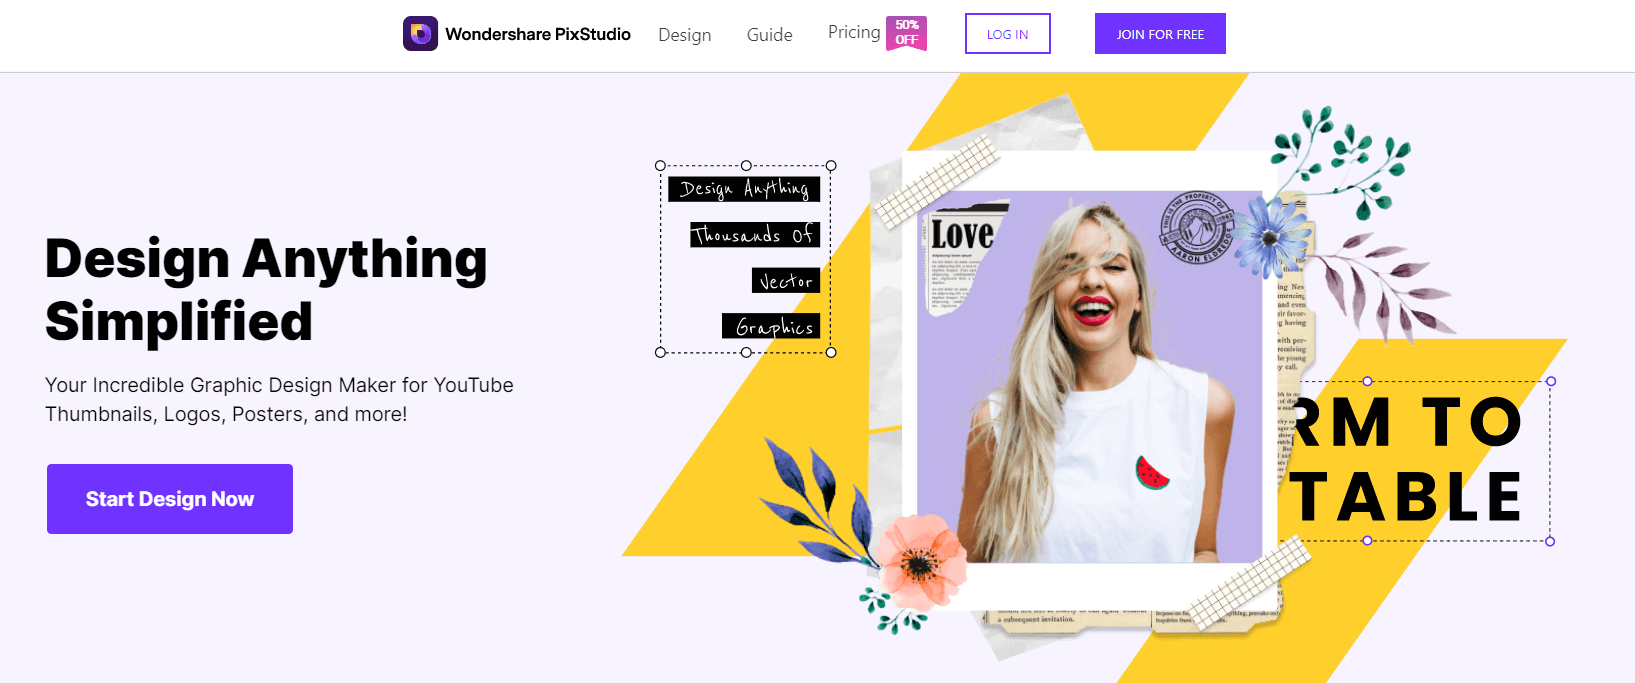
Wondershare PixStudio has certain unique features to erase the image background. With a single tap only, you can quickly remove the image background; then, you can use your image flexibly. And, it’s just a subscription of $7.99 per month to use the features.
Part 2: How to Create a Discord Banner with Kapwing
Since your server banner will take up an important place in your Discord server, you must make yours look just right. You have to consider the dimensions, formatting, and arrangement of the Discord profile banner.
- Use optimal dimensions
- Make sure the important parts are visible
- How to upload your banner image
Step 1: Use Optimal Dimensions
Discord recommends that your image have optimal dimensions of 960x540 at least, which is different than 16:9 images. You can use a slightly larger 16:9 aspect ratio for great appearances, like 1920x1080 or even 2560x1440.
With Kapwing Studio, you can crop any photo to a 16:9 aspect ratio and resize it to the given dimensions. Visit Kapwing.com in your browser, click Start Editing, and paste the link to a photo you found online or upload your image directly on the Studio.
Now, click the Crop tool to make your photo 16:9, and head towards the Output Size options to make your aspect ratio larger than 960x540.
Step 2: Make Sure the Important Parts Are Visible
This is the essential part of setting up your Discord banner – making sure your banner is properly visible on the Discord.
Your banner image’s safe zone is that you should keep ideal sections out of the top 28% since that’s where your server’s options and name button will show.
The portion is a bit covered with text about the top 22% of your Discord banner photo. So, keep important sections and the text of your image below the top 120 pixels on a 960x540 Discord banner.

Source: kapwing.com
Now, you must note that the Discord profile banner will display as it starts fading about halfway down until merging in with the bottom-edge dark grey area of Discord.
And, you can smoothly edit any design elements, titles, text, or essential visuals at the bottom of the Discord profile banner. You should relocate them closer to the frame’s center to be visible.

Source: kapwing.com
Hit the Crop button in the Kapwing Studio to add text boxes for banner personalization and horizontally flip your images to keep elements aside from the upper left corner. Hit the green Export Image button after you are over with cropping, then the Download button to save your banner to your device.
Step 3: Upload Your Banner Image
Adding a Discord profile banner is intuitive once your server boosts enough to reach level 2. Just open your server dropdown menu and hit the Server Settings, then choose “Upload Background.”
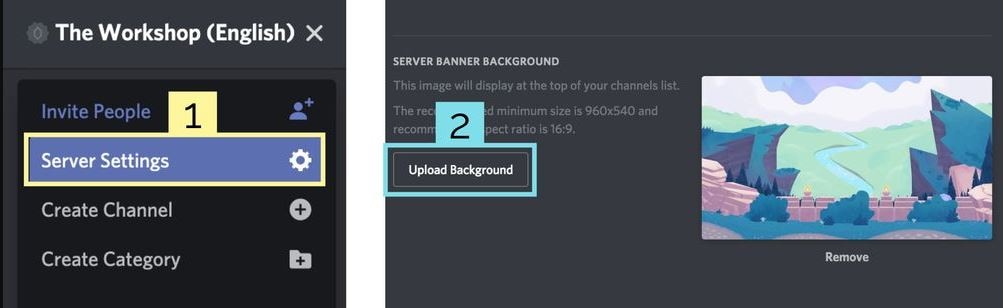
Source: kapwing.com
Here, look for the image in your camera roll or files and upload it to your Discord channel server. It’s that simple!
Part 3: FAQs about Discord Banner
1 - How do you make a banner on Discord?
You can consider various banner makers mentioned above to make a banner on Discord. However, you have to ensure compliance with Discord banner size requirements.
2 - How do I get free Discord banners?
You can find free custom Discord Banner images already optimized and cropped for the Discord banner. Browse thousands of profile banners in categories like animated, meme, etc., on pfps.gg website to get free discord banners.
3 – Can the Discord banner be GIF?
Yes, uploading a Discord banner in GIF format is allowed.
Conclusion
The ability to set a Discord banner is part of the Discord update called “Custom Profiles Premium.”
The feature is live on Discord, which means that everyone can modify or set Discord profile banners as per their likes and preferences. However, you must have access to Discord Nitro to change your profile banner. And, users who don’t have Discord Nitro are not allowed to set a profile banner.
Richard Bennett
Richard Bennett is a writer and a lover of all things video.
Follow @Richard Bennett
Richard Bennett
Mar 27, 2024• Proven solutions
A Discord banner is best to customize your Discord account and make it more convincing. It allows you to improvise your profile icon with one of your favorite movies, games, memes, or anime characters. You can even decorate the space with your face.
Before looking at the steps to create a Discord profile banner, it’s crucial to note that only Nitro users can use this feature. You’ll have to settle for a limited list of 10-15 pre-made banners if you’ve not yet accessed the Nitro plan. These Discord banners feature solid colors and basic designs. What’s more, you can’t modify your banner for Discord on the Discord mobile apps. It’s only accessible via desktop versions.
In this article, we’ll discuss the top 9 Discord banner makers, plus a helpful section on how to create your Discord banner.
- Part 1: Top 9 Discord Banner Makers in 2022 [with free templates]
- Part 2: How to Create a Discord Banner with Kapwing
- Part 3: FAQs about Discord Banner
Part 1: Top 9 Discord Banner Makers in 2022 [with free templates]
1. Visme
Visme offers 50 plus free channel art editable templates through their online graphics service. However, it has a bit more complex UI than some of the other makers on this list, but the free templates are wonderful, and you can upload your images to edit with them.
2. Fotor
Another graphics program with free templates is Fotor. It is easy to use – perhaps the most accessible program on this list. You click on the element in your template and then click on what you want to replace it with, and thus you don’t even have to use the drag and drop feature in the ‘background’ tab. Of course, you can upload your photos as well.
There are subscription options in Fotor. Thus, you get a watermark for your project unless you pay for premium services, but there are enough free options to satisfy most creators.
3. Snappa
If you want to get something quick in design, Snappa is the right choice. First, choose one of the free templates under the YouTube Channel Art under the Headers tab. Then it’s just a matter of elements swapping in the template with ones that suit your channel.
Snappa shows you the ideal placement section for different devices while you edit.
4. Crello
Crello provides ten free examples of channel art templates through their blog, and you can rightly edit them on the site.
Crello is a simple visual editor designed for social media and marketing creators, meaning that non-design people can quickly jump into this platform. Beyond the free text options and templates, however, most of their backgrounds and stock photos cost $1. You’re required to use the default images to use Crello for free or upload your own.
5. Design Wizard
This is another Discord banner maker with a few free templates to design or craft anything out through personalization. One of the best valuable abilities of the design wizard is that it will display the ‘safe zone’ – the area of your Discord banner that will show up on any device screen – so you can design keeping those dimensions in mind.
Also, make sure to delete the safe zone marker before you export.
6. Canva
Canva is one of the famous and free channel art makers. It is simple with a drag-and-drop editor. Also, the program will automatically resize images to adjust easily within the Discord banner space. It has a variety of free resources like stock photos. Some resources are paid ($1), but most of them are free.
7. Adobe Spark
While editing the Discord banner templates via Adobe Spark, click on the resources in the template and then select the images/fonts/etc., that you want to use. Resources like filters are also very accessible.
The only drawback of Spark is that the watermarks are in free downloads. However, the watermark is quite small, meaning that it won’t show up for viewers as it is placed in the bottom-right corner watching your channel on either mobile devices or computers.
Note: Whenever you click ‘Create your YouTube channel art,’ it will show you a thumbnail template instead of a banner template. Hit the Resize button in the side menu and switch to your exported images or the channel art.
8. BeFunky
This is a graphics creator platform that doubles as a Discord profile banner maker as well. You need to head towards BeFunky’s ‘Designer’ tool and look for the channel art templates under ‘YouTube’ and ‘Social Media Headers.’ However, we won’t find here any free art templates.
9. Wondershare PixStudio
Wondershare PixStudio has certain unique features to erase the image background. With a single tap only, you can quickly remove the image background; then, you can use your image flexibly. And, it’s just a subscription of $7.99 per month to use the features.
Part 2: How to Create a Discord Banner with Kapwing
Since your server banner will take up an important place in your Discord server, you must make yours look just right. You have to consider the dimensions, formatting, and arrangement of the Discord profile banner.
- Use optimal dimensions
- Make sure the important parts are visible
- How to upload your banner image
Step 1: Use Optimal Dimensions
Discord recommends that your image have optimal dimensions of 960x540 at least, which is different than 16:9 images. You can use a slightly larger 16:9 aspect ratio for great appearances, like 1920x1080 or even 2560x1440.
With Kapwing Studio, you can crop any photo to a 16:9 aspect ratio and resize it to the given dimensions. Visit Kapwing.com in your browser, click Start Editing, and paste the link to a photo you found online or upload your image directly on the Studio.
Now, click the Crop tool to make your photo 16:9, and head towards the Output Size options to make your aspect ratio larger than 960x540.
Step 2: Make Sure the Important Parts Are Visible
This is the essential part of setting up your Discord banner – making sure your banner is properly visible on the Discord.
Your banner image’s safe zone is that you should keep ideal sections out of the top 28% since that’s where your server’s options and name button will show.
The portion is a bit covered with text about the top 22% of your Discord banner photo. So, keep important sections and the text of your image below the top 120 pixels on a 960x540 Discord banner.
Source: kapwing.com
Now, you must note that the Discord profile banner will display as it starts fading about halfway down until merging in with the bottom-edge dark grey area of Discord.
And, you can smoothly edit any design elements, titles, text, or essential visuals at the bottom of the Discord profile banner. You should relocate them closer to the frame’s center to be visible.
Source: kapwing.com
Hit the Crop button in the Kapwing Studio to add text boxes for banner personalization and horizontally flip your images to keep elements aside from the upper left corner. Hit the green Export Image button after you are over with cropping, then the Download button to save your banner to your device.
Step 3: Upload Your Banner Image
Adding a Discord profile banner is intuitive once your server boosts enough to reach level 2. Just open your server dropdown menu and hit the Server Settings, then choose “Upload Background.”
Source: kapwing.com
Here, look for the image in your camera roll or files and upload it to your Discord channel server. It’s that simple!
Part 3: FAQs about Discord Banner
1 - How do you make a banner on Discord?
You can consider various banner makers mentioned above to make a banner on Discord. However, you have to ensure compliance with Discord banner size requirements.
2 - How do I get free Discord banners?
You can find free custom Discord Banner images already optimized and cropped for the Discord banner. Browse thousands of profile banners in categories like animated, meme, etc., on pfps.gg website to get free discord banners.
3 – Can the Discord banner be GIF?
Yes, uploading a Discord banner in GIF format is allowed.
Conclusion
The ability to set a Discord banner is part of the Discord update called “Custom Profiles Premium.”
The feature is live on Discord, which means that everyone can modify or set Discord profile banners as per their likes and preferences. However, you must have access to Discord Nitro to change your profile banner. And, users who don’t have Discord Nitro are not allowed to set a profile banner.
Richard Bennett
Richard Bennett is a writer and a lover of all things video.
Follow @Richard Bennett
How to Effortlessly Assign Roles in Discord Networks
How to Add Roles in Discord?
Richard Bennett
Mar 27, 2024• Proven solutions
Having a Discord server for you and your friends is a fun experience. And for gamers, Discord is a necessity. You can customize it with bots, connect real-time over voice channels, and even add rooms for chat forums.
Obviously, creating and managing a Discord server can get difficult. Especially when the server gets crammed with members, it is no longer a one-person show. You need help with monitoring and moderation. And let’s face it – you cannot watch your server round the clock.
So, let us learn the art of delegation on Discord! This guide will help you with – How to add roles in Discord and how to assign them to members. This includes creating roles, deleting them, and granting appropriate permissions.
- Part 1: Discord Server Permissions Introduction
- Part 2: How to Make and Add Roles in Discord on Computer
- Part 3: How to Manage Roles in Discord?
- Part 4: How to Delete Roles in Discord?
- Part 5: How to Add Roles on Discord Mobile?
- Part 6: Adding Roles to Discord FAQs
Part 1: Discord Server Permissions You Can Set Up
To give you a heads-up, there are around 29 permissions that you can adjust over a Discord server. More specifically, there are 7 voice permissions, 9 permissions related to texts, and about 13 permissions dealing with the server.
1. General server permission
Administrator – this is the highest permission that you can grant to a user. Think twice before giving this authority to anyone.
View Audit Log – with this permission, a user can read the server’s audits.
Manage Server – this permission enables a user to change the server’s name or shift it to another region.
Manage Roles – a user with this authority can make new roles or modify the roles without this permission.
Manage Channels – with this; a user can make, edit, or remove channels on a server.
Manage emojis – users with this authority can manage emotes.
Manage Webhooks – if you have this authority, you can add, modify, and remove webhooks.
Read Text Channels & See Voice Channels – a user with this permission can read text channels.
2. Membership permissions
Ban Members – a member with permission, can ban members from the server.
Create Instant Invite – users with this permission can invite people to the server.
Change Nickname – you can change your nickname anytime if this permission is enabled.
Manage Nicknames – if enabled, a user can change other’s nicknames.
Kick Members – a user with this authority can remove members from the server.
3. Text channel permissions
Send Messages – with this; users can send texts on chats.
Send TTS Messages – this enables users to send text-to-speech texts.
Manage Messages – with this; a user can remove or pin texts of other users.
Embed Links – enables users to embed hyperlinks in texts.
Attach Files – with this; users can attach files in the texts.
Read Message History – enables users to access earlier texts.
Mention Everyone – you can send push notifications on the channel if this permission is enabled.
Use External Emojis – if enabled, users can send emojis from other servers.
Add Reactions – with this; users can add new reactions to a text.
4. Voice channel permissions
Connect – enables users to connect themselves over the voice channel.
Speak – users can talk over the voice channel.
Mute Members – turn off other user’s speech.
Deafen Members – turn off hearing on the channel for a user.
Move Members – enables a user to shift members from one channel to a different channel.
Use Voice Activity – a member can talk without using Push-to-Talk, with this permission.
Priority Speaker – when this permission is turned on for a user, other’s
this permission allows the user to reduce the volume of other users when this user is speaking so that their words are louder on the channel.
5. Advanced permissions
Includes the ‘Administrator’ permission, which by default enables all the permissions to the assigned user.
Part 2: How to Make and Add Roles in Discord on Computer
The desktop app and Browser resemble the mobile apple a lot. The process of assigning roles and configuring members is more or less the same across devices. First, you need to create roles and define their authority before assigning these roles to some members.
How to create roles in Discord?
Before you can assign roles, you need a server. Once you have created your Discord server, start crafting the structure.
- Open your server and right-click on it.
- From the menu that appears, tap server settings.
- Name the role suitably. It should be descriptive of the authority.
- Tap on the plus sign that appears on the top right of the page.
- Here, you can change the title off the roll and even choose the color.
- Now comes the time to grant some permissions. These are basically the authority that you gave to every profile.
- When you are done, save the changes.
How to Assign Roles to Members in Discord?
To be able to assign roles, you should first create them
- Once again, hit that right button on your server and go to server settings.
- From the menu that appears to the left, ‘choose members’ under user management.
- Here, you will see the list of all the members on your server, tap the Plus sign that is right beside the username.
- From the drop-down menu that appears, select a role you want to assign to that member.
- You will notice that the color changes as per your settings. And this is how you assign roles to a server.
Part 3: How to Manage Roles in Discord?
After you learn how to make roles in Discord, you might want to manage them.
If you have got the hang of creating roles, then managing them is no different. Whenever the server gets crowded, you can create more roles or modify the existing ones. A smaller server can run smoothly with just an admin and an ‘everyone’ role.
The quickest and easiest way to manage your bloating server is to let all members be ‘everyone’ and adjust permissions accordingly. So, whenever members enter your server, they will automatically be assigned the common role.
Further, you can easily figure out what roles you have assigned to whom. Due to these colors, the other members can identify moderators, admins, or other roles.
Part 4: How to Delete Roles in Discord?
Honestly, removing Discord roles easier than setting them up. There are hardly a few steps that you need to follow for role removal.
- place the cursor on the server, and hit the right-click.
- From the list, choose server settings. Then click on roles.
- From the roles window, tap on the role that you wish to delete.
- Towards the bottom, you will see the option to delete the role.
- Press ok to confirm.
Part 5: How to Add Roles on Discord Mobile?
Like we mentioned earlier, the user interface of Discord is similar across devices. So, there is little difference between the process of creating and managing roles. But it can be baffling for beginners, so here’s a brief!
1. How to create roles in Discord mobile app?
Before you can assign roles, you have to create them.
- Open your server.
- Tap on the arrow beside the server’s title. A drop-down menu will appear. Select ‘server settings’ from that.
- Tap on ‘Roles.’ A common role, ‘everyone’ is assigned to all the members who have basic permissions enabled for everyone.
- Tap the plus sign and add a role.
- Give the role a color and describe it in a few words.
- Go through the permissions and enable the ones that fit the role.
- Save the changes.
You can repeat this multiple times to create more roles.
2. How to Assign Roles in Discord mobile app?
- Head over to settings and select ‘Members.’
- Select the members you want to assign roles to.
- Tick the boxes beside each member’s name for the roles you are assigning them.
Save the changes, and you are good to go! You can assign multiple roles to a member.
Part 6: FAQs about Discord Server Roles
Just some obvious things you might wonder about.
- How to make someone admin on Discord?
Making someone admin is the same as assigning other roles. Open your server and go to server settings.
- From there, select ‘roles’ from the left pane.
- Create a new role.
- Name the role ‘admin’ or an equivalent title.
- Adjust the setting related to sorting out role members with other members.
- Go to general permissions and tick the ‘Administrator’ option.
- Hit the ‘save changes’ button at the bottom.
- Now it’s time to assign the role to someone. Right-click on the user that you want to assign the role.
- Choose ‘roles’ from the drop-down list and select ‘Admin.’
And now your server has an admin!
- How can I assign roles to new users in Discord automatically?
By default, every member gets the role of ‘everyone’ on the server. However, you can customize this and add the MEE6 bot for automatic role allocation.
- Why can’t I manage the server even I am an admin on the server?
This is likely to happen if the server owner gave you the role of admin, but the permissions are disabled. You can ask the owner to enable the permissions for your user ID.
Richard Bennett
Richard Bennett is a writer and a lover of all things video.
Follow @Richard Bennett
Richard Bennett
Mar 27, 2024• Proven solutions
Having a Discord server for you and your friends is a fun experience. And for gamers, Discord is a necessity. You can customize it with bots, connect real-time over voice channels, and even add rooms for chat forums.
Obviously, creating and managing a Discord server can get difficult. Especially when the server gets crammed with members, it is no longer a one-person show. You need help with monitoring and moderation. And let’s face it – you cannot watch your server round the clock.
So, let us learn the art of delegation on Discord! This guide will help you with – How to add roles in Discord and how to assign them to members. This includes creating roles, deleting them, and granting appropriate permissions.
- Part 1: Discord Server Permissions Introduction
- Part 2: How to Make and Add Roles in Discord on Computer
- Part 3: How to Manage Roles in Discord?
- Part 4: How to Delete Roles in Discord?
- Part 5: How to Add Roles on Discord Mobile?
- Part 6: Adding Roles to Discord FAQs
Part 1: Discord Server Permissions You Can Set Up
To give you a heads-up, there are around 29 permissions that you can adjust over a Discord server. More specifically, there are 7 voice permissions, 9 permissions related to texts, and about 13 permissions dealing with the server.
1. General server permission
Administrator – this is the highest permission that you can grant to a user. Think twice before giving this authority to anyone.
View Audit Log – with this permission, a user can read the server’s audits.
Manage Server – this permission enables a user to change the server’s name or shift it to another region.
Manage Roles – a user with this authority can make new roles or modify the roles without this permission.
Manage Channels – with this; a user can make, edit, or remove channels on a server.
Manage emojis – users with this authority can manage emotes.
Manage Webhooks – if you have this authority, you can add, modify, and remove webhooks.
Read Text Channels & See Voice Channels – a user with this permission can read text channels.
2. Membership permissions
Ban Members – a member with permission, can ban members from the server.
Create Instant Invite – users with this permission can invite people to the server.
Change Nickname – you can change your nickname anytime if this permission is enabled.
Manage Nicknames – if enabled, a user can change other’s nicknames.
Kick Members – a user with this authority can remove members from the server.
3. Text channel permissions
Send Messages – with this; users can send texts on chats.
Send TTS Messages – this enables users to send text-to-speech texts.
Manage Messages – with this; a user can remove or pin texts of other users.
Embed Links – enables users to embed hyperlinks in texts.
Attach Files – with this; users can attach files in the texts.
Read Message History – enables users to access earlier texts.
Mention Everyone – you can send push notifications on the channel if this permission is enabled.
Use External Emojis – if enabled, users can send emojis from other servers.
Add Reactions – with this; users can add new reactions to a text.
4. Voice channel permissions
Connect – enables users to connect themselves over the voice channel.
Speak – users can talk over the voice channel.
Mute Members – turn off other user’s speech.
Deafen Members – turn off hearing on the channel for a user.
Move Members – enables a user to shift members from one channel to a different channel.
Use Voice Activity – a member can talk without using Push-to-Talk, with this permission.
Priority Speaker – when this permission is turned on for a user, other’s
this permission allows the user to reduce the volume of other users when this user is speaking so that their words are louder on the channel.
5. Advanced permissions
Includes the ‘Administrator’ permission, which by default enables all the permissions to the assigned user.
Part 2: How to Make and Add Roles in Discord on Computer
The desktop app and Browser resemble the mobile apple a lot. The process of assigning roles and configuring members is more or less the same across devices. First, you need to create roles and define their authority before assigning these roles to some members.
How to create roles in Discord?
Before you can assign roles, you need a server. Once you have created your Discord server, start crafting the structure.
- Open your server and right-click on it.
- From the menu that appears, tap server settings.
- Name the role suitably. It should be descriptive of the authority.
- Tap on the plus sign that appears on the top right of the page.
- Here, you can change the title off the roll and even choose the color.
- Now comes the time to grant some permissions. These are basically the authority that you gave to every profile.
- When you are done, save the changes.
How to Assign Roles to Members in Discord?
To be able to assign roles, you should first create them
- Once again, hit that right button on your server and go to server settings.
- From the menu that appears to the left, ‘choose members’ under user management.
- Here, you will see the list of all the members on your server, tap the Plus sign that is right beside the username.
- From the drop-down menu that appears, select a role you want to assign to that member.
- You will notice that the color changes as per your settings. And this is how you assign roles to a server.
Part 3: How to Manage Roles in Discord?
After you learn how to make roles in Discord, you might want to manage them.
If you have got the hang of creating roles, then managing them is no different. Whenever the server gets crowded, you can create more roles or modify the existing ones. A smaller server can run smoothly with just an admin and an ‘everyone’ role.
The quickest and easiest way to manage your bloating server is to let all members be ‘everyone’ and adjust permissions accordingly. So, whenever members enter your server, they will automatically be assigned the common role.
Further, you can easily figure out what roles you have assigned to whom. Due to these colors, the other members can identify moderators, admins, or other roles.
Part 4: How to Delete Roles in Discord?
Honestly, removing Discord roles easier than setting them up. There are hardly a few steps that you need to follow for role removal.
- place the cursor on the server, and hit the right-click.
- From the list, choose server settings. Then click on roles.
- From the roles window, tap on the role that you wish to delete.
- Towards the bottom, you will see the option to delete the role.
- Press ok to confirm.
Part 5: How to Add Roles on Discord Mobile?
Like we mentioned earlier, the user interface of Discord is similar across devices. So, there is little difference between the process of creating and managing roles. But it can be baffling for beginners, so here’s a brief!
1. How to create roles in Discord mobile app?
Before you can assign roles, you have to create them.
- Open your server.
- Tap on the arrow beside the server’s title. A drop-down menu will appear. Select ‘server settings’ from that.
- Tap on ‘Roles.’ A common role, ‘everyone’ is assigned to all the members who have basic permissions enabled for everyone.
- Tap the plus sign and add a role.
- Give the role a color and describe it in a few words.
- Go through the permissions and enable the ones that fit the role.
- Save the changes.
You can repeat this multiple times to create more roles.
2. How to Assign Roles in Discord mobile app?
- Head over to settings and select ‘Members.’
- Select the members you want to assign roles to.
- Tick the boxes beside each member’s name for the roles you are assigning them.
Save the changes, and you are good to go! You can assign multiple roles to a member.
Part 6: FAQs about Discord Server Roles
Just some obvious things you might wonder about.
- How to make someone admin on Discord?
Making someone admin is the same as assigning other roles. Open your server and go to server settings.
- From there, select ‘roles’ from the left pane.
- Create a new role.
- Name the role ‘admin’ or an equivalent title.
- Adjust the setting related to sorting out role members with other members.
- Go to general permissions and tick the ‘Administrator’ option.
- Hit the ‘save changes’ button at the bottom.
- Now it’s time to assign the role to someone. Right-click on the user that you want to assign the role.
- Choose ‘roles’ from the drop-down list and select ‘Admin.’
And now your server has an admin!
- How can I assign roles to new users in Discord automatically?
By default, every member gets the role of ‘everyone’ on the server. However, you can customize this and add the MEE6 bot for automatic role allocation.
- Why can’t I manage the server even I am an admin on the server?
This is likely to happen if the server owner gave you the role of admin, but the permissions are disabled. You can ask the owner to enable the permissions for your user ID.
Richard Bennett
Richard Bennett is a writer and a lover of all things video.
Follow @Richard Bennett
Also read:
- [New] Unlocking the Potential of Live Broadcasting on Discord
- 2024 Approved Navigating the End of an Online Chapter in Discord
- [Updated] 2024 Approved Unveiling Methods to Easily Find Lesser-Known Discord Servers
- [Updated] Efficiently Clear Out Discord Conversations in Batches
- [Updated] 2024 Approved Navigating Networks Adding Pals via Discord
- [Updated] 2024 Approved Taking Audio to the Next Level on Desktop & Mobile Discord with VoiceMod
- [New] Unlocking Free DiscoVideo on PC, Android, iOS Without Payments
- [Updated] Seamless Integration Incorporating Dynamic GIFs Into Your Discord Chats for 2024
- [New] 2024 Approved Free vs Paid Membership Decoding the Value of DiscoNitro in Discord
- The Ultimate Tutorial for Making Eye-Catching Pfps on Discord for 2024
- [Updated] Exclusive Communication Apps Post-Discord
- [Updated] Elevate Communication A Comprehensive Guide to Using GIFs on Discord for 2024
- [Updated] In 2024, Pro-Level Strategies for Stunningly Pinning Messages in Discord
- [Updated] 2024 Approved Leading Choices Discord's Elite Emoji Generators
- [Updated] Essential Knowledge for Manipulating Discord Message Designs
- In 2024, Dating Servers for Love on the Go with Discord
- [New] In 2024, Themed Odyssey The 10 Most Epic DiscoThemes
- [Updated] In 2024, Dive Into Creating a Captivating Discord Profile
- In 2024, Navigating the In-App Interface for Smooth Streaming
- [New] 2024 Approved Ultimate Anonymous Group Communicators
- In 2024, Decoding Discord Spoilers in Minutes
- In 2024, How to Transfer from Apple iPhone 14 Plus to Samsung Galaxy S20? | Dr.fone
- In 2024, Why Your WhatsApp Location is Not Updating and How to Fix On Vivo Y78 5G | Dr.fone
- [New] The EZ Grabber User Manual in a Nutshell for 2024
- In 2024, Unlocking a World of Gratis Aural Enhancements Online
- In 2024, What Is AI Background Generator? | Wondershare Virbo Glossary
- Fixing the Full-Screen Freeze in OBS
- In 2024, How To Do Realme GT 5 (240W) Screen Sharing | Dr.fone
- Updated Exploring the Best No-Cost Voice Recorders on Your Computer – The 10 Essential Tools
- [New] Unlocking the Secrets to Collecting FB GIFs A Comprehensive Manual
- [Updated] Mastering Aspects for Impactful Facebook Posts & Videos for 2024
- From Viewer to Voyager In-Depth Guide for Captivating Live TV on Your PC
- In 2024, Is GSM Flasher ADB Legit? Full Review To Bypass Your Tecno Spark 10CFRP Lock
- [New] In 2024, TikTok Sensation Challenge
- How to Repair Broken video files of Poco M6 Pro 4G on Windows??
- New Adobe Premiere Pro Essentials 6 Time-Saving Tips for Better Video Edits for 2024
- 2 Ways to Transfer Text Messages from Motorola Razr 40 Ultra to iPhone 15/14/13/12/11/X/8/ | Dr.fone
- Complete Tutorial to Use GPS Joystick to Fake GPS Location On ZTE Nubia Flip 5G | Dr.fone
- [New] Innovative Ways to Capture Online Discussions
- Android Safe Mode - How to Turn off Safe Mode on Vivo Y78 5G? | Dr.fone
- Title: [New] Top 9 Discord Banner Makers and How to Make a Profile Banner
- Author: Timothy
- Created at : 2024-05-23 22:47:38
- Updated at : 2024-05-24 22:47:38
- Link: https://discord-videos.techidaily.com/new-top-9-discord-banner-makers-and-how-to-make-a-profile-banner/
- License: This work is licensed under CC BY-NC-SA 4.0.
