
!["[Updated] 2024 Approved Elevate Discord Audio Quality with Simple VoiceMod Adjustments"](https://www.lifewire.com/thmb/E7SxLoAdzClArIUU0WaG58EFnS4=/400x300/filters:no_upscale():max_bytes(150000):strip_icc()/twitter2-56a5310a5f9b58b7d0db681a.jpg)
"[Updated] 2024 Approved Elevate Discord Audio Quality with Simple VoiceMod Adjustments"
Elevate Discord Audio Quality with Simple VoiceMod Adjustments
How To Use Voicemod On Discord

Richard Bennett
Mar 27, 2024• Proven solutions
A voice changer will allow you to prank friends, create content, and most of all, secure your presence by maintaining anonymity. With it, you can turn your voice into several unique and exciting voices to serve any purpose you deem fit.
And when it comes to voice changers, none is as easy to operate as the Voicemod in Discord. Its claim to fame is that it features numerous voice options to choose from.
With Vociemod, you have to simply run the program in the background and select your desired voice!
Read on as we discuss how to use Voicemod on Discord in detail:
In this article
Part 1: How To Use Voice Changer Voicemod For Discord On Desktop Computer
Part 2: How To Fix Voicemod Not Working Discord?
Part 3: How To Change Voice For Discord On Mobile?
Part 1: How To Use Voice Changer Voicemod For Discord On Desktop Computer
Voicemod is arguably one of the best voice changer tools available on the internet for its excellent features.
But before we jump straight into using Voicemod for Discord, you must know how to install one on your desktop Mac/PC.
Here’s how to install Voicemod
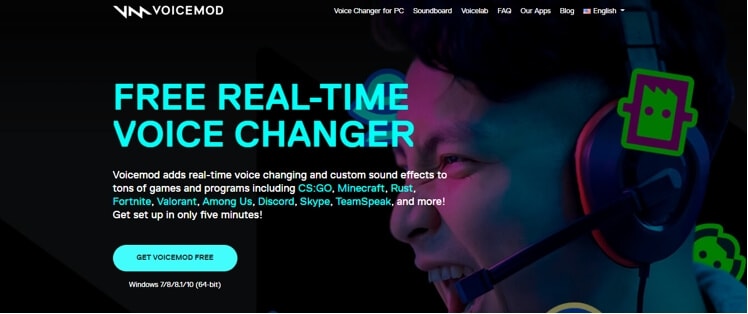
- Visit the Voicemod website to begin the download process.
- You’ll see the button “Get Voicemod Free” on the screen. Click it!
- Upon clicking, the site will ask you to sign in to your account from Discord, Twitch, to Google. Use your Discord login details to sign in.
- After you’re signed in, the “.exe” file will be downloaded to your PC/Mac’s download folder. Open the “.exe” file the moment it’s downloaded.
- An install wizard will open up. Navigate through the wizard’s installation process to install the program on your PC/Mac.
- After installation is complete, the installation wizard will ask to restart your windows’ Mac or PC.
You can skip it, but it’s best to restart it for smooth operations.
Once your Mac/PC restarts, you’ll see the Voicemod app icon on your desktop screen.
Now that you have successfully installed the voice changer Voicemod app into your desktop computer, let’s dive into knowing how to use Voicemod on Discord!
Here’s how to use voice changer on Discord
- Click the Vociemod icon on the desktop to open the app. If you can’t find it there, click the “windows icon” located at the screen’s bottom-left. Just type “Voicemod,” and the program will show up. Double click it to get it opened.
- When the app opens up, you’ll have to choose the output and input it will use. If you’re wondering, why the output? This is to give you an insight into what your voice will sound like on each filter.
Once it’s done, you can play around with different filters!
Every day, you’ll get new free filters to use; however, to unlock and access all filters, you need to upgrade to the “pro-version” of voice changer Voicemod.
On the other hand, if you only need a few filters, the “basic-version” should suffice.
Apart from that, you can unlock an additional free filter in your app by sharing it on your social media accounts.

Step 1
To set up Voicemod with Discord, open your discord account and go to the settings (gear icon) placed at the screen’s bottom-left corner.
Step 2
Click the “Voice and Video” option right under the app settings.
Step 3
To make Voicemod usable, you’ll have to change Voice settings. Within the “Input Device” option, select the option that says “Microphone Voicemod Virtual Audio.”
Step 4
After you have changed settings, you can easily change the voice within the program. Not only this, but other users can also hear your audio alteration.
Step 5
With the “basic version,” you’ll have seven free voice choices that will change each day. On the contrary, with the “pro-version,” you’ll gain access to more than 80 different voice options.
So, if you’re searching for an easy and simple voice-changing app to use, look no further than Voicemod!
Part 2: How To Fix Voicemod Not Working Discord?
Is your voice changer Voicemod not working on Discord? No worries, you can troubleshoot the issues with a few basic steps.
Here are some ways you can use to fix Voicemod not working in Discord:
Method 1: Restart Your Windows PC/Mac
Though it’s not a technical solution, restarting your desktop computer fixes incorrect settings by rebooting them and solves many problems connected with your computer system, programs, and hardware.
So, when your Voicemod suddenly ceases to work in Discord, make sure to restart your Windows PC/Mac before going any further, as it’s the first step in fixing voice issues.
If restarting doesn’t help, slide to the next step!
Method 2: Make Sure The Mic Is Properly Set
The next step is to check if the mic works correctly. This is because faulty settings may stop voice changer Voicemod from operating correctly.
Just follow the steps below to resolve it:
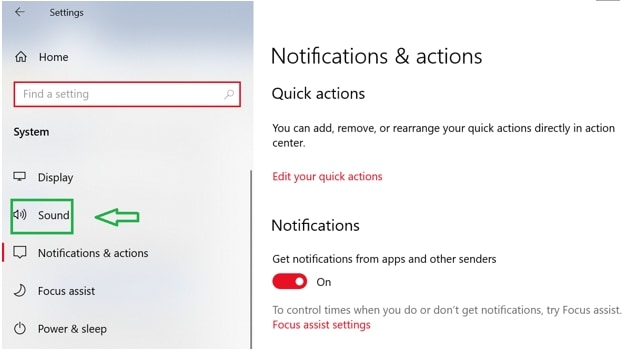
- On the keyboard, press the “Win” logo and the “I” key simultaneously to open Windows settings. Click “System.”
- On the left, you’ll see the option “Sound.” Click it.
- First, you have to test the microphone! To do so, choose the “Headset” option rather than the Voicemod microphone under the “Input” section
- Click “Device properties & test microphone”
- Make sure to uncheck the “disable” box and keep the volume section 100
- Click the “Start test” button and speak into the microphone
- After that, click “Stop test.” If the greatest value it shows is above “0”, then your microphone works correctly
Now, restart your Voicemod app to see if it’s working properly or not! If the issue still persists, jump to the next solution.
Method 3: Install Windows Updates
If you use Windows 10, it has two kinds of updates that offer performance boost and security patches. Sometimes, an update can fix a few driver and software conflicts automatically.
You can quickly solve the voice chat problem by simply updating the system settings. Here’s how to update your Windows 10:
- Open your windows setting by pressing the “Windows button” and the “I” key together.
- Click on “Update and Security”
- Click the “Check for Updates” button. If an update is found, it will install automatically on the system
Make sure to repeat this process until it says you’re up-to-date. Then, restart the PC. Check whether the Vociemod is properly working or not!
If not, try our next option!
Method 4:Re-Install Voice Changer Voicemod Drivers
In many instances, the issue signifies that you’re using outdated or faulty drivers. To troubleshoot this, simply re-install your Voicemod driver, and you’ll be good to go!
First, uninstall your Voicemod driver from the windows PC/Mac. Here’s how to do it:
- On the keyboard, press the “Windows button” as well as the “I” key to bring up the “Run box”
- Paste or type “devmgmt.msc” and click “OK.” This will open the “Device Manager”
- Click the “expand” option of “Audio Inputs & Outputs.”
- Click the “Microphone WMD” and choose the “Uninstall device” option
- A pop-up window will appear. Click the “Uninstall” button
- Restart the PC
Install the voice changer Voicemod again, whether automatically or manually, and see if it works!
Part 3: How To Change Voice For Discord On Mobile?
“Voicemod clips” is the version for both Apple and Android devices. The app will help you make high-quality content using its wide selection of one-of-a-kind effects, which will change your voice so much that you won’t recognize yourself!
In addition to that, you can add filters, which are connected to your cell phone’s camera to create funny, interesting videos.
Additionally, you’ll have the option to choose from 10 different voices. Plus, you can also make unlimited videos and audio from the humorous to the terrifying.
Some of the Voicemod voices on mobile include male-to-female, different robot effects, famous celebrities, scary voices, and much more. In short, everything is based on how you would like to modify your voice!
Not just that, you can also cross-share creative videos and audio to popular social networking platforms such as Facebook, Twitter, Instagram, TikTok, and Snapchat using your smartphone.
Curious to know how to change your voice for Discord on mobile? Here are step-by-step instructions:
- Make sure the Voicemod app is downloaded on your Apple or Android device and appropriately configured
- Open Discord
- Tap the “cogwheel icon” near your name and avatar
- You’ll see the “settings” page
- Within it, tap the “Voice & Video” option
- Tap Voicemod under the “Input Device” option and the headset under the “Output Device” option and tap escape. You’ll have access to numerous exciting sounds
Richard Bennett
Richard Bennett is a writer and a lover of all things video.
Follow @Richard Bennett
Richard Bennett
Mar 27, 2024• Proven solutions
A voice changer will allow you to prank friends, create content, and most of all, secure your presence by maintaining anonymity. With it, you can turn your voice into several unique and exciting voices to serve any purpose you deem fit.
And when it comes to voice changers, none is as easy to operate as the Voicemod in Discord. Its claim to fame is that it features numerous voice options to choose from.
With Vociemod, you have to simply run the program in the background and select your desired voice!
Read on as we discuss how to use Voicemod on Discord in detail:
In this article
Part 1: How To Use Voice Changer Voicemod For Discord On Desktop Computer
Part 2: How To Fix Voicemod Not Working Discord?
Part 3: How To Change Voice For Discord On Mobile?
Part 1: How To Use Voice Changer Voicemod For Discord On Desktop Computer
Voicemod is arguably one of the best voice changer tools available on the internet for its excellent features.
But before we jump straight into using Voicemod for Discord, you must know how to install one on your desktop Mac/PC.
Here’s how to install Voicemod
- Visit the Voicemod website to begin the download process.
- You’ll see the button “Get Voicemod Free” on the screen. Click it!
- Upon clicking, the site will ask you to sign in to your account from Discord, Twitch, to Google. Use your Discord login details to sign in.
- After you’re signed in, the “.exe” file will be downloaded to your PC/Mac’s download folder. Open the “.exe” file the moment it’s downloaded.
- An install wizard will open up. Navigate through the wizard’s installation process to install the program on your PC/Mac.
- After installation is complete, the installation wizard will ask to restart your windows’ Mac or PC.
You can skip it, but it’s best to restart it for smooth operations.
Once your Mac/PC restarts, you’ll see the Voicemod app icon on your desktop screen.
Now that you have successfully installed the voice changer Voicemod app into your desktop computer, let’s dive into knowing how to use Voicemod on Discord!
Here’s how to use voice changer on Discord
- Click the Vociemod icon on the desktop to open the app. If you can’t find it there, click the “windows icon” located at the screen’s bottom-left. Just type “Voicemod,” and the program will show up. Double click it to get it opened.
- When the app opens up, you’ll have to choose the output and input it will use. If you’re wondering, why the output? This is to give you an insight into what your voice will sound like on each filter.
Once it’s done, you can play around with different filters!
Every day, you’ll get new free filters to use; however, to unlock and access all filters, you need to upgrade to the “pro-version” of voice changer Voicemod.
On the other hand, if you only need a few filters, the “basic-version” should suffice.
Apart from that, you can unlock an additional free filter in your app by sharing it on your social media accounts.
Step 1
To set up Voicemod with Discord, open your discord account and go to the settings (gear icon) placed at the screen’s bottom-left corner.
Step 2
Click the “Voice and Video” option right under the app settings.
Step 3
To make Voicemod usable, you’ll have to change Voice settings. Within the “Input Device” option, select the option that says “Microphone Voicemod Virtual Audio.”
Step 4
After you have changed settings, you can easily change the voice within the program. Not only this, but other users can also hear your audio alteration.
Step 5
With the “basic version,” you’ll have seven free voice choices that will change each day. On the contrary, with the “pro-version,” you’ll gain access to more than 80 different voice options.
So, if you’re searching for an easy and simple voice-changing app to use, look no further than Voicemod!
Part 2: How To Fix Voicemod Not Working Discord?
Is your voice changer Voicemod not working on Discord? No worries, you can troubleshoot the issues with a few basic steps.
Here are some ways you can use to fix Voicemod not working in Discord:
Method 1: Restart Your Windows PC/Mac
Though it’s not a technical solution, restarting your desktop computer fixes incorrect settings by rebooting them and solves many problems connected with your computer system, programs, and hardware.
So, when your Voicemod suddenly ceases to work in Discord, make sure to restart your Windows PC/Mac before going any further, as it’s the first step in fixing voice issues.
If restarting doesn’t help, slide to the next step!
Method 2: Make Sure The Mic Is Properly Set
The next step is to check if the mic works correctly. This is because faulty settings may stop voice changer Voicemod from operating correctly.
Just follow the steps below to resolve it:
- On the keyboard, press the “Win” logo and the “I” key simultaneously to open Windows settings. Click “System.”
- On the left, you’ll see the option “Sound.” Click it.
- First, you have to test the microphone! To do so, choose the “Headset” option rather than the Voicemod microphone under the “Input” section
- Click “Device properties & test microphone”
- Make sure to uncheck the “disable” box and keep the volume section 100
- Click the “Start test” button and speak into the microphone
- After that, click “Stop test.” If the greatest value it shows is above “0”, then your microphone works correctly
Now, restart your Voicemod app to see if it’s working properly or not! If the issue still persists, jump to the next solution.
Method 3: Install Windows Updates
If you use Windows 10, it has two kinds of updates that offer performance boost and security patches. Sometimes, an update can fix a few driver and software conflicts automatically.
You can quickly solve the voice chat problem by simply updating the system settings. Here’s how to update your Windows 10:
- Open your windows setting by pressing the “Windows button” and the “I” key together.
- Click on “Update and Security”
- Click the “Check for Updates” button. If an update is found, it will install automatically on the system
Make sure to repeat this process until it says you’re up-to-date. Then, restart the PC. Check whether the Vociemod is properly working or not!
If not, try our next option!
Method 4:Re-Install Voice Changer Voicemod Drivers
In many instances, the issue signifies that you’re using outdated or faulty drivers. To troubleshoot this, simply re-install your Voicemod driver, and you’ll be good to go!
First, uninstall your Voicemod driver from the windows PC/Mac. Here’s how to do it:
- On the keyboard, press the “Windows button” as well as the “I” key to bring up the “Run box”
- Paste or type “devmgmt.msc” and click “OK.” This will open the “Device Manager”
- Click the “expand” option of “Audio Inputs & Outputs.”
- Click the “Microphone WMD” and choose the “Uninstall device” option
- A pop-up window will appear. Click the “Uninstall” button
- Restart the PC
Install the voice changer Voicemod again, whether automatically or manually, and see if it works!
Part 3: How To Change Voice For Discord On Mobile?
“Voicemod clips” is the version for both Apple and Android devices. The app will help you make high-quality content using its wide selection of one-of-a-kind effects, which will change your voice so much that you won’t recognize yourself!
In addition to that, you can add filters, which are connected to your cell phone’s camera to create funny, interesting videos.
Additionally, you’ll have the option to choose from 10 different voices. Plus, you can also make unlimited videos and audio from the humorous to the terrifying.
Some of the Voicemod voices on mobile include male-to-female, different robot effects, famous celebrities, scary voices, and much more. In short, everything is based on how you would like to modify your voice!
Not just that, you can also cross-share creative videos and audio to popular social networking platforms such as Facebook, Twitter, Instagram, TikTok, and Snapchat using your smartphone.
Curious to know how to change your voice for Discord on mobile? Here are step-by-step instructions:
- Make sure the Voicemod app is downloaded on your Apple or Android device and appropriately configured
- Open Discord
- Tap the “cogwheel icon” near your name and avatar
- You’ll see the “settings” page
- Within it, tap the “Voice & Video” option
- Tap Voicemod under the “Input Device” option and the headset under the “Output Device” option and tap escape. You’ll have access to numerous exciting sounds
Richard Bennett
Richard Bennett is a writer and a lover of all things video.
Follow @Richard Bennett
Create and Showcase: Innovative Discord Flags for Profile Spotlight
Top 9 Discord Banner Makers and How to Make One Easily
Richard Bennett
Mar 27, 2024• Proven solutions
A Discord banner is best to customize your Discord account and make it more convincing. It allows you to improvise your profile icon with one of your favorite movies, games, memes, or anime characters. You can even decorate the space with your face.
Before looking at the steps to create a Discord profile banner, it’s crucial to note that only Nitro users can use this feature. You’ll have to settle for a limited list of 10-15 pre-made banners if you’ve not yet accessed the Nitro plan. These Discord banners feature solid colors and basic designs. What’s more, you can’t modify your banner for Discord on the Discord mobile apps. It’s only accessible via desktop versions.
In this article, we’ll discuss the top 9 Discord banner makers, plus a helpful section on how to create your Discord banner.
- Part 1: Top 9 Discord Banner Makers in 2022 [with free templates]
- Part 2: How to Create a Discord Banner with Kapwing
- Part 3: FAQs about Discord Banner
Part 1: Top 9 Discord Banner Makers in 2022 [with free templates]
1. Visme
Visme offers 50 plus free channel art editable templates through their online graphics service. However, it has a bit more complex UI than some of the other makers on this list, but the free templates are wonderful, and you can upload your images to edit with them.
2. Fotor
Another graphics program with free templates is Fotor. It is easy to use – perhaps the most accessible program on this list. You click on the element in your template and then click on what you want to replace it with, and thus you don’t even have to use the drag and drop feature in the ‘background’ tab. Of course, you can upload your photos as well.
There are subscription options in Fotor. Thus, you get a watermark for your project unless you pay for premium services, but there are enough free options to satisfy most creators.
3. Snappa
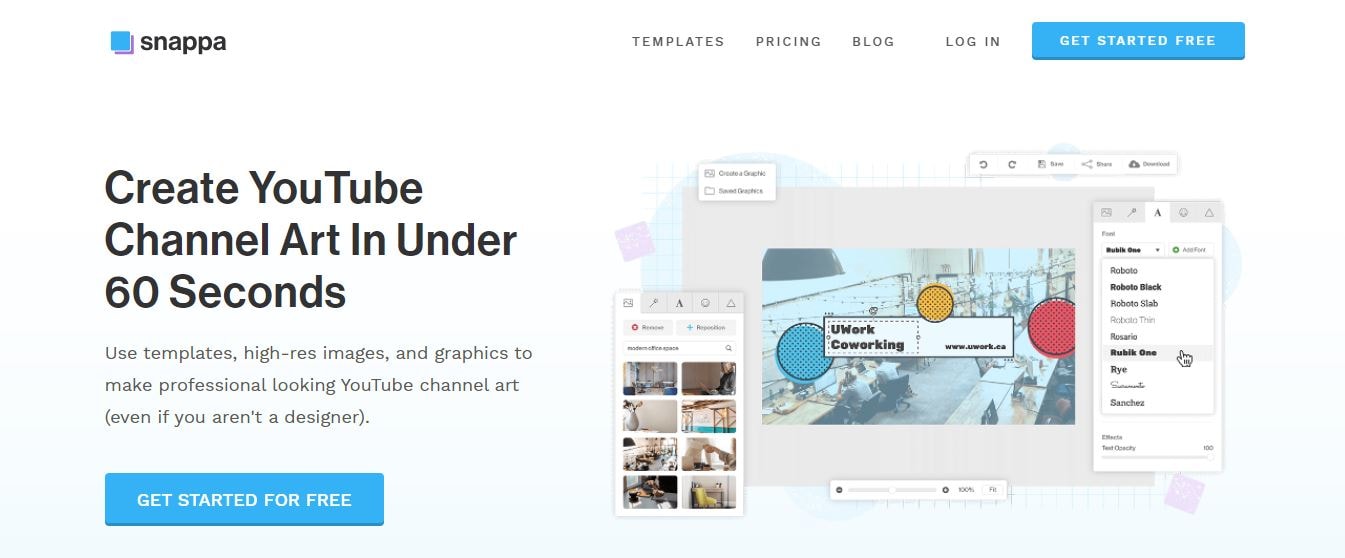
If you want to get something quick in design, Snappa is the right choice. First, choose one of the free templates under the YouTube Channel Art under the Headers tab. Then it’s just a matter of elements swapping in the template with ones that suit your channel.
Snappa shows you the ideal placement section for different devices while you edit.
4. Crello
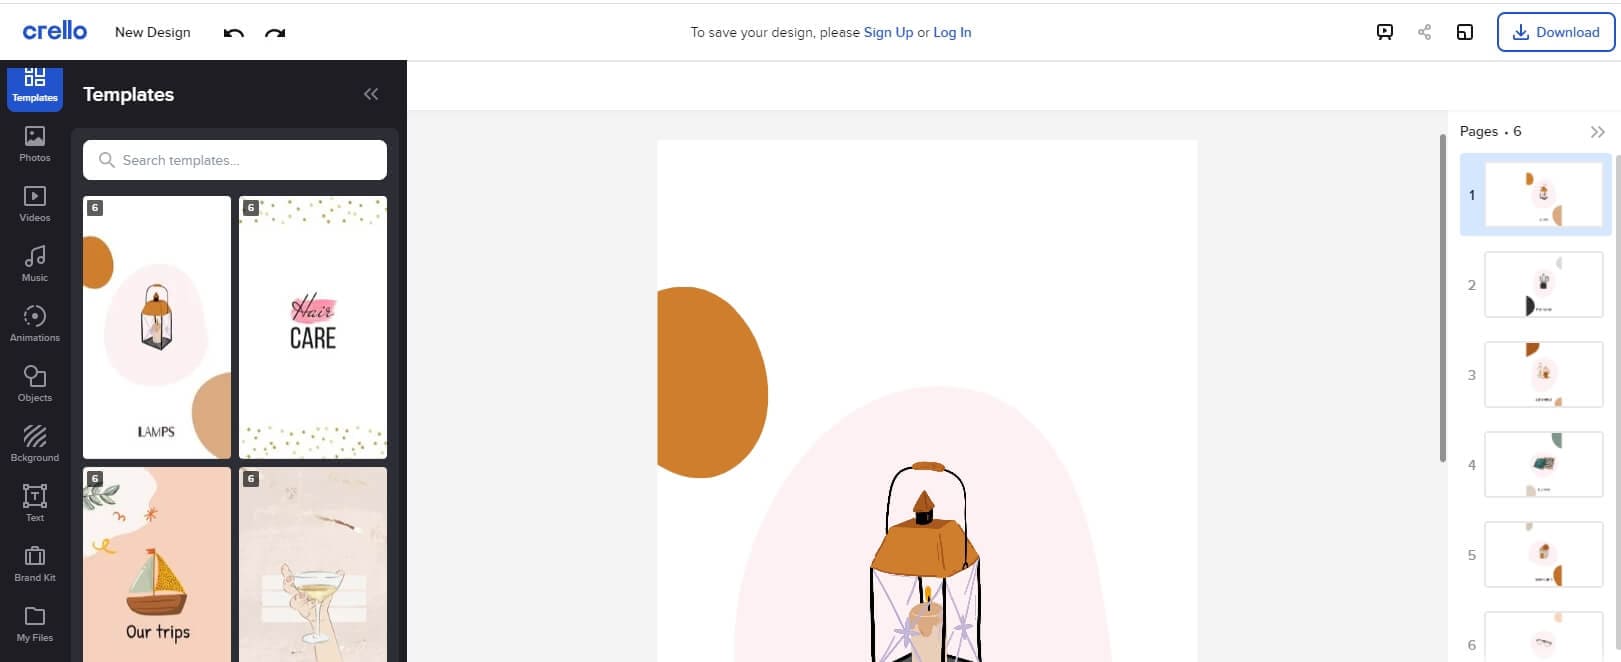
Crello provides ten free examples of channel art templates through their blog, and you can rightly edit them on the site.
Crello is a simple visual editor designed for social media and marketing creators, meaning that non-design people can quickly jump into this platform. Beyond the free text options and templates, however, most of their backgrounds and stock photos cost $1. You’re required to use the default images to use Crello for free or upload your own.
5. Design Wizard
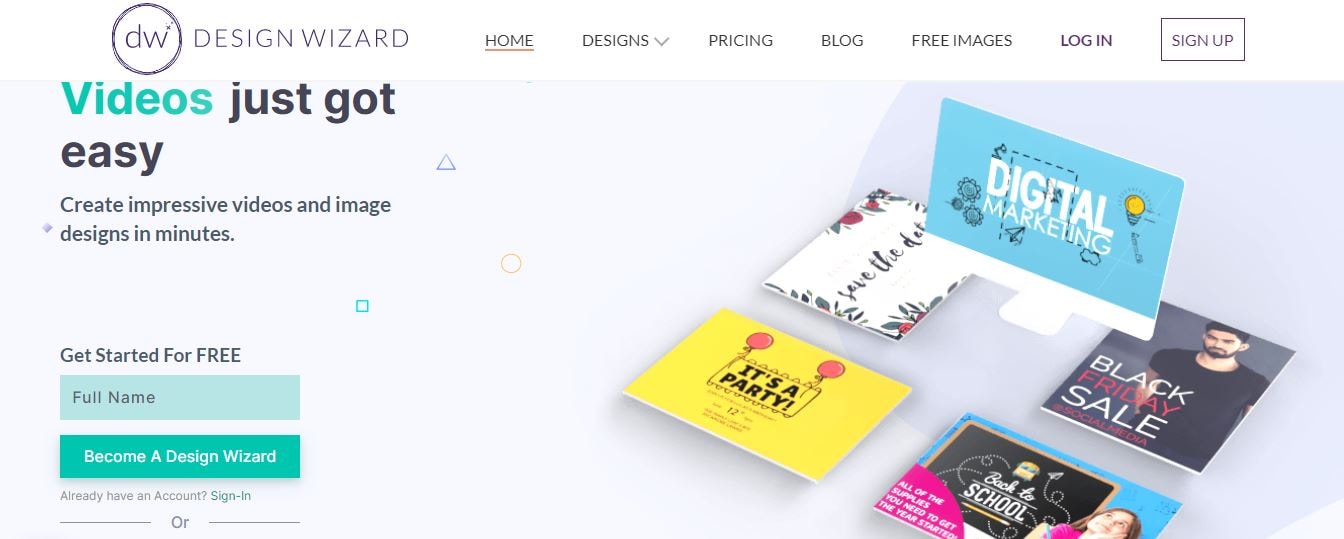
This is another Discord banner maker with a few free templates to design or craft anything out through personalization. One of the best valuable abilities of the design wizard is that it will display the ‘safe zone’ – the area of your Discord banner that will show up on any device screen – so you can design keeping those dimensions in mind.
Also, make sure to delete the safe zone marker before you export.
6. Canva
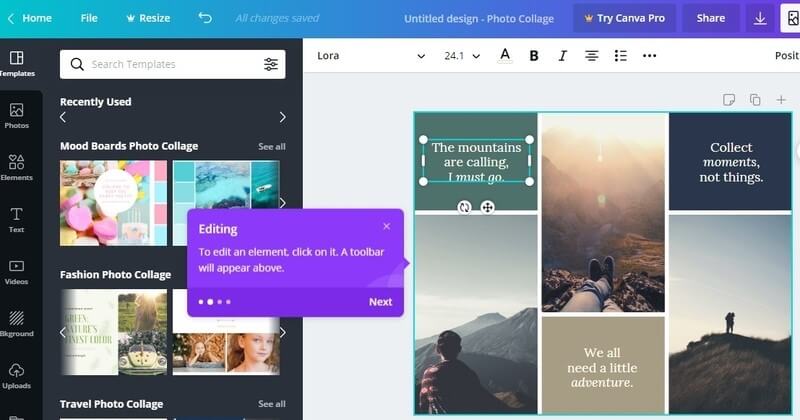
Canva is one of the famous and free channel art makers. It is simple with a drag-and-drop editor. Also, the program will automatically resize images to adjust easily within the Discord banner space. It has a variety of free resources like stock photos. Some resources are paid ($1), but most of them are free.
7. Adobe Spark
While editing the Discord banner templates via Adobe Spark, click on the resources in the template and then select the images/fonts/etc., that you want to use. Resources like filters are also very accessible.
The only drawback of Spark is that the watermarks are in free downloads. However, the watermark is quite small, meaning that it won’t show up for viewers as it is placed in the bottom-right corner watching your channel on either mobile devices or computers.
Note: Whenever you click ‘Create your YouTube channel art,’ it will show you a thumbnail template instead of a banner template. Hit the Resize button in the side menu and switch to your exported images or the channel art.
8. BeFunky
This is a graphics creator platform that doubles as a Discord profile banner maker as well. You need to head towards BeFunky’s ‘Designer’ tool and look for the channel art templates under ‘YouTube’ and ‘Social Media Headers.’ However, we won’t find here any free art templates.
9. Wondershare PixStudio
Wondershare PixStudio has certain unique features to erase the image background. With a single tap only, you can quickly remove the image background; then, you can use your image flexibly. And, it’s just a subscription of $7.99 per month to use the features.
Part 2: How to Create a Discord Banner with Kapwing
Since your server banner will take up an important place in your Discord server, you must make yours look just right. You have to consider the dimensions, formatting, and arrangement of the Discord profile banner.
- Use optimal dimensions
- Make sure the important parts are visible
- How to upload your banner image
Step 1: Use Optimal Dimensions
Discord recommends that your image have optimal dimensions of 960x540 at least, which is different than 16:9 images. You can use a slightly larger 16:9 aspect ratio for great appearances, like 1920x1080 or even 2560x1440.
With Kapwing Studio, you can crop any photo to a 16:9 aspect ratio and resize it to the given dimensions. Visit Kapwing.com in your browser, click Start Editing, and paste the link to a photo you found online or upload your image directly on the Studio.
Now, click the Crop tool to make your photo 16:9, and head towards the Output Size options to make your aspect ratio larger than 960x540.
Step 2: Make Sure the Important Parts Are Visible
This is the essential part of setting up your Discord banner – making sure your banner is properly visible on the Discord.
Your banner image’s safe zone is that you should keep ideal sections out of the top 28% since that’s where your server’s options and name button will show.
The portion is a bit covered with text about the top 22% of your Discord banner photo. So, keep important sections and the text of your image below the top 120 pixels on a 960x540 Discord banner.

Source: kapwing.com
Now, you must note that the Discord profile banner will display as it starts fading about halfway down until merging in with the bottom-edge dark grey area of Discord.
And, you can smoothly edit any design elements, titles, text, or essential visuals at the bottom of the Discord profile banner. You should relocate them closer to the frame’s center to be visible.

Source: kapwing.com
Hit the Crop button in the Kapwing Studio to add text boxes for banner personalization and horizontally flip your images to keep elements aside from the upper left corner. Hit the green Export Image button after you are over with cropping, then the Download button to save your banner to your device.
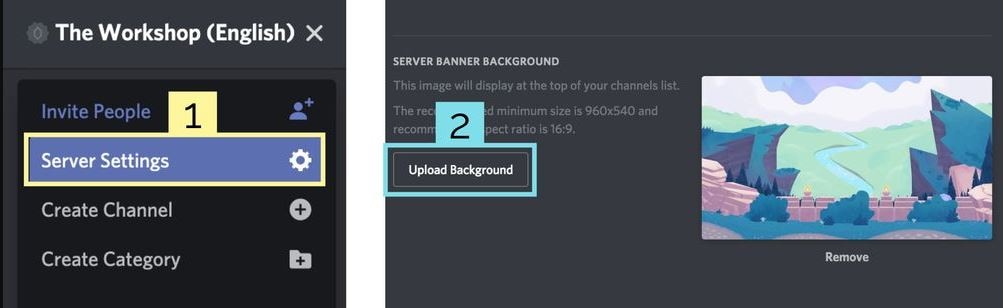
Step 3: Upload Your Banner Image
Adding a Discord profile banner is intuitive once your server boosts enough to reach level 2. Just open your server dropdown menu and hit the Server Settings, then choose “Upload Background.”
Source: kapwing.com
Here, look for the image in your camera roll or files and upload it to your Discord channel server. It’s that simple!
Part 3: FAQs about Discord Banner
1 - How do you make a banner on Discord?
You can consider various banner makers mentioned above to make a banner on Discord. However, you have to ensure compliance with Discord banner size requirements.
2 - How do I get free Discord banners?
You can find free custom Discord Banner images already optimized and cropped for the Discord banner. Browse thousands of profile banners in categories like animated, meme, etc., on pfps.gg website to get free discord banners.
3 – Can the Discord banner be GIF?
Yes, uploading a Discord banner in GIF format is allowed.
Conclusion
The ability to set a Discord banner is part of the Discord update called “Custom Profiles Premium.”
The feature is live on Discord, which means that everyone can modify or set Discord profile banners as per their likes and preferences. However, you must have access to Discord Nitro to change your profile banner. And, users who don’t have Discord Nitro are not allowed to set a profile banner.
Richard Bennett
Richard Bennett is a writer and a lover of all things video.
Follow @Richard Bennett
Richard Bennett
Mar 27, 2024• Proven solutions
A Discord banner is best to customize your Discord account and make it more convincing. It allows you to improvise your profile icon with one of your favorite movies, games, memes, or anime characters. You can even decorate the space with your face.
Before looking at the steps to create a Discord profile banner, it’s crucial to note that only Nitro users can use this feature. You’ll have to settle for a limited list of 10-15 pre-made banners if you’ve not yet accessed the Nitro plan. These Discord banners feature solid colors and basic designs. What’s more, you can’t modify your banner for Discord on the Discord mobile apps. It’s only accessible via desktop versions.
In this article, we’ll discuss the top 9 Discord banner makers, plus a helpful section on how to create your Discord banner.
- Part 1: Top 9 Discord Banner Makers in 2022 [with free templates]
- Part 2: How to Create a Discord Banner with Kapwing
- Part 3: FAQs about Discord Banner
Part 1: Top 9 Discord Banner Makers in 2022 [with free templates]
1. Visme
Visme offers 50 plus free channel art editable templates through their online graphics service. However, it has a bit more complex UI than some of the other makers on this list, but the free templates are wonderful, and you can upload your images to edit with them.
2. Fotor
Another graphics program with free templates is Fotor. It is easy to use – perhaps the most accessible program on this list. You click on the element in your template and then click on what you want to replace it with, and thus you don’t even have to use the drag and drop feature in the ‘background’ tab. Of course, you can upload your photos as well.
There are subscription options in Fotor. Thus, you get a watermark for your project unless you pay for premium services, but there are enough free options to satisfy most creators.
3. Snappa
If you want to get something quick in design, Snappa is the right choice. First, choose one of the free templates under the YouTube Channel Art under the Headers tab. Then it’s just a matter of elements swapping in the template with ones that suit your channel.
Snappa shows you the ideal placement section for different devices while you edit.
4. Crello
Crello provides ten free examples of channel art templates through their blog, and you can rightly edit them on the site.
Crello is a simple visual editor designed for social media and marketing creators, meaning that non-design people can quickly jump into this platform. Beyond the free text options and templates, however, most of their backgrounds and stock photos cost $1. You’re required to use the default images to use Crello for free or upload your own.
5. Design Wizard
This is another Discord banner maker with a few free templates to design or craft anything out through personalization. One of the best valuable abilities of the design wizard is that it will display the ‘safe zone’ – the area of your Discord banner that will show up on any device screen – so you can design keeping those dimensions in mind.
Also, make sure to delete the safe zone marker before you export.
6. Canva
Canva is one of the famous and free channel art makers. It is simple with a drag-and-drop editor. Also, the program will automatically resize images to adjust easily within the Discord banner space. It has a variety of free resources like stock photos. Some resources are paid ($1), but most of them are free.
7. Adobe Spark
While editing the Discord banner templates via Adobe Spark, click on the resources in the template and then select the images/fonts/etc., that you want to use. Resources like filters are also very accessible.
The only drawback of Spark is that the watermarks are in free downloads. However, the watermark is quite small, meaning that it won’t show up for viewers as it is placed in the bottom-right corner watching your channel on either mobile devices or computers.
Note: Whenever you click ‘Create your YouTube channel art,’ it will show you a thumbnail template instead of a banner template. Hit the Resize button in the side menu and switch to your exported images or the channel art.
8. BeFunky
This is a graphics creator platform that doubles as a Discord profile banner maker as well. You need to head towards BeFunky’s ‘Designer’ tool and look for the channel art templates under ‘YouTube’ and ‘Social Media Headers.’ However, we won’t find here any free art templates.
9. Wondershare PixStudio
Wondershare PixStudio has certain unique features to erase the image background. With a single tap only, you can quickly remove the image background; then, you can use your image flexibly. And, it’s just a subscription of $7.99 per month to use the features.
Part 2: How to Create a Discord Banner with Kapwing
Since your server banner will take up an important place in your Discord server, you must make yours look just right. You have to consider the dimensions, formatting, and arrangement of the Discord profile banner.
- Use optimal dimensions
- Make sure the important parts are visible
- How to upload your banner image
Step 1: Use Optimal Dimensions
Discord recommends that your image have optimal dimensions of 960x540 at least, which is different than 16:9 images. You can use a slightly larger 16:9 aspect ratio for great appearances, like 1920x1080 or even 2560x1440.
With Kapwing Studio, you can crop any photo to a 16:9 aspect ratio and resize it to the given dimensions. Visit Kapwing.com in your browser, click Start Editing, and paste the link to a photo you found online or upload your image directly on the Studio.
Now, click the Crop tool to make your photo 16:9, and head towards the Output Size options to make your aspect ratio larger than 960x540.
Step 2: Make Sure the Important Parts Are Visible
This is the essential part of setting up your Discord banner – making sure your banner is properly visible on the Discord.
Your banner image’s safe zone is that you should keep ideal sections out of the top 28% since that’s where your server’s options and name button will show.
The portion is a bit covered with text about the top 22% of your Discord banner photo. So, keep important sections and the text of your image below the top 120 pixels on a 960x540 Discord banner.
Source: kapwing.com
Now, you must note that the Discord profile banner will display as it starts fading about halfway down until merging in with the bottom-edge dark grey area of Discord.
And, you can smoothly edit any design elements, titles, text, or essential visuals at the bottom of the Discord profile banner. You should relocate them closer to the frame’s center to be visible.
Source: kapwing.com
Hit the Crop button in the Kapwing Studio to add text boxes for banner personalization and horizontally flip your images to keep elements aside from the upper left corner. Hit the green Export Image button after you are over with cropping, then the Download button to save your banner to your device.
Step 3: Upload Your Banner Image
Adding a Discord profile banner is intuitive once your server boosts enough to reach level 2. Just open your server dropdown menu and hit the Server Settings, then choose “Upload Background.”
Source: kapwing.com
Here, look for the image in your camera roll or files and upload it to your Discord channel server. It’s that simple!
Part 3: FAQs about Discord Banner
1 - How do you make a banner on Discord?
You can consider various banner makers mentioned above to make a banner on Discord. However, you have to ensure compliance with Discord banner size requirements.
2 - How do I get free Discord banners?
You can find free custom Discord Banner images already optimized and cropped for the Discord banner. Browse thousands of profile banners in categories like animated, meme, etc., on pfps.gg website to get free discord banners.
3 – Can the Discord banner be GIF?
Yes, uploading a Discord banner in GIF format is allowed.
Conclusion
The ability to set a Discord banner is part of the Discord update called “Custom Profiles Premium.”
The feature is live on Discord, which means that everyone can modify or set Discord profile banners as per their likes and preferences. However, you must have access to Discord Nitro to change your profile banner. And, users who don’t have Discord Nitro are not allowed to set a profile banner.
Richard Bennett
Richard Bennett is a writer and a lover of all things video.
Follow @Richard Bennett
Also read:
- [Updated] The Essential Guide to Premium Discord Emoji Tools for 2024
- Evaluating Team Communication Tools Does Slack Outshine Discord's Benefits for 2024
- [New] Removing Discord Servers Step-by-Step
- [Updated] In 2024, Harmonious Integration Spotify Meets Discord
- [New] In 2024, The Comprehensive Guide to Discord Spoiler Tags
- [New] Top 30 Catchy Disco Handles for Quick Attention
- Talk the Walk Engaging Others on Discord Desktop/Mobile
- Personalizing Every Aspect of Your Discord Image
- [Updated] How to Make Discord Video Calls on Desktop and Mobile
- Guide to Delete Discord Server From Mobile
- [New] The Disco Diplomat's Manual How to Respond Effectively for 2024
- In 2024, Mastery in Making Stunning Discord Pfps with Minimal Effort
- [Updated] 2024 Approved Dive Into Free Emoji Worlds with These Innovative Online Locations
- [New] The Ultimate Free Voice Changer Guide for Discord Users for 2024
- [Updated] 2024 Approved Ultimate Guide to Cool and Captivating Disco Tags
- [New] In 2024, Breaking Down Discord for Beginners
- [New] 2024 Approved From Setting Up to Broadcasting A DiscoGuide
- In 2024, Comparing Messaging Services Discord Versus Skype Revealed
- [Updated] Streamlining the Process of Removing a Discord Server for 2024
- [Updated] 2024 Approved Enhancing Conversations The Essential Guide to Using GIFs on Discord
- [New] Mastery in Locating the Right Discord Server Amidst Thousands
- [New] Mastering the Art of Adding Unique Emojis to Your Discord Avatar (PC/Mobile)
- [Updated] In 2024, The Elite Circle of Discord Symbol Architects
- [New] 2024 Approved Expanding Your Circle Discord Friending 101
- [Updated] The Ultimate Guide to Interacting in Discord DMs
- In 2024, Unleash Creativity with These Best-Of Discord's Emoji Makers
- [New] A Complete Guide to Personalizing Your Virtual Space on Discord
- [Updated] 2024 Approved Integrating Fun Factors Emojis Within Discord Status Lines
- [Updated] Premiere Social Signatures Animation Highlights for 2024
- [Updated] Pinnacle Non-Discord Communities Online for 2024
- [Updated] Themed Realm The Ultimate 10 BestDiscord Choices
- [New] Decoding the Process Your Comprehensive Guide to Filing a Dispute Report on Discord for 2024
- [New] 2024 Approved Most Vibrant Social Media Emblems Animated Artistry
- [New] 2024 Approved Dissolve Link to Discord on Devices
- [New] Expertly Crafted Font Generators for Discord on Mobile for 2024
- A Comprehensive Guide to Profile Picture Perfection on Discord for 2024
- [New] 2024 Approved Navigating Networks Adding Pals via Discord
- [New] 2024 Approved Conquering Loud Environments Using VoiceMod on Discord Platforms
- [Updated] Unleash Your Creativity Creating Memorable Pfp's on Discord
- Unlocking Your Gaming Potential The Complete Guide to Getting DiscoNitro
- [New] How To Craft Strikingly Attractive Pfps for Your DiscoLife in Discord
- In 2024, The Ultimate Guide to Enhancing Your Discord Talk with No-Cost Tools
- [Updated] Top Video Conferencing Apps Post-Discord
- 2024 Approved DIY Approach for Animated Emoji Addition on Nitro-Free Discord
- [New] In 2024, Capturing Your Lenovo Display with Ease
- 2024 Approved Maximizing Game Capture with Bandicam - Essentials for the Year 2023
- Recover Apple iPhone SE (2022) Data From iCloud | Dr.fone
- [New] Beyond Glitter The Pure Reality of RecordCast Experience for 2024
- How to Unlock iCloud lock from your iPhone SE (2022) and iPad?
- [Updated] In 2024, Accurate Mac Photography Mastery of Five Proven Snapshot Ways
- 2024 Approved Probing Sound Clarity An Updated Analysis of Cambridges CXU Series
- NoWorryCapture - Quick and Easy Win11 Recordings
- [New] Mythos Mazes Decade’s Best Adventure Games for 2024
- [Updated] Be Bold on IGTV The 10 Cutting-Edge Video Concepts for Your Brand for 2024
- Updated Little Tricks to Create Canva Slideshow No One Is Telling You for 2024
- [New] Efficient Methods for YouTube Video Preservation for 2024
- How to Reset a Samsung Galaxy M14 4G Phone That Is Locked | Dr.fone
- [New] 2024 Approved The Ultimate Tutorial on Making an Impact with Instagram Live
- In 2024, Ultimate Guide from Samsung Galaxy A14 5G FRP Bypass
- A Complete Guide To OEM Unlocking on Google Pixel 7a
- How to Transfer from Apple iPhone X to Samsung Galaxy S20? | Dr.fone
- [Updated] 2024 Approved Posting Tweets with Vids? Check the Aspect Ratio
- In 2024, Unleash Potential Best Free, Safe Followers Enhancing Your Feed (iOS/Android)
- [New] Top Ultra-Short Timelapse Capture Methods
- [New] Motivational Moments The Ultimate List for Insta
- Updated Get Rid of TikTok Watermarks Best Free Online Removers for 2024
- How to create a digital signature and certificate
- Updated Adobe Premiere Rush Not for You? Try These Top 4 Alternatives Instead
- 9 Quick Fixes to Unfortunately TouchWiz has stopped Of Infinix Smart 8 | Dr.fone
- Fine-Tuning Your FB Videos Aspect Ratios Decoded for 2024
- Updated Learn and Save Final Cut Pro Education Pricing You Wont Want to Miss
- Title: "[Updated] 2024 Approved Elevate Discord Audio Quality with Simple VoiceMod Adjustments"
- Author: Timothy
- Created at : 2024-05-23 22:48:07
- Updated at : 2024-05-24 22:48:07
- Link: https://discord-videos.techidaily.com/updated-2024-approved-elevate-discord-audio-quality-with-simple-voicemod-adjustments/
- License: This work is licensed under CC BY-NC-SA 4.0.
