
!["[Updated] 2024 Approved How to Add a Touch of Personality to Your Discord Status A PC & Mobile Walkthrough"](https://www.lifewire.com/thmb/Wey1hmvaFNXkpGULggG7yXOy4ro=/300x200/filters:no_upscale():max_bytes(150000):strip_icc()/GettyImages-525956536-f1c8a23b12e2480cad7b8a4544b1c0d2.jpg)
"[Updated] 2024 Approved How to Add a Touch of Personality to Your Discord Status A PC & Mobile Walkthrough"
How to Add a Touch of Personality to Your Discord Status: A PC & Mobile Walkthrough
If you have an active Nitro subscription and want to make your Discord status look better, you can put emojis in Discord status. This article will help you walk through the process of using Discord custom status to upload emojis. Custom status is a new feature introduced by Discord. By uploading the emojis, you can keep your Discord status fresh! So, keep reading to find how to put emojis in Discord status through your desktop and mobile app conveniently.
In this article
01 How to Put Custom Emoji in Discord Status on Desktop and Online?
02 How to Add Custom Emoji on Discord Status on Mobile?
03 How to Copy and Paste Emojis in Discord Status?
04 How to Add Animated Emojis to Discord Status?
05 Custom Discord Status Emoji Ideas
Part 1: How to Put Custom Emoji in Discord Status on Desktop and Online?

For those who want to add an emoji on their Discord status on desktop and online, you can do that easily by following the steps that we have listed below:
Step 1: First, you need to go to https://discord.com . Once you visit the site, please log in using your Discord credential.
Step 2: Once your profile is open, please click on the profile picture.
Step 3: On your profile, look at the bottom of the menu. You will see a pop-up menu that says set a custom status.
Step 4: On the emojis bar, you can add an emoji. To do that, you need to click on the emoji status. Next, you will see a list of emojis. Please note that only an active Nitro subscription user can use animated or custom emojis. On the left will be the category of emojis. Choose one category that suits your mood; once the category opens, click on an emoji to add it.
Step 5: After that, you need to click on the Today option. This will open a drop-down menu. You need to choose a time frame for the emoji or status. You can choose today, 4 hours, 1 hour, etc.
Step 6: If you are done with the emoji selection and have chosen the duration for the status, you need to click on the Save option. The Save option will be on the bottom right of the same pop-up window.
And that’s it. The emojis will be successfully added to your status based on the duration that you have chosen. If you want to change the emoji or remove it, you need to undergo the same process.
Related: How to Get Free Animated Emojis on Discord
Part 2: How to Add Custom Emoji on Discord Status on Mobile?

If you are using the Discord app on your mobile phone, you can add a custom emoji on Discord status using your phone too. Follow the step-by-step guide that we have prepared to learn how to do that.
Step 1: Take your smartphone and look for the Discord app. The icon will look like a controller. Click on it to launch Discord.
Step 2: Just like the web steps, you will have to click on your profile. Click on the hamburger icon, which is there in the upper left corner. Then, look at the bottom right corner to find your profile.
Step 3: Now, click on the Set Status option. This will be the first option on your profile. Go on and click on that.
Step 4: After that, click on the option that says set a custom status. On the status bar, you will see an emoji. You need to click on that to open the list of emojis to choose from.
Step 5: Choose a time frame for the emoji, for example, 30 minutes, 1-hour, clear tomorrow, etc. If you are using an Android, you will see the floppy disk option; click on that to save your status. If you are using an iOS device, you will see the save option.
By following these steps, your status with the emoji you have chosen will be saved successfully. If you want to add a new emoji, repeat the same process.
Related: How to Change Discord Status
Part 3: How to Copy and Paste Emojis in Discord Status?
If you don’t want to go through the hassle of adding an emoji manually, you can just copy and paste one to your status. How to do it? Follow these steps:
Step 1: Go to a website that has emojis for Discord status.
Step 2: Scroll down the list of emojis and copy it.
Step 3: Go back to your Discord Nitro page and open the status setting. There, on the emoji section, paste the emoji that you have copied from another site.
Please note that this may not be possible for all types of emojis, though. Also, this will work if only the website has created emojis that can be directly copied and pasted on the status section.
Part 4: How to Add Animated Emojis to Discord Status?
Apart from the basic emojis, you can also add animated emojis to your Discord Status to make your status look even better. Here are the steps to follow to add an animated emoji:
Step 1: First, go to a website called https://betterdiscord.app/ . Once you are there, click on the Download option.
Step 2: You will see a page loaded with codes, right-click on the screen and click on the Save option. When it is downloaded, click on the Better Discord Windows installer. Next, read the license agreement and click on the Next option.
Step 3: Then click install better Discord and hit the next button. Choose the Discord version that you currently have installed.
Step 4: Open Discord and click on the user settings. There, you will see the Better Discord section. Next, click on the Plugin option. Now, close the Discord window and drag the animated status dot plugin into the plugin folder that opened after clicking on the Plugin option.
Step 5: Go to Discord again, and you will see the Animated Status option. Enable it and click on the gear icon. To add an animated emoji, click on the + icon. Next, you will see a Nitro ID field. Then, go to a chat page and click on the emoji option.
Step 6: Look at the emoji that you like and memorize the animated emoji name. Press \ followed by the name of the emoji. Now, copy the whole text and paste it again. You will see a few numbers; that’s the Nitro ID for the emoji. Copy the number only, go back to the Animated plugin and paste it on the Nitro ID field. Go back to the Nitro page again, and you will see the animated emoji on your status.
Part 5: Custom Discord Status Emoji Ideas

If you want to make your Discord Status look really cool, you can get some custom Discord status emoji ideas from us. Read this section to find out a few super cool custom Discord status emojis ideas and get inspired.
Use Kaomoji in Status
Kaomoji is a collection of super cute emojis that can brighten anyone’s day! They are great because they make your status look different and cute at the same time. You can choose from stars, smiley faces, cute polar bears, and much more! And yes, they are different than your usual emojis.
Add Old-school Emoticons
Remember the good old Nokia 1100 days when you used to send emojis using some signs? Well, you can try this idea too to give a vintage look to your status. Everybody uses the same smiley emojis, so why not try something different? Go back to your old 90s school days and display images, such as @}->– which is a rose! You can find old-school emoticons online easily.
Conclusion
And that’s it; now you know how to put emoji in Discord status without sweating much. We hope you have found this article helpful, and you will start using cool emojis on your status to make your Discord status look different than others!
02 How to Add Custom Emoji on Discord Status on Mobile?
03 How to Copy and Paste Emojis in Discord Status?
04 How to Add Animated Emojis to Discord Status?
05 Custom Discord Status Emoji Ideas
Part 1: How to Put Custom Emoji in Discord Status on Desktop and Online?
For those who want to add an emoji on their Discord status on desktop and online, you can do that easily by following the steps that we have listed below:
Step 1: First, you need to go to https://discord.com . Once you visit the site, please log in using your Discord credential.
Step 2: Once your profile is open, please click on the profile picture.
Step 3: On your profile, look at the bottom of the menu. You will see a pop-up menu that says set a custom status.
Step 4: On the emojis bar, you can add an emoji. To do that, you need to click on the emoji status. Next, you will see a list of emojis. Please note that only an active Nitro subscription user can use animated or custom emojis. On the left will be the category of emojis. Choose one category that suits your mood; once the category opens, click on an emoji to add it.
Step 5: After that, you need to click on the Today option. This will open a drop-down menu. You need to choose a time frame for the emoji or status. You can choose today, 4 hours, 1 hour, etc.
Step 6: If you are done with the emoji selection and have chosen the duration for the status, you need to click on the Save option. The Save option will be on the bottom right of the same pop-up window.
And that’s it. The emojis will be successfully added to your status based on the duration that you have chosen. If you want to change the emoji or remove it, you need to undergo the same process.
Related: How to Get Free Animated Emojis on Discord
Part 2: How to Add Custom Emoji on Discord Status on Mobile?
If you are using the Discord app on your mobile phone, you can add a custom emoji on Discord status using your phone too. Follow the step-by-step guide that we have prepared to learn how to do that.
Step 1: Take your smartphone and look for the Discord app. The icon will look like a controller. Click on it to launch Discord.
Step 2: Just like the web steps, you will have to click on your profile. Click on the hamburger icon, which is there in the upper left corner. Then, look at the bottom right corner to find your profile.
Step 3: Now, click on the Set Status option. This will be the first option on your profile. Go on and click on that.
Step 4: After that, click on the option that says set a custom status. On the status bar, you will see an emoji. You need to click on that to open the list of emojis to choose from.
Step 5: Choose a time frame for the emoji, for example, 30 minutes, 1-hour, clear tomorrow, etc. If you are using an Android, you will see the floppy disk option; click on that to save your status. If you are using an iOS device, you will see the save option.
By following these steps, your status with the emoji you have chosen will be saved successfully. If you want to add a new emoji, repeat the same process.
Related: How to Change Discord Status
Part 3: How to Copy and Paste Emojis in Discord Status?
If you don’t want to go through the hassle of adding an emoji manually, you can just copy and paste one to your status. How to do it? Follow these steps:
Step 1: Go to a website that has emojis for Discord status.
Step 2: Scroll down the list of emojis and copy it.
Step 3: Go back to your Discord Nitro page and open the status setting. There, on the emoji section, paste the emoji that you have copied from another site.
Please note that this may not be possible for all types of emojis, though. Also, this will work if only the website has created emojis that can be directly copied and pasted on the status section.
Part 4: How to Add Animated Emojis to Discord Status?
Apart from the basic emojis, you can also add animated emojis to your Discord Status to make your status look even better. Here are the steps to follow to add an animated emoji:
Step 1: First, go to a website called https://betterdiscord.app/ . Once you are there, click on the Download option.
Step 2: You will see a page loaded with codes, right-click on the screen and click on the Save option. When it is downloaded, click on the Better Discord Windows installer. Next, read the license agreement and click on the Next option.
Step 3: Then click install better Discord and hit the next button. Choose the Discord version that you currently have installed.
Step 4: Open Discord and click on the user settings. There, you will see the Better Discord section. Next, click on the Plugin option. Now, close the Discord window and drag the animated status dot plugin into the plugin folder that opened after clicking on the Plugin option.
Step 5: Go to Discord again, and you will see the Animated Status option. Enable it and click on the gear icon. To add an animated emoji, click on the + icon. Next, you will see a Nitro ID field. Then, go to a chat page and click on the emoji option.
Step 6: Look at the emoji that you like and memorize the animated emoji name. Press \ followed by the name of the emoji. Now, copy the whole text and paste it again. You will see a few numbers; that’s the Nitro ID for the emoji. Copy the number only, go back to the Animated plugin and paste it on the Nitro ID field. Go back to the Nitro page again, and you will see the animated emoji on your status.
Part 5: Custom Discord Status Emoji Ideas
If you want to make your Discord Status look really cool, you can get some custom Discord status emoji ideas from us. Read this section to find out a few super cool custom Discord status emojis ideas and get inspired.
Use Kaomoji in Status
Kaomoji is a collection of super cute emojis that can brighten anyone’s day! They are great because they make your status look different and cute at the same time. You can choose from stars, smiley faces, cute polar bears, and much more! And yes, they are different than your usual emojis.
Add Old-school Emoticons
Remember the good old Nokia 1100 days when you used to send emojis using some signs? Well, you can try this idea too to give a vintage look to your status. Everybody uses the same smiley emojis, so why not try something different? Go back to your old 90s school days and display images, such as @}->– which is a rose! You can find old-school emoticons online easily.
Conclusion
And that’s it; now you know how to put emoji in Discord status without sweating much. We hope you have found this article helpful, and you will start using cool emojis on your status to make your Discord status look different than others!
Step-by-Step: Changing Text Appearance in Discord
How to Change Text Style in Discord | 3 Methods

Richard Bennett
Mar 27, 2024• Proven solutions
Discord is a brand name that many people have heard about, and this instant messaging and content distribution service is rapidly gaining popularity among many groups of users. A unique feature of this platform is that it facilitates community-based communication, where users who share certain interests can form their own private chats that are known as servers.
While its user interface is quite simple, Discord allows users to deploy a variety of advanced communication tools, from textual content to audio and video streams. It’s natural that users want to express their thoughts creatively, so there is a lot of genuine interest in learning how to change the visual look of the messages through the use of basic text formatting. In this article, we will discuss how to change text style in Discord and provide detailed instructions for activating various options, such as using bold or italic letters or underlining a part of the text.
Let’s start with the software module that makes it all possible.
- Part 1: How Does Discord Text Engine Work?
- Part 2: How to Change Text Style in Discord with Markdown?
- Part 3: How to Use Code Block for Discord Text Formatting?
- Part 4: How to Change the Text Color in Discord Message?
- Part 5: FAQs About Discord Text Formatting
Part 1: How Does Discord Text Engine Work?
Beneath the surface, Discord runs on a powerful engine called Markdown, which regulates how text is displayed on the pages visible to users. It’s an application of markup language that completely depends on textual symbols as commands, making it quite simple for users who are not skilled at advanced programming to alter the look of the text.
Basically, Markdown allows you to enter a few symbols and it will interpret them as commands for changing the text style, for example bolding or underlying certain word or sentence. For highlighting blocks of text, there is a specific library named Highlight.js that allows simple text marking for stylistic emphasis.
This approach is very practical and easy to learn, so long-time users of Discord are able to change text style as they type without thinking too much about it. Really, it’s all about following a couple of simple rules and knowing the most important combinations of characters (tags).
Tips You May Not Want to Miss!!

Filmora Text Video Editor
Add & Change Text Style in Video
• Offer 500+ video text style and effects to emphasize your video content
• Easily apply multiple text animations to polish your video
• Cross-platform supported - (Windows, Mac, iOS, Android)
Change Video Text Style Change Video Text Style Change Video Text Style Learn More >
Part 2: How to Change Text Style in Discord with Markdown?
As we mentioned previously, Markdown is completely text-based and has a very simple syntax. All you need to do to apply special formatting to your text is to enter a few special characters at the right places, and the appropriate effect (bold, italic…) will appear in the chat. Keep in mind that you can easily combine the formatting styles by using multiple commands at the same time.
Here is an overview of the most important options for changing text style in Discord, and you can preview the text style in real time before sending to friends:
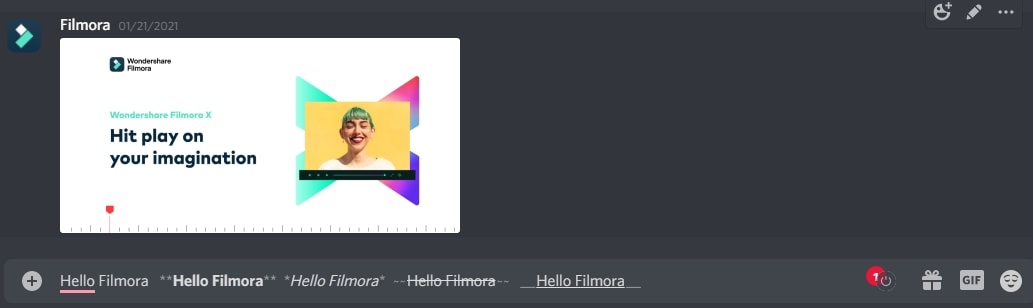
How to Bold Text in Discord?
A simple way to use bold text style is to add two asterisks (**) at the beginning and the end of the text that you want to have this effect.
How to Italicize in Discord?
Italicized style of text will be displayed in the chat if you put one asterisk character (*) before and one more after the selected text.
How to Write Strikethrough and Make Discord Cross Out Text?
In order to get a strikethrough effect on your text, you will have to type two tilde characters (~~) on either side of the section of text that you want to change, and then you will create an appearance of a crossed-out portion of text.
How to Make Discord Underline Text?
Underline effect is also available on Discord and equally simple to activate. Just type two underscore dashes (__)at the start and the ending of the text selection to apply it.
How to Combine Text Formatting Options in Discord?
Once you mastered the basic effects and know the commands without thinking, it’s time to consider more complex text transformations that combine more than one effect. In principle, Markdown lets you do this just as easily, for as long as you know all the right combinations of characters that produce the desired effect. Here are the detailed instructions for some of the most frequently utilized combos:
Underlined and Italicized text
For this elegant combination, use two underscore dashes (__) followed by one asterisk (*) before and after the selected text.

Underlined and Bolded text
Put two underscore dashes (__) and add two asterisk characters (**) to both sides of the selection to get those two effects together.

Underlined, Italicized, and Bolded text
This combination is achieved by placing two underscore marks (__) and three straight asterisks (***) at the beginning as well as the end of the text.

Bolded, Italicized, underlined, and crossed out text
You can combine all four style changes as well – just use two tildes (~~), two underscores (__) and three asterisks (***) on either side of your text.

Part 3: How to Use Code Block for Discord Text Formatting?
In addition to simple font transformations, Discord allows users to engage in advanced text formatting with incredible ease. One way to do it is to deploy code blocks, which can be activated with the backtick character ( ` ) placed on the beginning and the end of a text section. This command will highlight the chosen part of the text while preserving blank space around it for extra emphasis of your message. However, if you use three consecutive ( ` ) signs before a block of text and separate the text into several lines by pressing enter, the result will be a series of highlighted lines that form a single code block. This option is simple enough that even beginners with no programming abilities can easily learn how to use it, and it has some practical applications that savvy Discord users are very fond of.
Part 4: How to Change the Text Color in Discord Message?
It’s not possible to alter the default text color from the native user interface in Discord. However, there is a simple solution to this problem that involves the highlight.is scrip mentioned earlier in the article. This Javascript-based library can transform the normal text into a code block consisting of three lines, where the middle line would be your selection of text in an alternative color. This is a neat workaround that’s very simple to activate using the same kind of text-based commands described above.
To change the text color, you should create a simple, three-line block. In the top line, you need to put three backtick characters (”’) along with a code phrase corresponding to the text color you would like to use. In the second line, you should type your entire text normally, while the bottom line should include three more backticks. You can create new lines by pressing the Shift and Enter keys at the same time.
Here is a detailed video tutorial for creating customized text in a range of different colors with all the relevant code phrases.
FAQs About Discord Text Formatting
1. What is the default Discord font?
Discord uses the same basic font all over the entire platform, including all chats between users and in your profile info. This is Uni sans font, which is quite simple and belongs to the sans serif family of fonts that are known for good readability on almost any background.
2. How do you get different fonts on Discord?
It’s not possible to change the font directly from the Discord app, but this limitation can be circumvented if you find a goodDiscord font generator on the internet. Those are very easy to use, so you can simply type your text in a chosen font and copy it back into Discord already formatted.
3. How to make a hidden text in Discord?
The creation of a hidden text message that requires direct user action to reveal is possible in Discord and requires a so-called spoiler tag. If you precede your message with the text /spoiler or type two slash bars ( //) at either side, it will be hidden from other users except for those who decide to view it and indicate their desire by clicking or tapping on it. Messages of this kind appear highlighted with gray background in the message stream on a Discord chat.
Richard Bennett
Richard Bennett is a writer and a lover of all things video.
Follow @Richard Bennett
Richard Bennett
Mar 27, 2024• Proven solutions
Discord is a brand name that many people have heard about, and this instant messaging and content distribution service is rapidly gaining popularity among many groups of users. A unique feature of this platform is that it facilitates community-based communication, where users who share certain interests can form their own private chats that are known as servers.
While its user interface is quite simple, Discord allows users to deploy a variety of advanced communication tools, from textual content to audio and video streams. It’s natural that users want to express their thoughts creatively, so there is a lot of genuine interest in learning how to change the visual look of the messages through the use of basic text formatting. In this article, we will discuss how to change text style in Discord and provide detailed instructions for activating various options, such as using bold or italic letters or underlining a part of the text.
Let’s start with the software module that makes it all possible.
- Part 1: How Does Discord Text Engine Work?
- Part 2: How to Change Text Style in Discord with Markdown?
- Part 3: How to Use Code Block for Discord Text Formatting?
- Part 4: How to Change the Text Color in Discord Message?
- Part 5: FAQs About Discord Text Formatting
Part 1: How Does Discord Text Engine Work?
Beneath the surface, Discord runs on a powerful engine called Markdown, which regulates how text is displayed on the pages visible to users. It’s an application of markup language that completely depends on textual symbols as commands, making it quite simple for users who are not skilled at advanced programming to alter the look of the text.
Basically, Markdown allows you to enter a few symbols and it will interpret them as commands for changing the text style, for example bolding or underlying certain word or sentence. For highlighting blocks of text, there is a specific library named Highlight.js that allows simple text marking for stylistic emphasis.
This approach is very practical and easy to learn, so long-time users of Discord are able to change text style as they type without thinking too much about it. Really, it’s all about following a couple of simple rules and knowing the most important combinations of characters (tags).
Tips You May Not Want to Miss!!
Filmora Text Video Editor
Add & Change Text Style in Video
• Offer 500+ video text style and effects to emphasize your video content
• Easily apply multiple text animations to polish your video
• Cross-platform supported - (Windows, Mac, iOS, Android)
Change Video Text Style Change Video Text Style Change Video Text Style Learn More >
Part 2: How to Change Text Style in Discord with Markdown?
As we mentioned previously, Markdown is completely text-based and has a very simple syntax. All you need to do to apply special formatting to your text is to enter a few special characters at the right places, and the appropriate effect (bold, italic…) will appear in the chat. Keep in mind that you can easily combine the formatting styles by using multiple commands at the same time.
Here is an overview of the most important options for changing text style in Discord, and you can preview the text style in real time before sending to friends:
How to Bold Text in Discord?
A simple way to use bold text style is to add two asterisks (**) at the beginning and the end of the text that you want to have this effect.
How to Italicize in Discord?
Italicized style of text will be displayed in the chat if you put one asterisk character (*) before and one more after the selected text.
How to Write Strikethrough and Make Discord Cross Out Text?
In order to get a strikethrough effect on your text, you will have to type two tilde characters (~~) on either side of the section of text that you want to change, and then you will create an appearance of a crossed-out portion of text.
How to Make Discord Underline Text?
Underline effect is also available on Discord and equally simple to activate. Just type two underscore dashes (__)at the start and the ending of the text selection to apply it.
How to Combine Text Formatting Options in Discord?
Once you mastered the basic effects and know the commands without thinking, it’s time to consider more complex text transformations that combine more than one effect. In principle, Markdown lets you do this just as easily, for as long as you know all the right combinations of characters that produce the desired effect. Here are the detailed instructions for some of the most frequently utilized combos:
Underlined and Italicized text
For this elegant combination, use two underscore dashes (__) followed by one asterisk (*) before and after the selected text.
Underlined and Bolded text
Put two underscore dashes (__) and add two asterisk characters (**) to both sides of the selection to get those two effects together.
Underlined, Italicized, and Bolded text
This combination is achieved by placing two underscore marks (__) and three straight asterisks (***) at the beginning as well as the end of the text.
Bolded, Italicized, underlined, and crossed out text
You can combine all four style changes as well – just use two tildes (~~), two underscores (__) and three asterisks (***) on either side of your text.
Part 3: How to Use Code Block for Discord Text Formatting?
In addition to simple font transformations, Discord allows users to engage in advanced text formatting with incredible ease. One way to do it is to deploy code blocks, which can be activated with the backtick character ( ` ) placed on the beginning and the end of a text section. This command will highlight the chosen part of the text while preserving blank space around it for extra emphasis of your message. However, if you use three consecutive ( ` ) signs before a block of text and separate the text into several lines by pressing enter, the result will be a series of highlighted lines that form a single code block. This option is simple enough that even beginners with no programming abilities can easily learn how to use it, and it has some practical applications that savvy Discord users are very fond of.
Part 4: How to Change the Text Color in Discord Message?
It’s not possible to alter the default text color from the native user interface in Discord. However, there is a simple solution to this problem that involves the highlight.is scrip mentioned earlier in the article. This Javascript-based library can transform the normal text into a code block consisting of three lines, where the middle line would be your selection of text in an alternative color. This is a neat workaround that’s very simple to activate using the same kind of text-based commands described above.
To change the text color, you should create a simple, three-line block. In the top line, you need to put three backtick characters (”’) along with a code phrase corresponding to the text color you would like to use. In the second line, you should type your entire text normally, while the bottom line should include three more backticks. You can create new lines by pressing the Shift and Enter keys at the same time.
Here is a detailed video tutorial for creating customized text in a range of different colors with all the relevant code phrases.
FAQs About Discord Text Formatting
1. What is the default Discord font?
Discord uses the same basic font all over the entire platform, including all chats between users and in your profile info. This is Uni sans font, which is quite simple and belongs to the sans serif family of fonts that are known for good readability on almost any background.
2. How do you get different fonts on Discord?
It’s not possible to change the font directly from the Discord app, but this limitation can be circumvented if you find a goodDiscord font generator on the internet. Those are very easy to use, so you can simply type your text in a chosen font and copy it back into Discord already formatted.
3. How to make a hidden text in Discord?
The creation of a hidden text message that requires direct user action to reveal is possible in Discord and requires a so-called spoiler tag. If you precede your message with the text /spoiler or type two slash bars ( //) at either side, it will be hidden from other users except for those who decide to view it and indicate their desire by clicking or tapping on it. Messages of this kind appear highlighted with gray background in the message stream on a Discord chat.
Richard Bennett
Richard Bennett is a writer and a lover of all things video.
Follow @Richard Bennett
Also read:
- [Updated] Crafting Engaging Content with Discord Streaming Tools
- [New] How to Download Discord Videos FREE, In 2024
- [Updated] 2024 Approved Step Up Your Text Game with FREE Emojis From These Websites
- [New] 2024 Approved Uncover the Power of Discord's Spoiler System
- [Updated] 2024 Approved Transform Your Digital Self Updating Status & Avatars on Discord
- [Updated] 2024 Approved Streamlining Your Discord Experience Bulk Deletion Made Simple
- 2024 Approved VibeRusher’s Top 10 Themes - BetterDiscord Style
- Master Your Presence The Complete Guide to Altering Status & Avatars for 2024
- Essential Steps for a Gorgeous Discord Profile Photo for 2024
- [Updated] Discover the Hottest Channel Names for Recognition
- In 2024, The Compreran Guide Sending Videos Through Discord's Lens
- In 2024, Powerful Presentations Elevate Your Screen Share on Discord
- [Updated] In 2024, Elite 5 Social Media Brand Identity Animations
- [New] A Comprehensive Guide to Creating Captivating Discord PFPs with Ease
- 2024 Approved Guide to Delete Discord Server From Mobile
- [New] 2024 Approved Seamless Social Setup From Desktops to Phones
- [Updated] In 2024, Discover the Best Musically-Focused Bots on Discord Platforms
- [New] Social Media Wiz How to Create Captivating Slideshow Stories for Facebook for 2024
- New 2024 Approved Lyric Video Production Made Easy Top Web Tools
- [Updated] Unlocking Video Creation with Aiseesoft's Capture Capabilities for 2024
- How to Intercept Text Messages on Realme Narzo 60x 5G | Dr.fone
- Slow-Motion Music Methods Keeping Rhythmic Patterns Consistent in Volume and Hertz for 2024
- New 2024 Approved Cloning Voices With Hugging Face An In-Depth Review
- In 2024, The Updated Method to Bypass Honor Magic 5 Lite FRP
- 2024 Approved Instagram Posting Incorporating Twitter Video Content
- [Updated] Recording Winning Calls A Complete Guide (Free vs Paid) for Windows & Mac Users
- Ultimate 2023 Tweet Video Roundup for 2024
- Title: "[Updated] 2024 Approved How to Add a Touch of Personality to Your Discord Status A PC & Mobile Walkthrough"
- Author: Timothy
- Created at : 2024-05-23 22:48:12
- Updated at : 2024-05-24 22:48:12
- Link: https://discord-videos.techidaily.com/updated-2024-approved-how-to-add-a-touch-of-personality-to-your-discord-status-a-pc-and-mobile-walkthrough/
- License: This work is licensed under CC BY-NC-SA 4.0.
